Do you have a question about the Fluke 6080A and is the answer not in the manual?
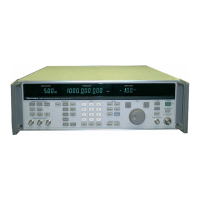
Overview of the 6080A/AN Synthesized RF Signal Generator's capabilities and applications.
List of items included with the signal generator upon unpacking.
Safety precautions and warnings for operating and handling the signal generator.
Details on included and optional accessories for the signal generator.
Key technical specifications of the 6080A/AN signal generator.
Overview of Section 2, covering general, functional, and software descriptions of the generator.
Describes the four major sections of the 6080A/AN Synthesized Signal Generator.
Details the front panel's role in operator interface, controls, and indicators.
Explains the shielded enclosures containing stimulus function circuits.
Lists components found on the rear panel, including power supply and connectors.
Outlines the key functional blocks of the signal generator and their parameters.
Explains the programmable output frequency, band controls, and synthesizer resolution.
Explains FM modulation, deviation ranges, and the FM oscillator loop operation.
Explains phase modulation, its index, and how it's achieved by reconfiguring circuits.
Describes level control via step attenuator and vernier DAC, including level correction.
Explains AM modulation depth programming and how the ALC loop controls output.
Describes how pulse modulation is accomplished using a GaAs FET switch.
Describes the modulation oscillator's wave generator and pulse generator sections.
Describes the instrument's linear power supply and its various DC/AC outputs.
Describes the software executed on the 68HCOOO microprocessor and its general functions.
Explains the software's operating system and how tasks handle input/output.
Explains the importance of calibration/compensation data and its redundant storage.
Details the instrument's automatic digital and analog circuit self-tests performed at power-on.
Describes status signals monitored by software, including reference switch and RF output status.
Explains closed-case calibration procedures for RF level, AM, FM, and reference oscillator.
Describes using front panel controls for calibration adjustments.
Details procedures for calibrating the generator via an automated station.
Explains how calibration and compensation data are stored and managed.
Details single-point calibration of AM depth using an RF modulation meter.
Step-by-step procedure for front panel AM calibration using key sequences and controls.
Describes remote AM calibration procedure, commands, and controller program elements.
Details single-point calibration of FM deviation using an RF modulation meter.
Step-by-step procedure for front panel FM calibration using key sequences and controls.
Describes remote FM calibration procedure, commands, and controller program elements.
Details single-point calibration of RF output level using an RF power meter.
Step-by-step procedure for front panel level calibration using key sequences and controls.
Describes remote level calibration procedure, commands, and controller program elements.
Details single-point calibration of the internal 10-MHz reference oscillator.
Step-by-step procedure for front panel reference oscillator calibration using key sequences.
Describes remote reference oscillator calibration procedure, commands, and controller program elements.
Describes performance tests for key parameters and their uses.
Lists recommended equipment for performance tests, adjustments, and troubleshooting.
Describes the built-in self-test performed at power-on for instrument functional check.
Compares the internal time base to a frequency standard for accuracy and stability.
Verifies frequency synthesis accuracy by measuring output at programmed frequencies against a common reference.
Measures output power at various frequencies to compute level accuracy and attenuator section errors.
Verifies level accuracy using a power meter and low-level power sensor across various frequencies.
Verifies level accuracy at -137 dBm and various frequencies using spectrum analyzer.
Verifies level accuracy across various settings using a measuring receiver.
Verifies high level flatness of the instrument using a power meter and sensor.
Verifies output signal leakage using a two-turn loop and RF spectrum analyzer.
Compares harmonic and spurious signals to the desired signal using an RF spectrum analyzer.
Measures phase noise and non-harmonic spurious signals using a phase noise system and RF spectrum analyzer.
Verifies modulation accuracy, residual, and incidental modulation using a modulation analyzer.
Tests AM bandwidth at 1 kHz rate and various frequencies.
Verifies incidental FM level at 1 kHz rate.
Verifies residual AM using integrated noise mode.
Checks FM accuracy and distortion using modulation analyzer.
Verifies VSWR using a VSWR bridge and spectrum analyzer.
Checks static and dynamic operation of pulse modulation.
Introduces Section 5, covering general access procedures and safety for major assemblies.
Illustrates the location of major assemblies within the signal generator.
General instructions for accessing assemblies, including disassembly steps.
Step-by-step instructions for removing the front panel section.
Step-by-step instructions for removing the rear panel section.
Step-by-step instructions for removing the A2 Coarse Loop PCA.
Step-by-step instructions for removing the A3 Sub-Synthesizer VCO PCA.
Step-by-step instructions for removing the A4 Sub-Synthesizer PCA.
Step-by-step instructions for removing the A5 Coarse Loop VCO PCA.
Step-by-step instructions for removing the A6 Mod Oscillator PCA.
Step-by-step instructions for removing the A8 Output PCA.
Step-by-step instructions for removing the A9 Sum Loop VCO PCA.
Step-by-step instructions for removing the A10 Premodulator PCA.
Step-by-step instructions for removing the A11 Modulation Control PCA.
Step-by-step instructions for removing the A12 Sum Loop PCA.
Step-by-step instructions for removing the A13 Controller PCA.
Step-by-step instructions for removing the A14 FM PCA.
Step-by-step instructions for removing the A20 Attenuator/RPP Assembly.
Step-by-step instructions for removing the A22 Delay Cable Assembly.
Explains Section 6's purpose: module exchange, component-level troubleshooting, and repair methods.
Details the process of identifying and replacing problem modules using the Module Exchange Program.
Describes the A1 Display PCA, including any adjustments.
Describes the A2 Coarse Loop PCA and its adjustments, including reference oscillator calibration.
Details the A3 Sub-Synthesizer VCO PCA, its adjustments, and compensation data.
Describes the A4 Sub-Synthesizer PCA, its adjustments, and reference oscillator calibration.
Details the A5 Coarse Loop VCO PCA, its adjustments, and coarse loop compensation.
Describes the A6 Mod Oscillator PCA and any adjustments.
Describes the A7 Relay Driver PCA and any adjustments.
Details the A8 Output PCA, its adjustments, and compensation data.
Describes the A9 Sum Loop VCO PCA, its adjustments, and sum loop compensation.
Describes the A10 Premodulator PCA and its adjustments.
Describes the A11 Modulation Control PCA and its adjustments.
Details the A12 Sum Loop PCA, its adjustments, and loop gain adjustment.
Describes the A13 Controller PCA and its adjustments.
Details the A14 FM Board PCA, its adjustments, and FM performance alignment.
Describes the A15 Power Supply PCA and any adjustments.
Describes the A19 Switch PCA and any adjustments.
Details the A20 Attenuator/RPP Assembly, its adjustments, and level correction data transfer.
Describes the A22 Delay Line Assembly and any adjustments.
Steps to update compensation memory with new module exchange data, involving EPROM installation.
Guides component replacement, noting special tools and procedures for chip components.
Describes instrument self-tests performed on power-on or via Special Function 02.
Performs basic checks of circuitry on the A13 Controller PCA, including memory checksums.
Programs normal and overmodulation conditions, checks ALC loop-leveled indicator state.
Programs normal and overmodulation conditions, checks FM loop-lock indicator state.
Verifies FM loop lock with programmed phase modulation settings.
Verifies operation of the DCFM status indicator by checking its relation to ACFM control voltage.
Programs frequencies in coarse loop VCO bands and expects loop lock status.
Programs frequencies near sub-synthesizer range and expects lock/unlock status.
Programs frequencies in sum loop VCO bands and expects loop lock status.
Verifies RF signal presence at the output of the Attenuator/RPP assembly, checking RPP indicator trip.
Configures RPP circuitry for pulse operation, checking logic levels and RPP indicator status.
Verifies selection and operation of output filter and divider sections, checking ALC loop indicator.
Lists major hardware status signals monitored by software and their corresponding front panel codes.
Notes that software includes built-in diagnostic functions for troubleshooting and alignment.
Generates continuous activity on data/address busses for monitoring with an oscilloscope.
Programs the instrument to a predefined state for troubleshooting and alignment procedures.
Forces internal DACs to predetermined settings for troubleshooting and alignment.
Displays sum loop, coarse loop, and sub-synthesizer frequencies for programmed RF output.
Provides a block diagram illustrating the power supply's functional sections.
Explains the circuit operation, including line voltage selection and secondary windings.
Outlines troubleshooting procedures for the power supply, including warnings.
Step-by-step procedure for troubleshooting power supply voltages in standby and operating modes.
Details the procedure for adjusting the output voltage of discrete supplies.
Block diagram illustrating the A13 Controller PCA and its functional groups.
Explains the circuit description of the A13 Controller PCA.
Details the 68HCOOO microprocessor and its clock signal generation.
Describes the different types of memory used, including EPROMs, RAM, and CMOS RAM.
Explains the memory select decoding and write protection logic.
Describes data transfer between the front panel and controller via tri-state buffers.
Explains how IEEE-488 communications are handled by the NEC μPD7210 IC.
Describes how attenuator control signals are latched and shifted.
Details control data transfer to RF circuitry via unidirectional data buses.
Explains input buffers for fault/status signals and control/buffer enable data.
Provides suggestions for isolating digital or control problems in the controller.
Explains communication with RF circuitry via connectors and buffered signals.
Discusses troubleshooting controller problems related to the microprocessor kernel.
Describes the 8-MHz clock oscillator output and its signal characteristics.
Explains the power-on reset signal generation and its relation to the power supply monitor IC.
Details the BR and BGACK signals and their required states.
Explains the bus error input and its function for detecting hardware faults.
Describes the front panel edit knob interrupt generation and its connection.
Discusses the microprocessor bus and troubleshooting common faults.
Explains the address decoding levels for memory and I/O device selection.
Details diagnostic tests for data write/read selects to latches, IEEE-488 IC, and control outputs.
Explains the importance of calibration/compensation data and its redundant storage.
Describes how self-tests verify checksums and detect data differences.
Outlines the procedure using Special Function 907 to repair invalid data segments.
Explains how data origin codes specify how calibration data was generated.
Describes the front panel housing, display PCA, switches, and connectors.
Details the A1 Display PCA, its function, and control circuitry.
Explains how display data is sent and latched, and level-shifting buffers.
Describes the source of AC filament voltage for the display.
Explains how bright-digit effect is achieved through refresh cycles.
Describes how digit strobe data latches and strobes the front panel switch matrix.
Explains inputs for remotely generated sequence commands via the rear panel AUX connector.
Describes the circuitry for the edit knob interface and its signals.
Explains how monostable and NOR gates clear the display if refresh is lost.
Describes how the front panel POWER switch selects operate or standby modes.
Discusses troubleshooting front panel display and controls.
Guides troubleshooting for display issues like missing digits or segments, and checks power supplies.
Starting point for troubleshooting frequency-related problems using a fault tree.
Block diagram to identify major functional blocks and signal paths of the sub-synthesizer.
Explains the sub-synthesizer PCA circuit, including VCO and dividers.
Guides troubleshooting for sub-synthesizer VCO issues, including status codes and voltage checks.
Describes the coarse loop PCA, its reference section, and main coarse loop.
Block diagram for the coarse loop reference section, showing PLL and components.
Block diagram of the coarse loop, detailing its interlocking loops and signal paths.
Troubleshoots the coarse loop, covering reference section and main coarse loop issues.
Lists adjustments for the A2 Coarse Loop PCA, including video amplifier offset and oscillator tuning.
Procedure to adjust the discriminator video amplifier output to 0V DC.
Procedure to adjust the coarse loop VCO steering voltage to 24V.
Procedure to adjust acquisition oscillator level at TP6 for phase locked loop disabled.
Procedure to adjust the 40-MHz oscillator to 40 MHz with the crystal removed.
Procedure to tune the 80-MHz filter for maximum level in the doubler section.
Procedure to adjust the 80-MHz level from A2-J5 to 4 dBm.
Procedure to minimize the 2-MHz signal at the output of the acquisition oscillator.
Describes how to select alternate reference frequencies using switches.
Describes the A5 Coarse Loop VCO PCA circuit, including varactor-tuned oscillators and control signals.
Guides troubleshooting for Coarse Loop VCO PCA issues, checking signals and DC voltages.
Block diagram for the Sum Loop, identifying functional sections and signal paths.
Describes the A12 Sum Loop PCA circuit, including PLL and RF sections.
Details the RF section's amplifiers, mixers, and filters for frequency down-conversion.
Describes circuits for phase lock acquisition and maintenance, including phase detector voltage.
Guides troubleshooting for sum loop problems, checking fault codes and input signals.
Lists five potentiometer adjustments for the A12 Sum Loop PCA.
Procedure to adjust the Sum Loop VCO steering voltage to +26V DC.
Procedure to adjust the SUMAUDIO buffer amplifier for equal gain in inverting/non-inverting modes.
FM null adjustment procedure for A12/A14 PCA replacement or shift.
Procedure to adjust loop gain so AC voltages at steering and phase lock ports are equal.
Procedure to adjust acquisition oscillator level at TP1 for phase locked loop disabled.
Describes the A9 Sum Loop VCO PCA circuit, including varactor-tuned oscillators and control signals.
Guides troubleshooting for Sum Loop VCO issues, checking phase lock, DC voltages, and output signals.
Fault tree for troubleshooting RF Level and AM problems.
Block diagram to identify functional sections and signal paths of the Output PCA.
Describes the interrelated circuits on the Output, Premodulator, and Modulation Control PCAs.
Details the RF path, including switches, filters, amplifiers, and frequency down-conversion.
Explains the leveling loop's function in controlling RF signal level and amplitude modulation.
Describes the level-control circuit, its inputs, and the output leveling loop control voltage.
Guides troubleshooting for inaccurate level or unleveled conditions, pointing to specific assemblies.
Discusses troubleshooting unleveled conditions, checking band controls, switches, and specific circuits.
Presents nominal signal characteristics at various test points on the Modulation Control PCA.
Lists adjustments for the Output Section, including Modulation Control, Premodulator, and Output PCAs.
Procedure to adjust the Level DAC offset for 0 ±0.5 mV at TP7 with RF OUTPUT off.
Procedure to adjust AM depth to 90% as measured with a Modulation Analyzer.
Procedure to adjust detector offset for a 24-dB change in output power for a 24-dB change in level DAC.
Procedure to adjust AM depth to 90% as measured with a Modulation Analyzer.
Procedure to adjust RF level adjustment, R20, for +9 dBm output.
Procedure to adjust R71 to provide 0.98V DC at TP1 for AM and FM indicators.
Procedure to adjust sum steer voltage to 10.24V with the Sum Loop VCO steering DAC set to full scale.
Procedure to adjust the spur at 5.5 MHz to -89 dBm ±2 dB with R72.
Procedure to adjust het level adjustment, R10, for equal output power at 14.9 and 15 MHz.
Procedure to adjust R51 and C7 to optimize AM bandwidth in the 256 to 1056-MHz band.
Procedure to adjust R96 for 1.355V DC between TP1 and TP2.
Procedure to adjust R1 to minimize harmonic distortion by adjusting collector current of Q9.
Procedure to adjust C201 for optimizing gain flatness, especially at high frequencies.
Describes the A20 Attenuator/RPP Assembly, its attenuation range, and protection features.
Guides troubleshooting for attenuator and RPP problems, focusing on relay contacts and trip operation.
Fault tree for troubleshooting FM/øM problems.
Block diagram showing functional sections and signal paths for FM/øM.
Explains the FM PCA's phase-locked loop, dividers, phase detectors, and modulation sections.
Describes the voltage controlled oscillator section, including tuning, filters, and amplifier stages.
Explains the programmable divider sections for reference and variable frequencies.
Discusses phase detectors, unlock detectors, loop amplifiers, and logic circuits.
Divides FM troubleshooting into frequency, modulation, and input signal checks.
Guides checking FM oscillator performance for faults in frequency lock using Table 6E-3.
Guides checking modulation for errors and faults using Table 6E-4.
Guides checking input signals and control input signals for FM PCA and Modulation Control PCA.
Lists PCAs involved in FM adjustments and recommended test equipment.
Details specific adjustments on the Modulation Control PCA, including equipment settings and connection.
Provides a procedure for aligning the FM PCA (A14), including centering pots and connecting test equipment.
Block diagram to identify functional sections and signal paths of the internal modulation oscillator.
Describes the modulation oscillator as DDS or pulse generator, synthesized from reference frequency.
Details the direct digital synthesizer frequency setting, amplitude control, and wave generation method.
Explains pulse generation mode selection, frequency, pulse width determination, and output termination.
Describes how analog switches select outputs to route pulse generator and DDS signals.
Verifies the 20 MHz input clock signal and troubleshooting steps for DDS and pulse generator.
Step-by-step troubleshooting for the direct digital synthesizer, including checking clock, MSB, and DAC outputs.
Step-by-step troubleshooting for the pulse generator, checking logic signals and pulse shape.
Introduces Section 7, containing an illustrated list of replaceable parts by assembly.
Explains how to order components using manufacturer or Fluke stock numbers, including required information.
Lists Fluke/Philips technical service centers.
| Brand | Fluke |
|---|---|
| Model | 6080A |
| Category | Portable Generator |
| Language | English |