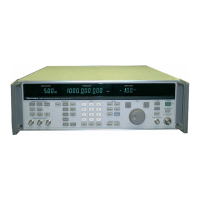
TROUBLESHOOTING AND REPAIR
POWER SUPPLY
The -5V local supply (U5) provides negative voltage to U1 and a -1.3V for U7 and U9
shut off voltage, U3. Triac Q3 is a voltage surge protector to protect against line voltage
surges as well as overvoltage in case of a wrong setting of the line power selector card.
When the voltage across the +5.1V secondary winding of the transformer is excessive,
CR2 or CR3 conduct current which fires the gate of Q3. This sets Q3 in the conductive
mode, shorting the secondary winding and causing the power line fuse to blow.
POWER SUPPLY TROUBLESHOOTING 6A-3.
WARNING
TROUBLESHOOTING THE POWER SUPPLY SHOULD BE DONE WITH
GREAT CAUTION SINCE IT IS POWERED UP WHILE THE LINE POWER IS
CONNECTED TO THE INSTRUMENT. THE FRONT PANEL POWER SWITCH
DOES NOT BREAK EITHER THE AC LINE POWER OR THE TRANS-
FORMER SECONDARY. THEREFORE, THE POWER SUPPLY IS
ENERGIZED WHENEVER IT IS CONNECTED TO THE MAINS.
To troubleshoot the power supply, remove the rear panel from the instrument and
remove the Power Supply PCA from its bracket.
Since the power supply is a floating type (to reduce ground loops) both the GND lines
and the GND SENSE lines must be connected via the controller connector (J4). It is a
good practice to connect load resistors to each of the supply lines. The load values
should correspond to the load current indicated on the power supply schematic.
When operating the power supply, make sure that the fan is aimed at the power
dissipators (Q1, Q2, U6, U4, U9). Failure to provide adequate air flow could damage
the power supply.
Troubleshooting Procedure 6A-4.
Troubleshoot the power supply as described in the following procedure:
1. Set the power supply to the standby mode (front panel yellow LED on).
2. Verify that the two standby supplies are operating and are within the specified
voltage range, and verify that the rest of the supplies are turned off. The specified
ranges are as follows:
a. TP2, 23.4V supply = 24V (± 5%)
b. TP14, -5Vsupply = -5V (±5%)
c. TP18, 24V supply = 0V (±0.1V)
d. TP6, +5.1V supply = 0V (±0.1V)
e. TP11, + 15V supply = 0V (± 0.1V)
f. TP16, -15V supply = 0V (± 0.1V)
g. TP20, 37V supply = 0V (± 0.1V)
h. TP21, 30V supply = 0V (± 0.1V)
i. TP15, +5V reference = 0V (± 0.1V)
6A-4