Section 3: Model 9100 Controls: Working with Front Panel Controls — Tutorials 3-51
Final Width = 215mm
TODAYS DATE TIME
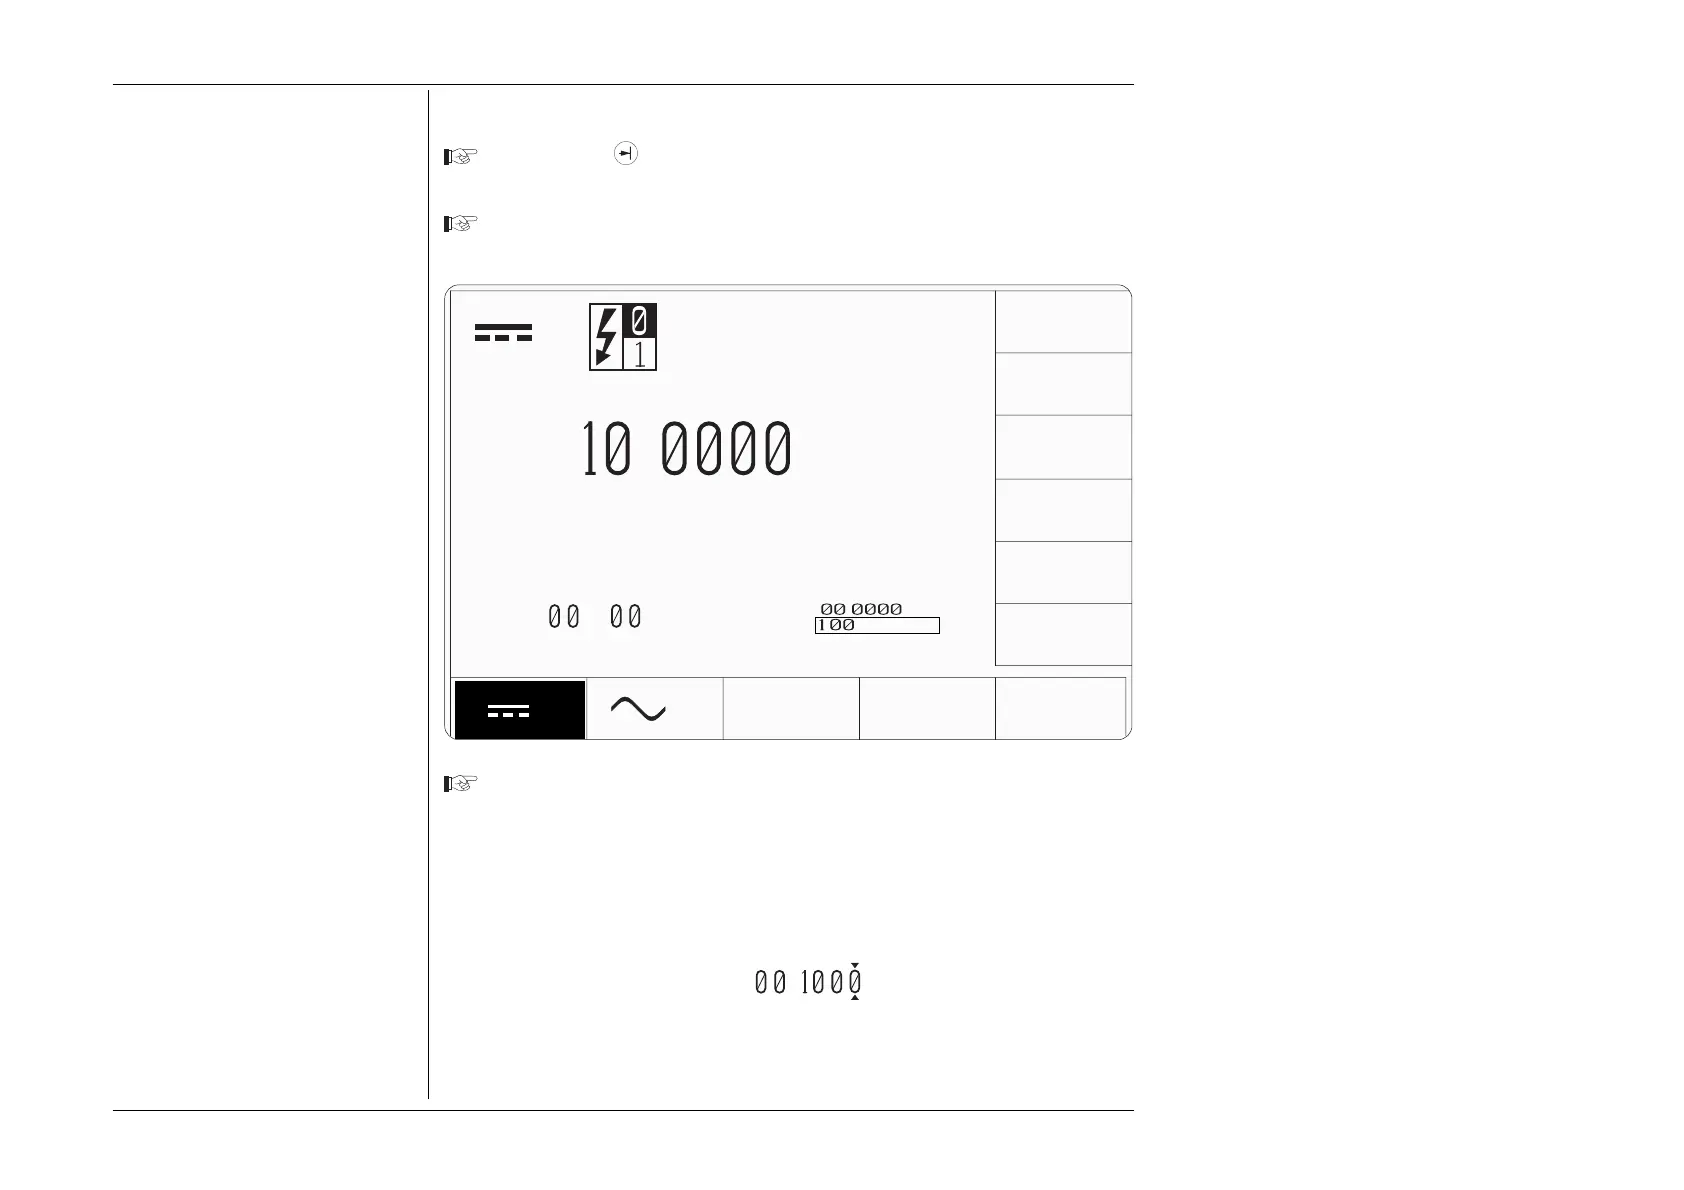
3.4.6.2 Editing Offset Values
Press the Tab
key. The cursor moves to the offset value.
This time we shall enter a positive offset of 100mV:
Type the number '100' using the numeric keypad (the + sign is not available on the
numeric keypad). The edit box will appear with 100 inside it:
Note:
The screen keys on the right of the
display have been re-labelled.
The new keys act as equivalents of the
↵ key on the numeric keypad, when
scaling of the entered value is required.
Press the screen key, on the right side of the display, labelled 'mV'. This fixes the
new offset value at 100mV, but because the resolutions of offset and output values
are different, the firmware will seek the best resolution which satisfies both
values. In this case, the best available resolution is that of the output value of
1Ø.ØØØØ V, so the new value which appears when the box is removed
(remember the 'mV' screen key is also the equivalent of the ↵ key) becomes
ØØ.1ØØØ V.
Rule:
The resolutions of the Output and
Offset Values must be identical.
When entering a new Output Value
or Offset Value, if the resolutions of
the two values are different, the
firmware will seek the best resolution
to satisfy both values. The new values
which appear when the Direct Edit
box is removed will generally be fixed
at the lowest resolution of the two.
∆V=+
.
V
V
+
.
∆
V
V
V
V
∆%=
.5
∆V=
.
V
mV
kV