66
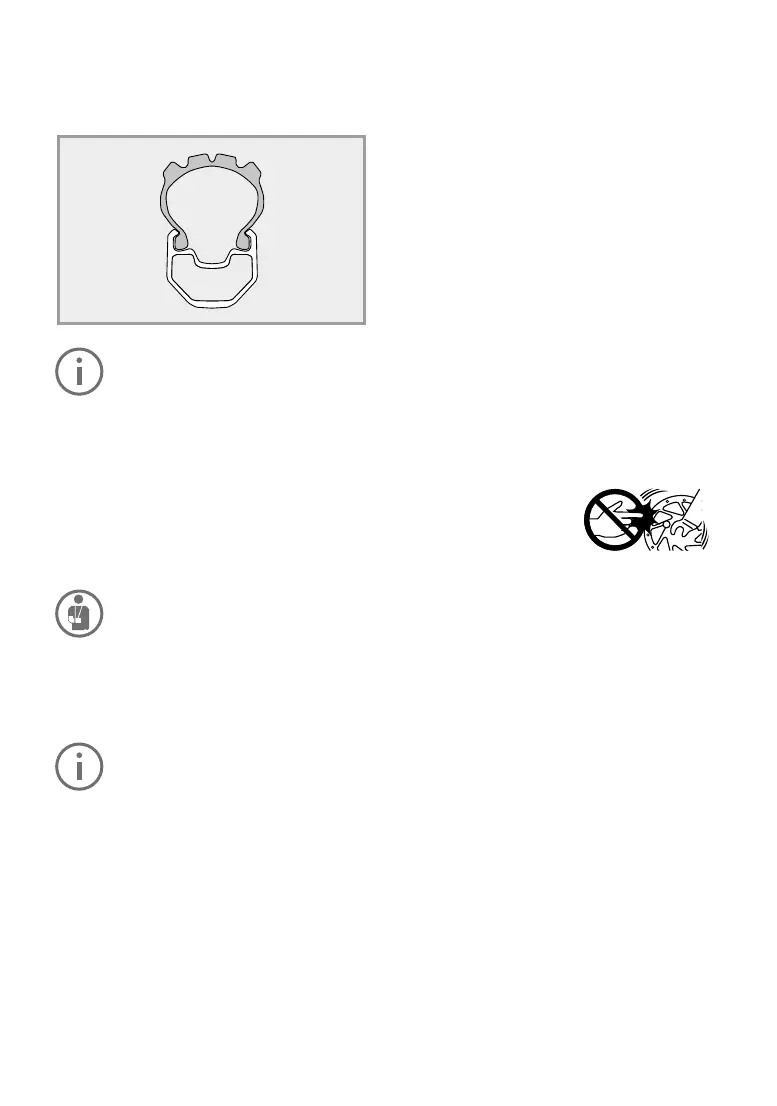
factory are pretreated with sealant for tubeless
use. Once you have let your FLYER specialist
retailer perform the simple installation, you can
enjoy improved traction o road and increased
puncture protection.
Tubeless tyres must only be tted and
removed from the rim without tools, as
using them could cause leaks.
Ifthesealantisnotsucienttopreventa
defect, a normal tube can be used once
the valve has been removed.
14.3 Dealingwithaattyre
Correct and safe repair of a at tyre requires
specialised E-Bike knowledge and special tools.
Havetechnicaldefects andat tyresexclusively
repaired by your FLYER specialist retailer.
Repairing a tyre puncture involves hav-
ing to adjust safety-relevant compo-
nents. Incorrect mounting of the wheels
and brakes can lead to severe falls and
injuries. We strongly advise you not to
repair a tyre puncture alone. Ask your
FLYER specialist retailer to x the tyre
puncture for you.
Get thorough instructions from your
FLYER specialist dealer and practise
changing the wheels and tyres under
their supervision if you plan to repair
yourownattyres.Thesystemmustbe
switchedoandthebatterymustbere-
moved before changing a tyre or wheel.
You need the following equipment to repair a tyre
puncture:
• Plastic tyre lever
• Patches
• Rubber cement
• Sandpaper
• Open-ended spanner or wrench
(for wheels without quick-release fasteners)
• Air pump
• Spare tube
If your bike is equipped with hydraulic rim
brakes, proceed to remove the brakes as follows:
• If you have quick releases for the brakes, you
can remove a brake unit according to the man-
ufacturer’s instructions.
• If you do not have a brake quick-release fas-
tener,deatealloftheairoutofthetyre.
If your FLYER is equipped with a disc brake, you
can remove the wheel without further preparation.
Pleasenote:whenttingthewheel,thediscmust
be slotted between the brake linings of the brake
calliper and ultimately be centred without contact.
In the case of back pedal brakes, the screws on
the brake arm of the chain stay have to be opened.
2. Removing the wheel
• If your bicycle has quick-release fasteners or
axles,openthem.
• Ifyourbicyclehashexagonalbolts,thenloos-
entheminanti-clockwisedirectionwithatting
ringspannerorbox-endwrench.
Removing the wheel
Front wheel
If your bicycle has quick-re-
lease fasteners or axles,
open them.
Ifyourbicyclehashexago-
nal bolts, then loosen them
in anti-clockwise direction
withattingringspannerorbox-endwrench.
You can then remove the front wheel according to
the steps listed above.
Rear wheel
If your bicycle uses a derailleur gear system,
change gear to the smallest sprocket. In this posi-
tion, the rear derailleur poses the least hindrance
in removing the wheel.
Ifyourbicyclehasquick-releasefastenersorax-
les, open them.
Ifyour bicyclehas hexagonal bolts,then loosen
theminanti-clockwisedirectionwithattingring
spannerorbox-endwrench.
Pull the rear derailleur backwards a little.
Lift the bicycle slightly.
Lightly strike the wheel from above with the palm
of the hand. Take the wheel out of the frame.
If your bicycle has a gear hub, please consult the
instructions supplied by your manufacturer for re-
moving the wheel.
Removingthetyreandinnertube
• Unscrew the valve cap, the fastening nut and
possibly the cap nut from the valve.
• Release all of the remaining air from the inner
tube.
®