72
Brake discs and brake pads are particu-
larly subject to wear. Have these safe-
ty-related components regularly checked
for wear and changed as required by
your FLYER specialist retailer.
If the brake system needs to be cleaned, contact
your FLYER specialist retailer.
The component manufacturer's instructions on
how to clean the brake system are provided in the
respective brake system manual.
Only allow your FLYER specialist retailer to
maintain the brake system and change individual
brake system components. Only original spare
parts may be used. Otherwise it is possible that
the functionality of your FLYER e-bike may be im-
pacted or damaged.
Have the brake pads regularly checked accord-
ingtomanufacturerspecicationsbyyourFLYER
specialist retailer.
17.4 Back pedal brakes
If your FLYER is equipped with back pedal
brakes, brake by pushing the pedals backwards
instead of forwards. This means that your bicycle
will not freewheel and you are unable to rotate the
pedals backwards freely as you otherwise can.
Back pedal brakes work best when both
cranks are in a horizontal position. If one
crank is pointing up and the other one
down, less force can be applied and
brakingislesseective.
Theeectivenessofback pedalbrakes
can deteriorate substantially on long
slopes if they are used on their own.
This type of braking system can become
very hot from continuous braking. Use
the rim brakes too on long slopes.
Wait until the back pedal brake has
cooled down and do not touch the brake
drum.
Ensure that the brake anchor plate is
correctly attached with the appropriate
screw when removing or installing it.
18. Lightingsystem
Your FLYER e-bike's lighting system is usually
powered by the battery. When the battery is emp-
ty, the light should still work for about one hour.
The headlight must be aligned to illuminate the
road according to the legal regulations of your
country.
Have the lighting system checked and, if
necessary, replaced by your FLYER
specialist retailer if a fault occurs.
18.1 Lights
Dierentlightingsystemsareinstalleddepending
on the area of use and bicycle type.
FLYER with pedal assist over 25 km/h with
high beam
Basic setting: when the system is activated, the
low beam/daytime running light is automatically
switched on. Light button function: Switch be-
tween low beam/daytime running light and high
beam.
Switching between low beam/daytime running
light: Automatic switching based on the integrated
light sensor.
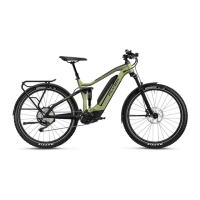
FLYER E-mountainbikes
If you have chosen to add the optional lights to
your FLYER e-mountainbike, the settings are as
follows:
Basic setting: when the system is activated, the
lightremainsswitchedo.Lightbuttonfunctions:
Activate the light by pressing the light button;
switch between low and high beam (if available)
bypressingthelightbuttonagain.Switchothe
light by pressing and holding the light button (at
least 1 second). Switching between low beam/
daytime running light: Automatic switching based
on the integrated light sensor.
In their default factory conguration, FLYER
Uproc e-mountainbikes are classied as sports
equipment. They are not compliant with StVZO
(the German regulations authorising the use of
vehiclesforroadtrac)andthereforearenotau-
thorised for use on roads. If you wish to use your
FLYER e-mountainbike on public roads, you will
needtoaskyourFLYERdealertottheneces-
saryequipment(light,reectorsetc).
Passivelighting(reectors)isincludedwithyour
purchase. Reectors are no substitute for the
necessarylights,butwillsignicantlyimprovevi-
sibility at dawn and dusk.
When attaching the reectors, please be aware
of the following: