3. Begin designing your plate dispense with the plate designer:
● Click and drag your mouse over a group of wells to select them, or select a
pattern from the Selection group under the plate designer.
● For a constant volume, type in a volume and press Enter on your keyboard.
● To use a gradient design, click the small down arrow next to the grid
button . You may choose a horizontal gradient, a vertical gradient, a
forward diagonal gradient, a backward diagonal gradient, checkerboard 1, or
checkerboard 2.
● To use a checkerboard dispense pattern, click the small down arrow next to
the grid button . You may choose checkerboard 1 or checkerboard 2.
● To add a backfill volume, click the small down arrow next to the grid button,
and then click the backfill volume button .
4. Click the Single Update Input button next to each reagent input. Select
the Chip Type (Low Volume, High Volume, High Volume PFE, Low Volume PFE, or
High Volume Continuous Flow chip), and type the Prime Volume (optional),
Primary Wash Volume, Secondary Wash Volume (optional), Recovery Volume,
and Pre-Dispense Volume. See Default Volume and Tubing Length
Recommendation on page 28.
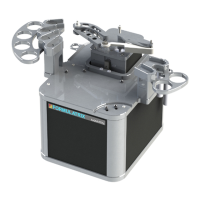
5. Drag the reagent name from the Dispense List to either the text box next to the chip
position, or the chip position on the image of the MANTIS.
OR
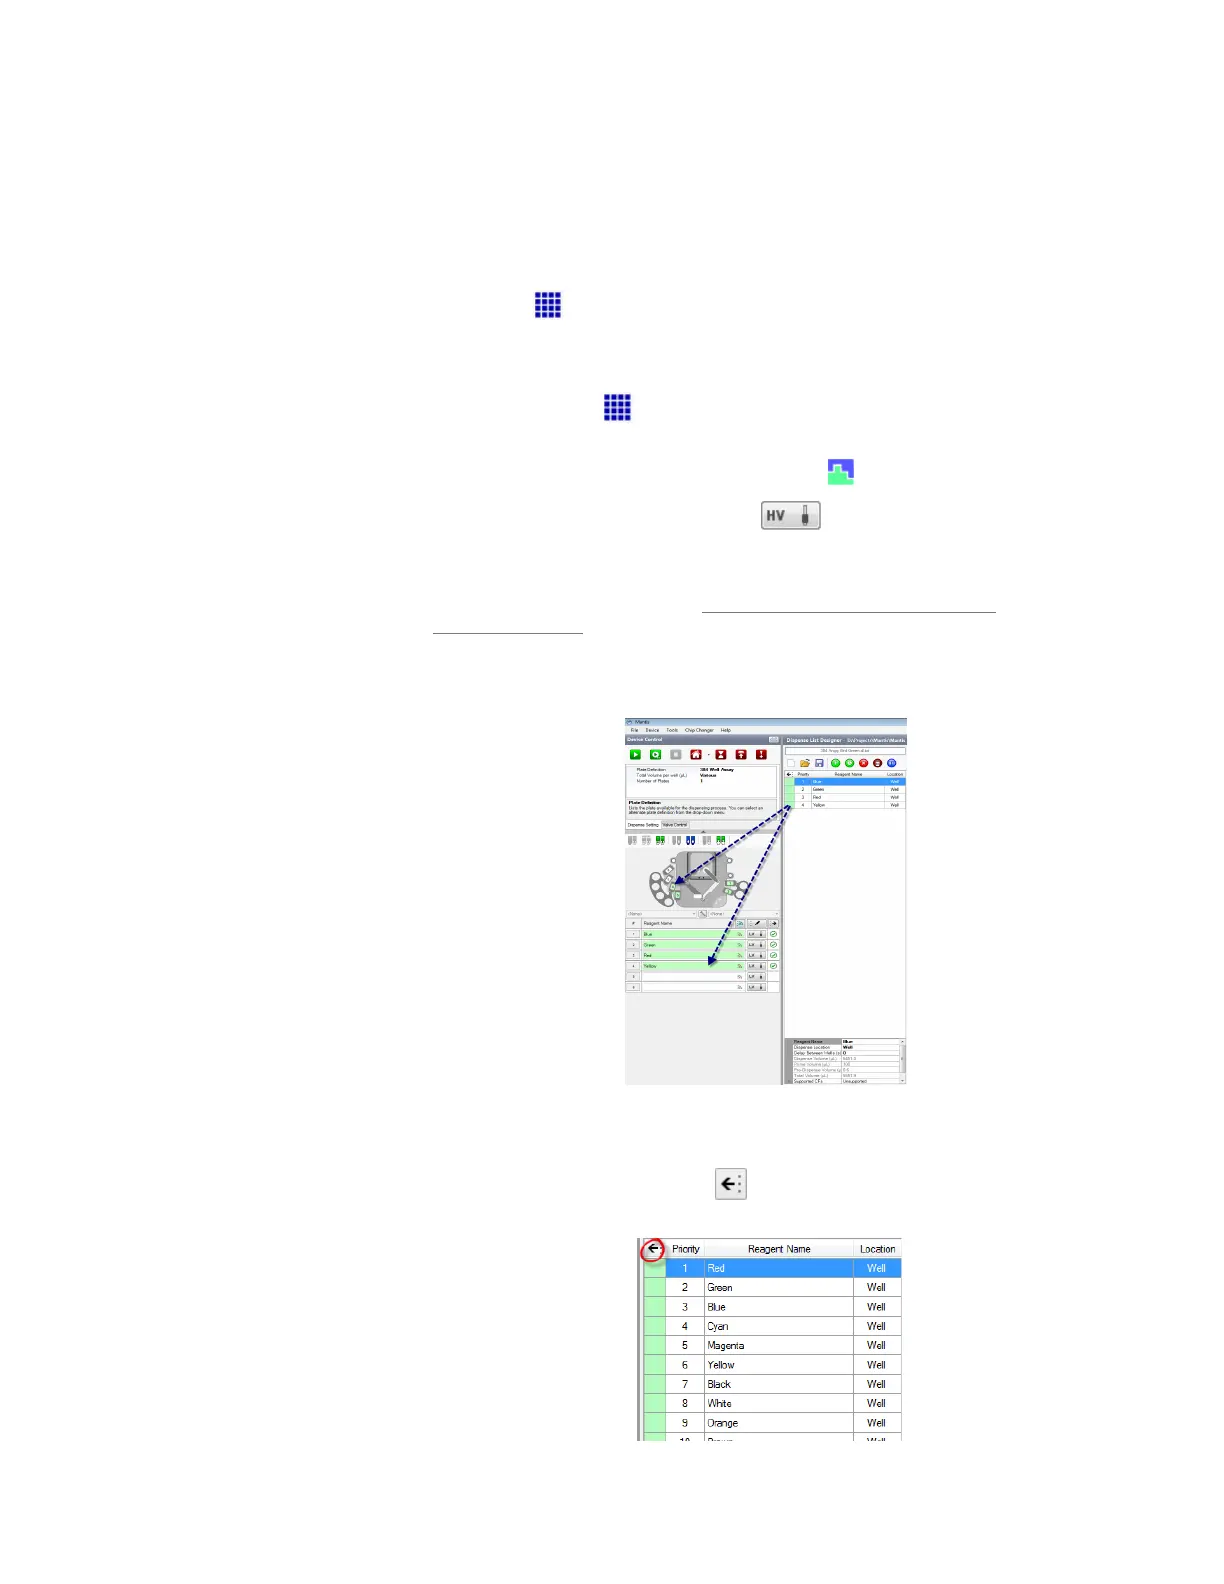
Click the Assign To Input button to assign all reagents from the Dispense
List at once.
Drag Reagent to the Device Control Panel
Assign a Dispense List of Reagents to Chip
MANTIS User's Guide | Chapter 9: Dispensing With the MANTIS