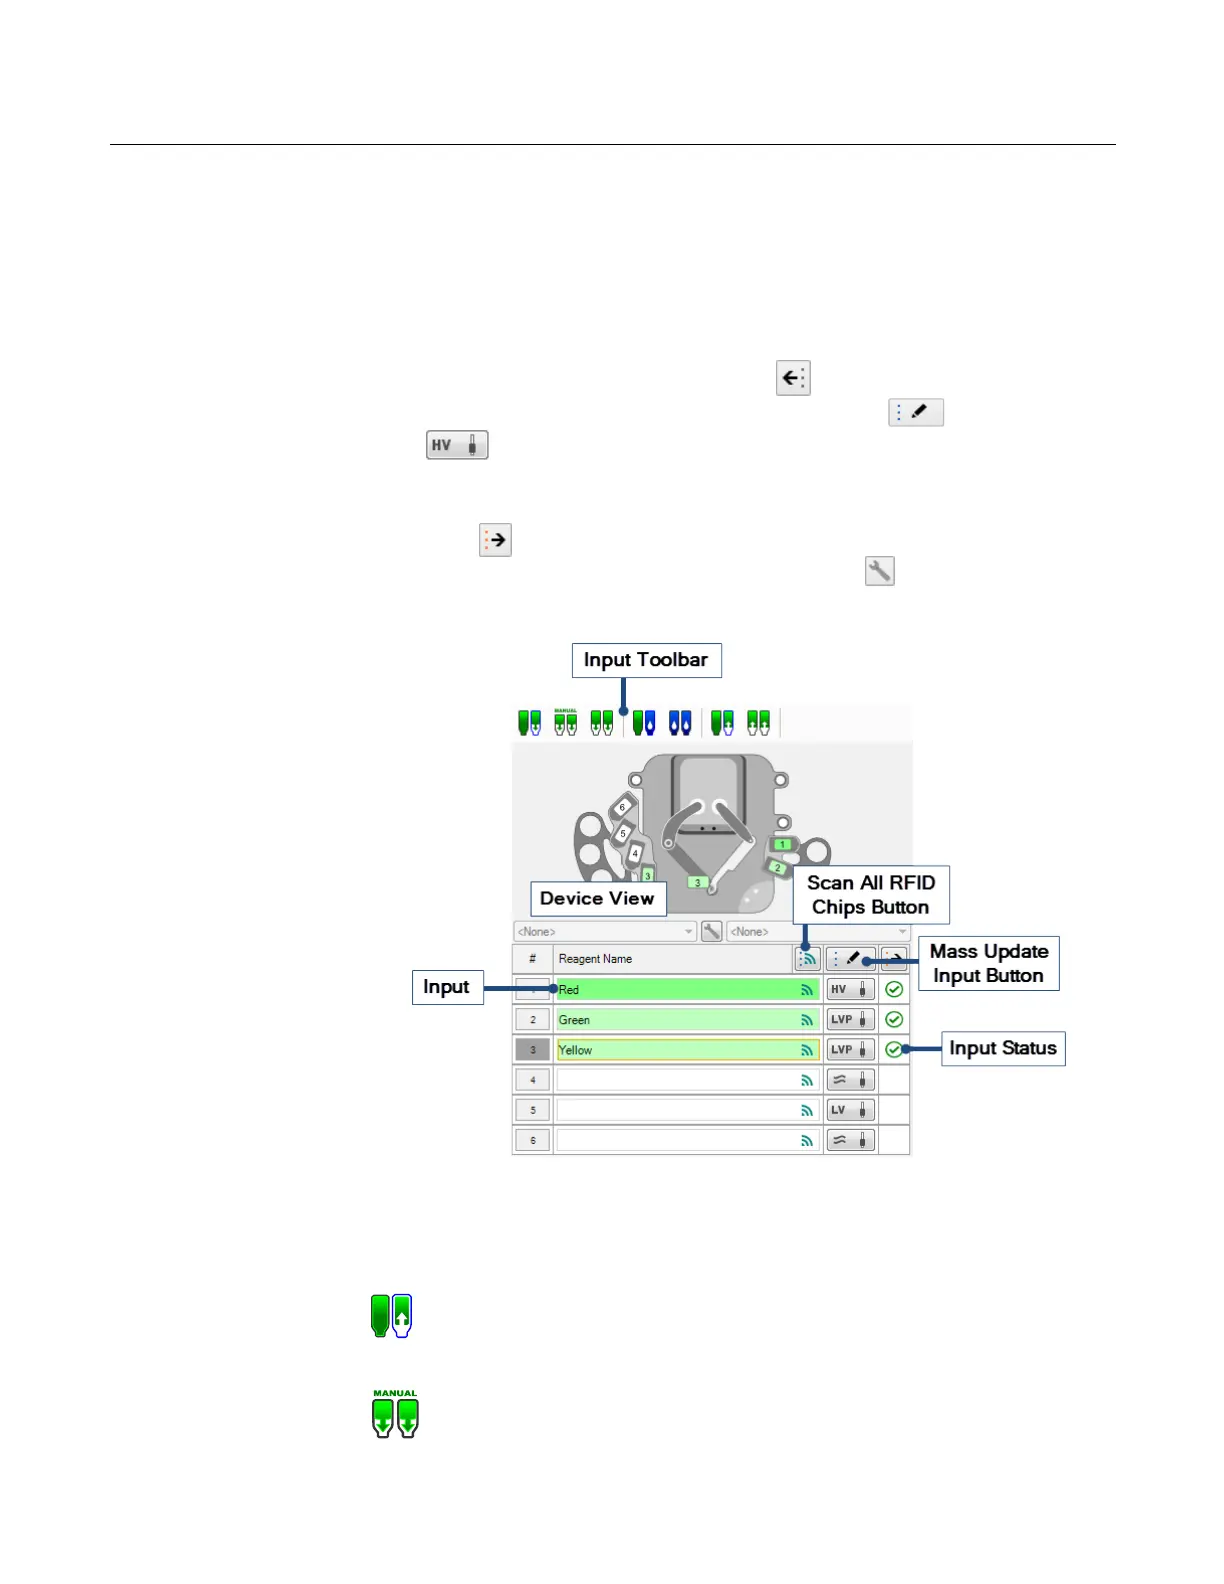
The Input Control panel is represented by the image of the MANTIS at the bottom of the
Device Control panel. This is where you will tell the MANTIS which chips are connected to
specific reagents, run priming and washing processes, and execute the reagent recovery
process.
You can assign a reagent to a chip location by dragging the name of the reagent from the
Dispense List to the text box next to the chip number or the chip's location on the image of
the MANTIS. OR click the Assign To Input button to assign all reagents in the Dispense
List at once. You can then click the Mass Update Input button or the Input
button next to every reagent name box to change the input source type (tube or
pipette tip), chip type (Low Volume, High Volume, Low Volume PFE, High Volume PFE, or
High Volume Continuous flow), and configure the prime volume, wash volume, recovery
volume, and pre-dispense volume. To move all the unassigned inputs to the Dispense List,
you can click next to the Mass Update Input button. If you want to configure all of the
input settings, click the Configure All Input Settings button .
Understanding the Input Control Panel
Input Toolbar. The Input Toolbar provides you with seven dedicated buttons to perform
specific MANTIS operations, explained below.
Input Control Panel
Auto Prime
Clicking the Auto Prime button primes the chip with a fixed amount
of reagent, controlled by the Input Option settings. Priming brings
reagent through the chip so that when you begin a dispense the
chip is not dispensing air.
Manual Prime
Clicking the Manual Prime button will prime the chip until you stop
pressing the button.
Input Control Panel
MANTIS User's Guide | Chapter 7: Software Overview