Hotstart func-
tion
To obtain optimum welding results, it will sometimes be necessary to adjust the
hotstart function.
Benefits
-
Improved ignition, even when using electrodes with poor ignition properties
-
Better fusion of the base material in the start-up phase, meaning fewer cold-
shut defects
-
Largely prevents slag inclusions
See the "Set-up menu: level 2" section for details on setting the available welding
parameters.
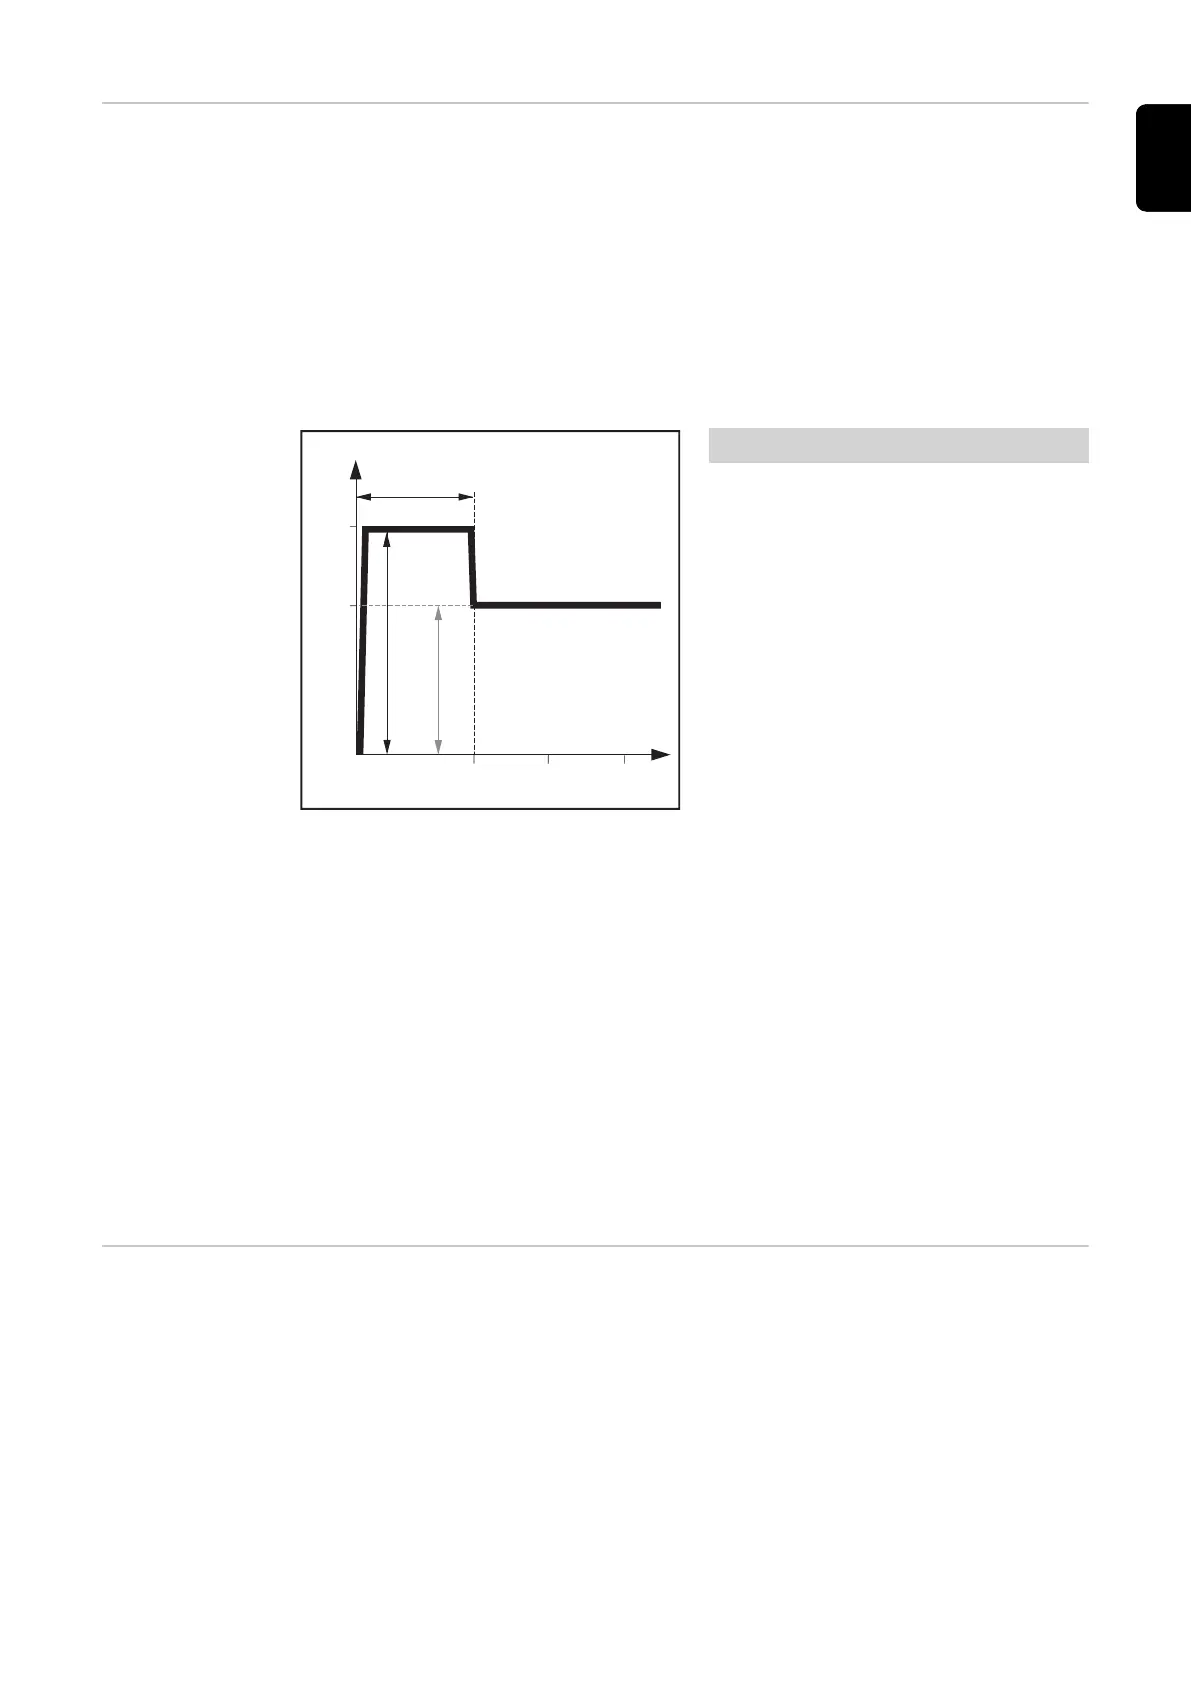
I (A)
t (s)
0,5 1 1,5
Hti
I
1
HCU
100
150
Example of hotstart function
Legend
Hti Hot-current time, 0-2 s, fact-
ory setting: 0.5 s
HCU HotStart current, 0-200%,
factory setting 150%
I
1
Main current = set welding
current
Function:
during the specified hot-current time
(Hti), the welding current I
1
is in-
creased to the HotStart current HCU.
To activate the hotstart function, the
HotStart current HCU must be > 100.
Settings examples:
HCU = 100
The HotStart current corresponds to the set welding current I
1
.
The hotstart function is not activated.
HCU = 170
The HotStart current is 70% higher than the set welding current I
1
.
The hotstart function is activated.
HCU = 200
The HotStart current is twice the set welding current I
1
.
The hotstart function is activated, the HotStart current is at its maximum.
HCU = 2 x I
1
Anti-stick func-
tion
As the arc becomes shorter, the welding voltage may drop so far that the rod
electrode will tend to stick. This may also cause the rod electrode to burn out.
Electrode burn-out is prevented by activating the anti-stick function. If the rod
electrode begins to stick, the power source immediately switches the welding
current off. After the rod electrode has been detached from the workpiece, the
welding process can be continued without any problems.
The anti-stick function can be activated and deactivated in the "Set-up menu -
level 2" section.
71
EN
 Loading...


