4-2
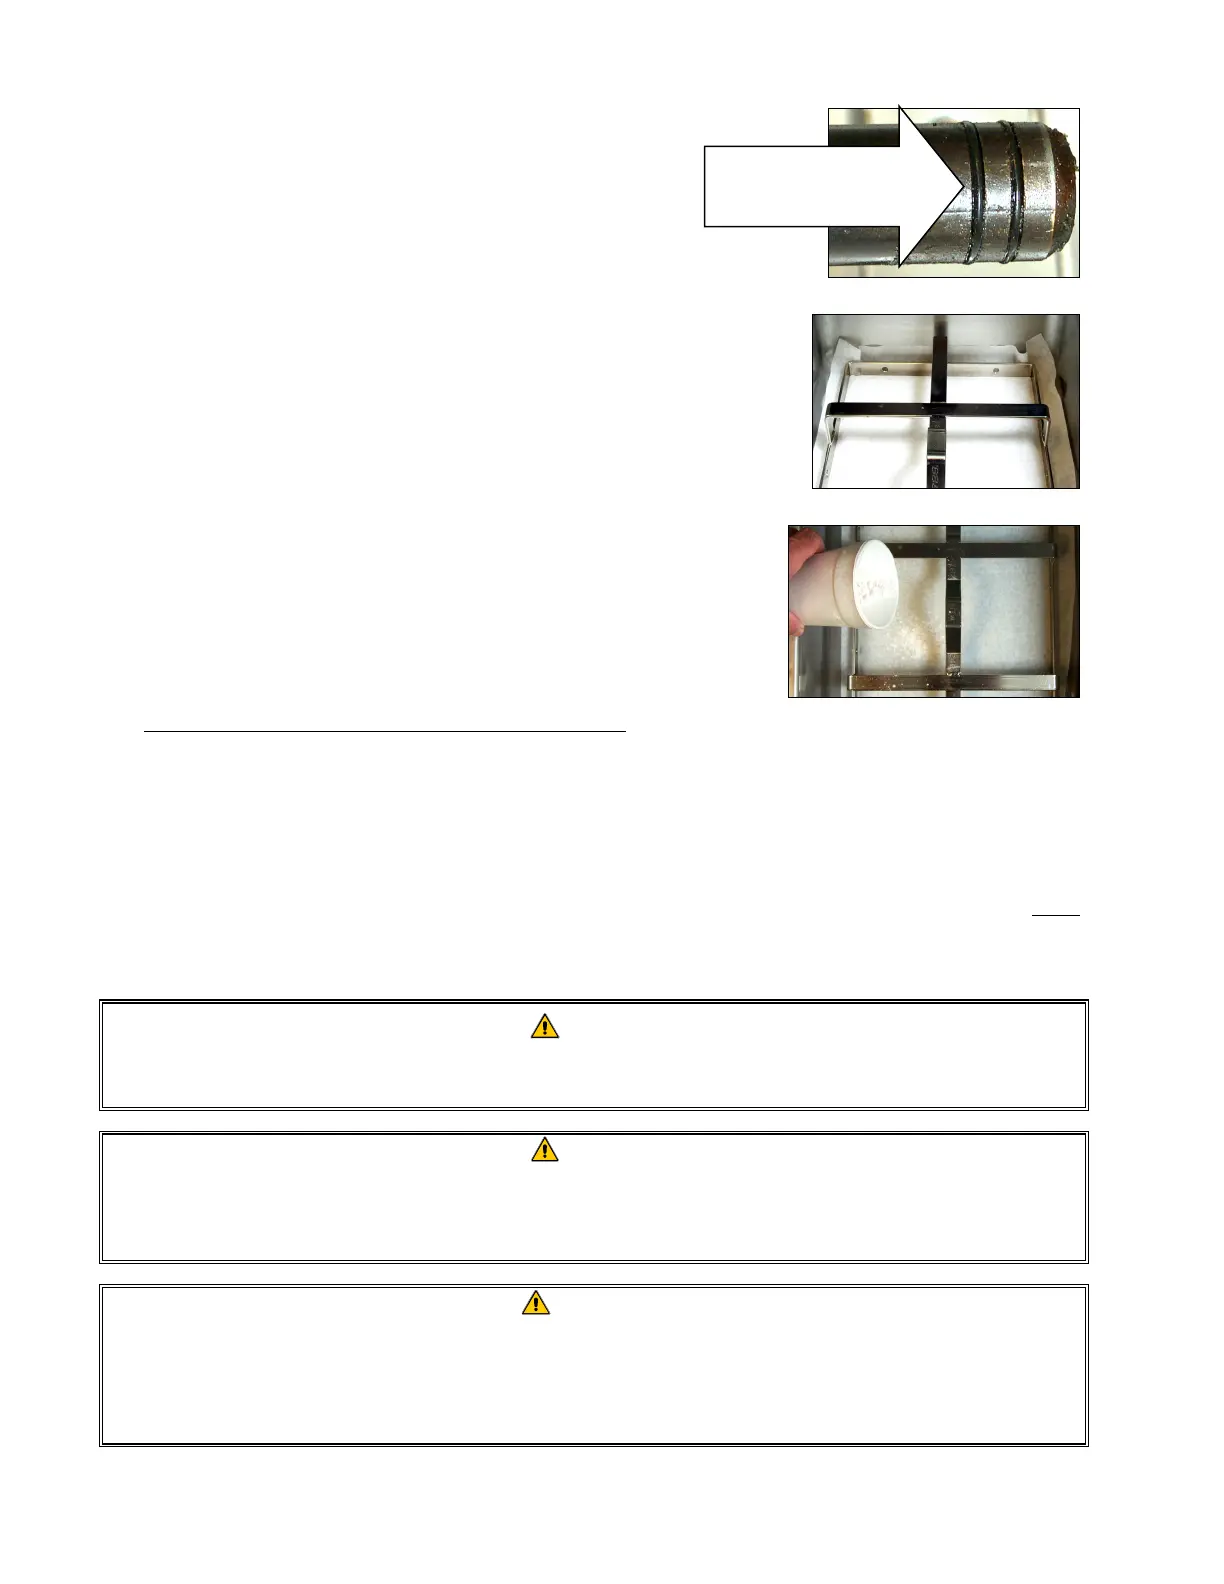
2. Inspect the filter pan connection fitting to ensure
that both O-rings are in good condition (see Figure
2).
3. Then in reverse order, place the metal filter screen
in the center of the bottom of the pan, then lay a
sheet of filter paper on top of the screen,
overlapping on all sides (see Figure 1). If using a
filter pad, ensure the rough side of the pad is up
and lay the pad over the screen, making sure that
the pad is in between the embossed ridges of the
filter pan.
4. Position the hold-down ring over the filter paper
and lower the ring into the pan, allowing the paper
to rest on the sides of the filter pan (see Figure 3).
5. When the hold-down ring is in position, if using
filter paper, sprinkle one packet of filter powder
evenly over the paper (see Figure 4).
DO NOT USE FILTER POWDER WITH THE PAD!
6. Replace the crumb tray in the filter pan, then push
the filter pan back into the fryer, positioning it
under the drain.
Figure 2
Figure 3
Figure 4
7. Push the filter pan back into the fryer, positioning it under the fryer. Ensure “P” is NOT
displayed in the upper right corner of the controller. The filtration system is now ready for
use.
DANGER
Do not drain more than one frypot at a time into the built-in filtration unit to avoid
overflow and spillage of hot oil that may cause severe burns, slipping and falling.
DANGER
The crumb tray in fryers equipped with a filter system must be emptied into a fireproof
container at the end of frying operations each day. Some food particles can
spontaneously combust if left soaking in certain shortening material.
WARNING
Do not bang fry baskets or other utensils on the fryer’s joiner strip. The strip is present
to seal the joint between the fry vessels. Banging fry baskets on the strip to dislodge
shortening will distort the strip, adversely affecting its fit. It is designed for a tight fit
and should only be removed for cleaning.
Inspect the filter
connection fitting
O-rings.
 Loading...