1-11
1.9.8 Replacing a Gas Valve
1. Disconnect fryer from electrical and gas supplies.
2. Disconnect the drain safety and high-limit thermostat wires from the gas valve. Mark each wire to facilitate
reconnection.
3. Remove the vent tube (on non-CE fryers) and the enrichment tube fitting from the valve. Disconnect the flexible
gas line(s).
If replacing the left-most valve on any configuration, or the right valve on a two-fryer battery, follow the
instructions below. If replacing valves in other positions, skip to “ALL OTHER VALVES.”
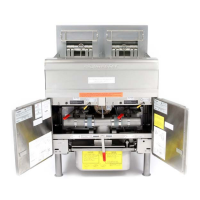
A. Remove the filter pan from the unit. Remove the door adjacent to the valve being replaced.
B. Remove the screws that attach the pan rails adjacent to the valve being replaced.
C. Uncouple the pipe union and remove the gas valve and associated piping from the unit.
D. Remove the fittings and associated piping from the failed valve and install them on the replacement valve using
Loctite
®
PST56765 or equivalent pipe thread sealant.
E. Reconnect the gas valve assembly to the fryer using Loctite
®
PST56765 or equivalent pipe thread sealant, and
reattach the flexible gas line(s), enrichment tube(s), and the vent tube (on non-CE units). Reconnect the high-
limit thermostat wires and drain safety wires to the valve.
F. Reconnect the fryer to the gas supply and open the cut off valve. Apply a thick soapy solution of water around
each connection to check for gas leaks and ensure there are no bubbles. Eliminate any that are found. There
should be no smell of gas.
G. Position the pan rail assembly beneath the fryer and rest the rear end of the rail on the cabinet frame. Install the
two nuts and bolts behind the front face of the rail, but do not tighten them. Install the nut and bolt at the rear end
of the filter rail and tighten securely.
H. Reattach the screws for the pan rails. Install the filter pan in the unit to make sure that all components are properly
aligned.
I. Reconnect the fryer to the electrical power supply and check for proper operation. When proper operation has
been verified, reinstall the door removed in Step A.
ALL OTHER VALVES
4. Carefully unscrew the valve from the manifold. NOTE: Some models may have the valve attached to the
manifold by means of a pipe union. In such cases, remove the valve by uncoupling the union.
5. Remove all fittings from the old gas valve and install them on the replacement valve, using Loctite
®
PST56765 or
equivalent pipe thread sealant.
6. Reconnect the gas valve assembly to the fryer using Loctite
®
PST56765 or equivalent pipe thread sealant, and
reattach the flexible gas line(s), enrichment tube(s), and the vent tube (on non-CE units). Reconnect the high-
limit thermostat wires and drain safety wires to the valve.
7. Reconnect the fryer to the gas supply and open the cut off valve. Apply a thick soapy solution of water around
each connection to check for gas leaks and ensure there are no bubbles. Eliminate any that are found. There
should be no smell of gas.
8. Reconnect the fryer to the electrical power supply and check for proper operation.
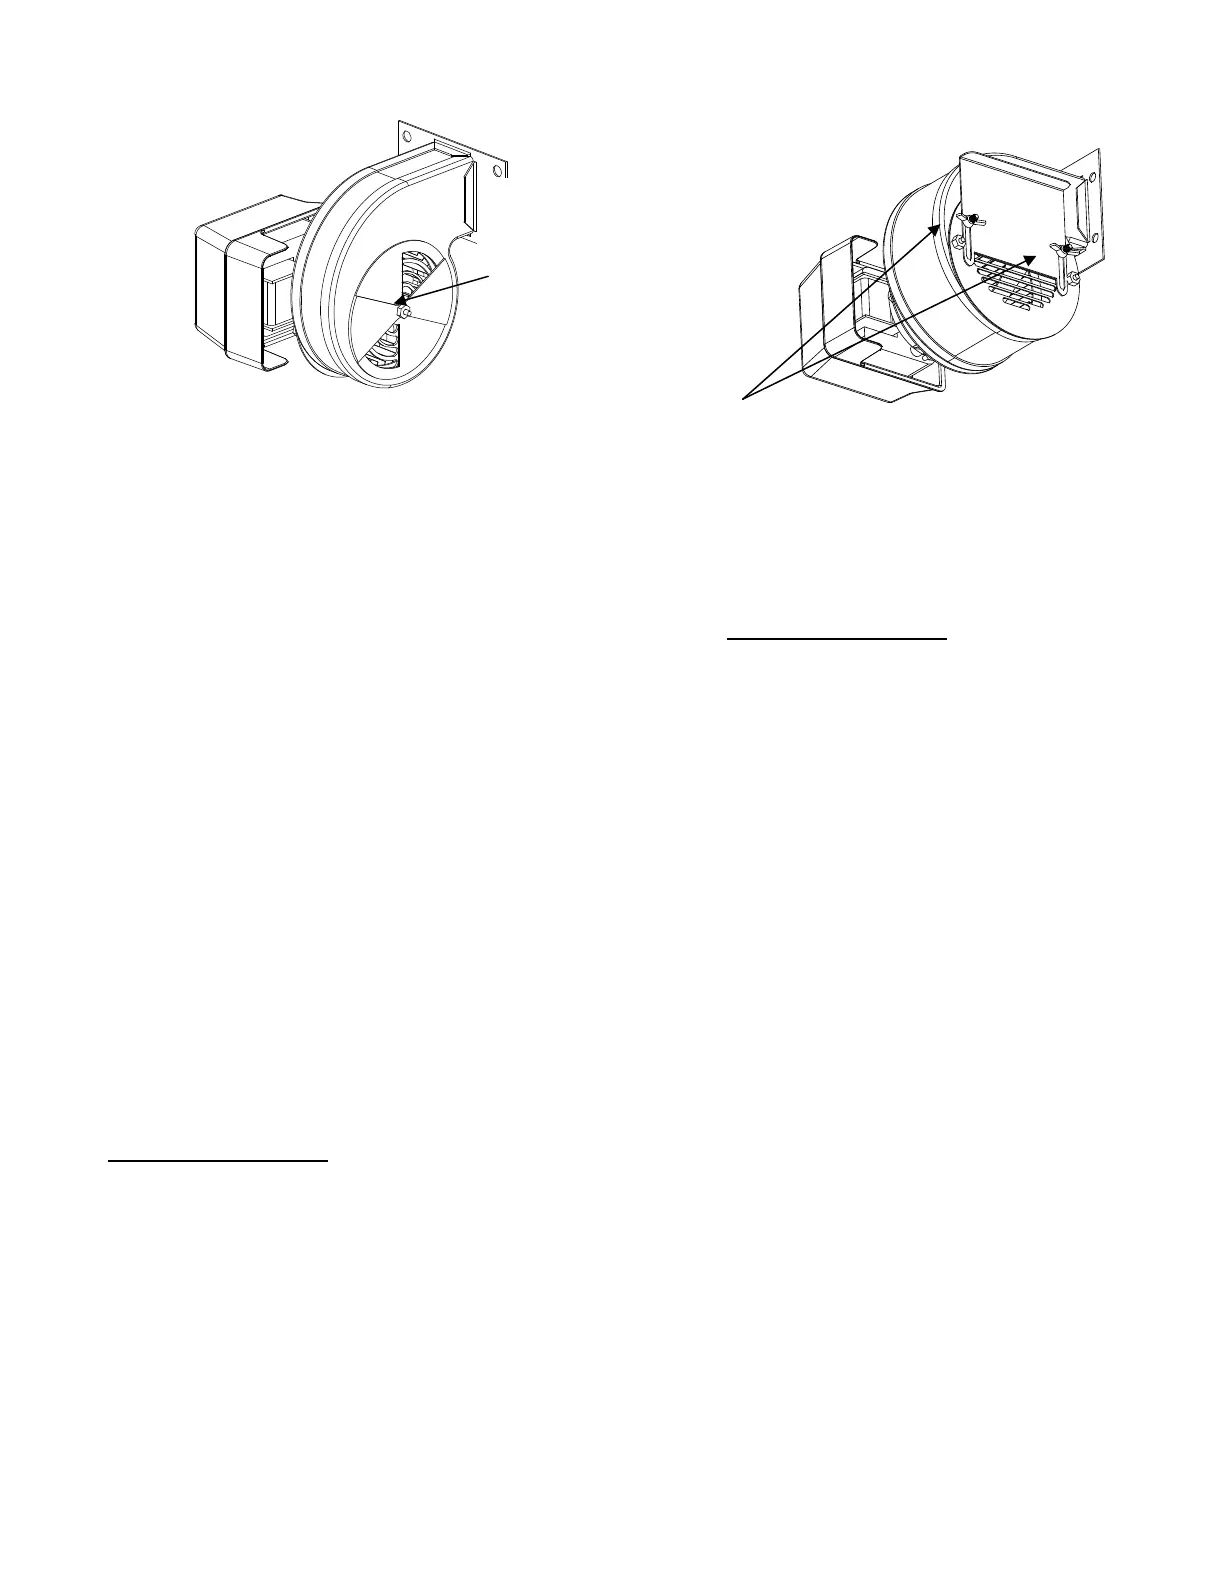
On non-CE blowers
loosen this nut and rotate
shutter to open or close
air intake.
On CE blowers loosen
both wing nuts and slide
the shutter to adjust the
air intake.