286 7 Maintenance
6. Select Layout Template.
Note
• The layout templates, Preset 1 to Preset 4, are provided with the printer. These provided layout
templates cannot be deleted.
• Some items may not be printed depending on the job type and performance conditions.
• Force annotation is not printed on a blank paper generated by the machine.
• Start time of the output job in the machine or actual start time of the print job may differ from the time you
specified. The annotation is forcibly printed at start time of the output job.
Refer to
• For information about how to enter characters, refer to “ Create Text String” (P. 286).
7. After all the settings are completed, click [Apply].
Delete Layout Template
This feature is not available with the printer.
Create Text String
Register text strings for the Force Annotation feature.
Important
• Text string available is only [Text String 1] for the printer. [Text String 2] to [Text String 8] are not available.
1. Launch your web browser and access CentreWare Internet Services.
Note
• For information on how to access CentreWare Internet Services, refer to “1.6 Configuring the Printer
Using CentreWare Internet Services” (P. 38).
• If you are prompted to enter the administrator's ID and password, enter them and click [OK].
2. Click the [Properties] tab.
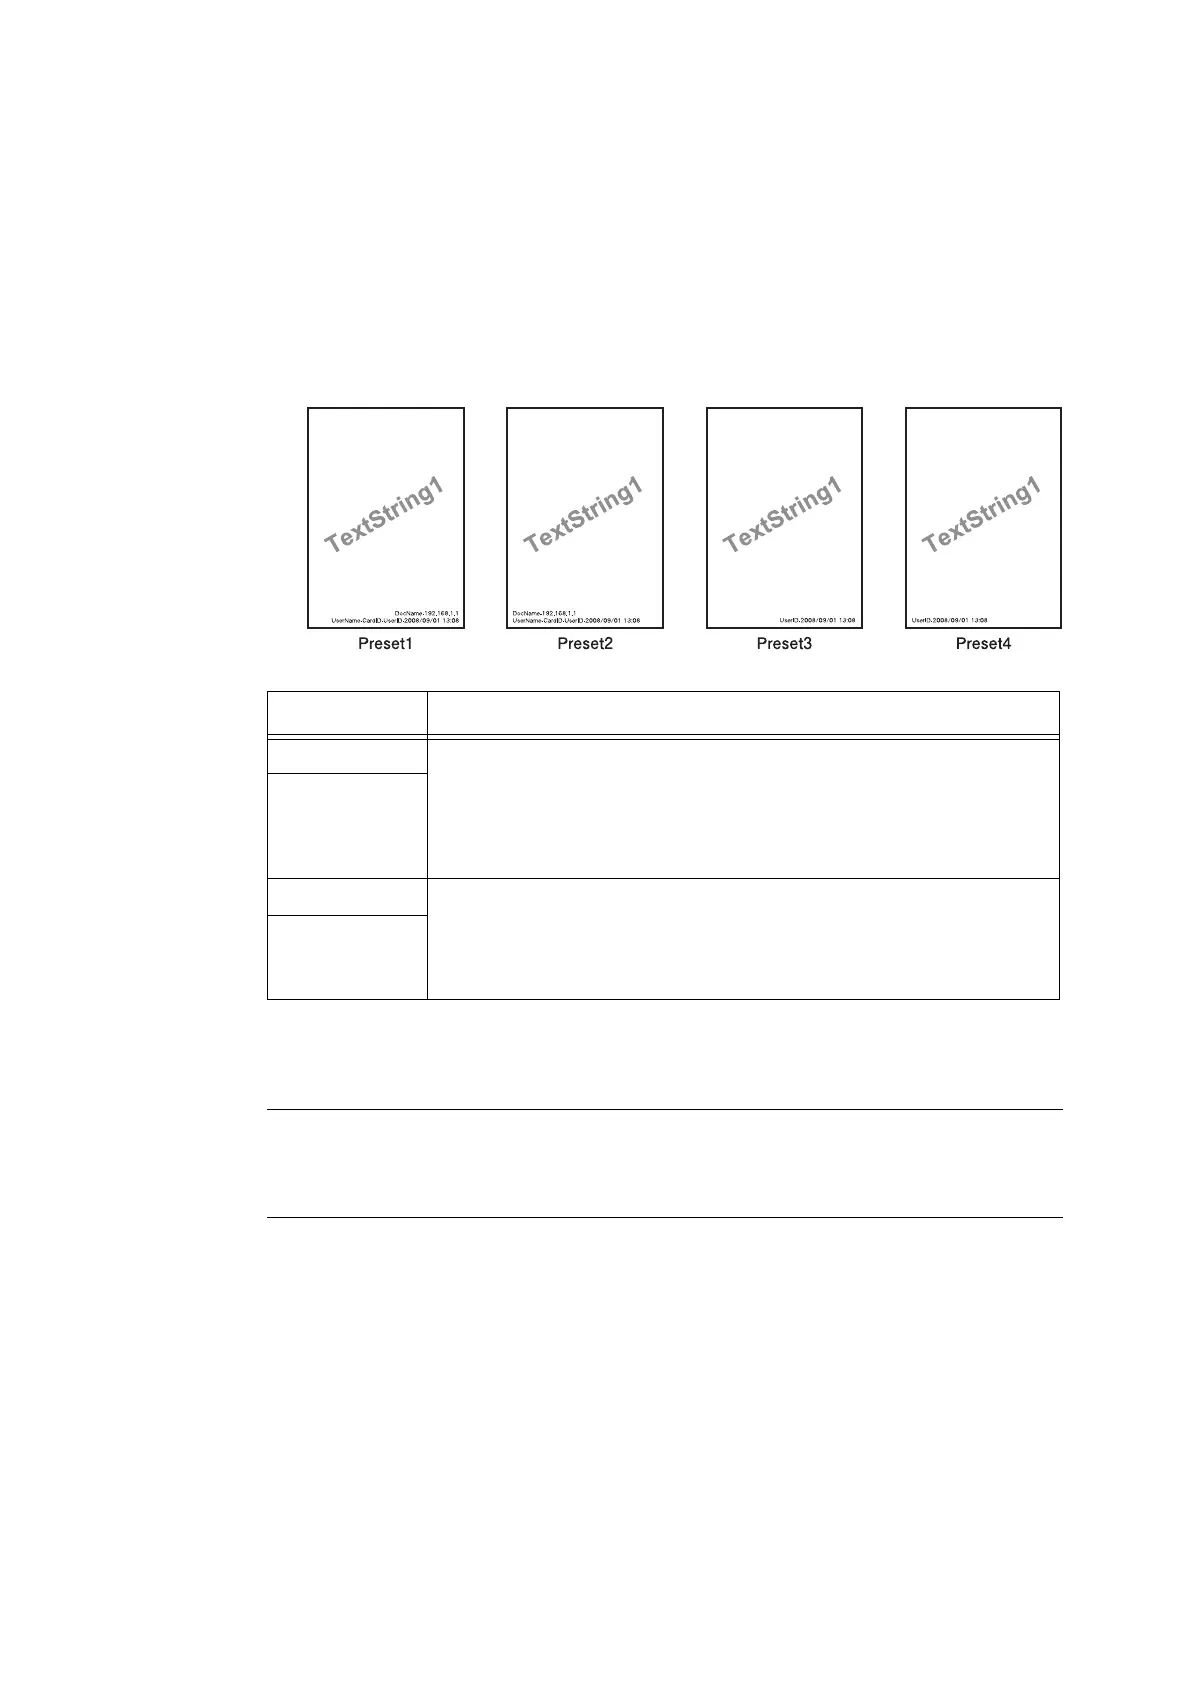
Layout Template Items Printed
preset1 The string registered on [Create Text String] > [Text String1] is printed as
watermark at an angle in the center of paper.
The following items are printed at the bottom right for Preset 1 or bottom left for
Preset 2 of paper.
• first line: file name and the IP address of the computer that send a print job
• second line: user name, card ID, user ID and date and time
preset2
preset3 The string registered on [Create Text String] > [Text String1] is printed as
watermark at an angle in the center of paper.
The following items are printed at the bottom right for Preset 3 or bottom left for
Preset 4 of paper.
• user ID and date and time
preset4

 Loading...


