7.10 Configuring Encryption Settings 299
Configuring IPSec Settings
Use CentreWare Internet Services to configure IPSec settings.
Note
• For details about CentreWare Internet Services setting items, refer to its online help.
1. Launch your web browser and access CentreWare Internet Services.
Note
• If you do not know how to access CentreWare Internet Services, refer to “1.6 Configuring the Printer
Using CentreWare Internet Services” (P. 38).
• If you are prompted to enter the administrator's ID and password, enter them and click [OK].
2. Click the [Properties] tab.
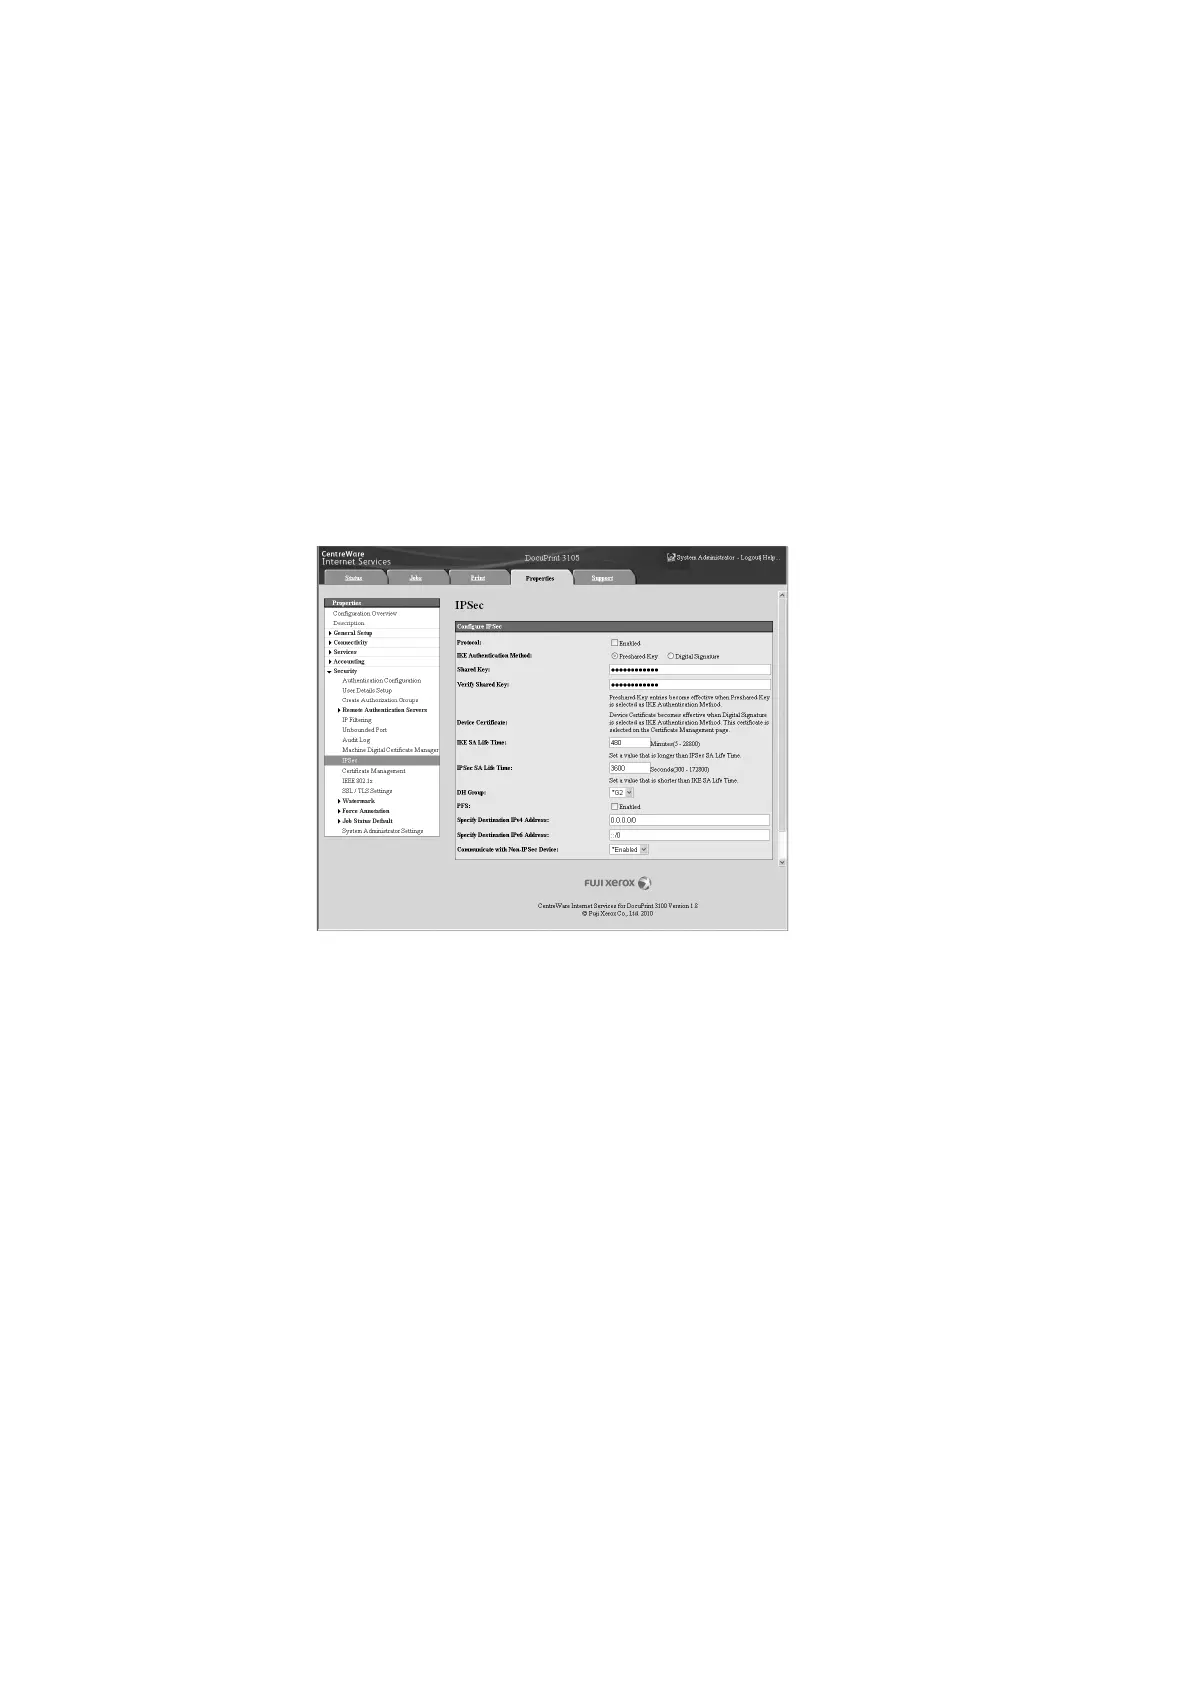
3. On the menu on the left, click [Security] > [IPSec].
The [IPSec] screen is displayed.
4. Select the [Enabled] check box for [Protocol].
5. Select [Preshared Key] or [Digital Signature] for [IKE Authentication Method].
6. If you select [Preshared Key] for [IKE Authentication Method], enter the IPsec
communication pre-shared key for [Shared Key] and [Verify Shared Key].
7. For [IKE SA Life Time], enter a value from 5 to 28800 (minutes).
8. For [IPSec SA Life Time], enter a value from 300 to 172800 (seconds).
Note
• Make sure that the time entered here is no greater than the [IKE SA Lifetime] value.
9. For [DH Group], select [G1] or [G2].
10. Selecting the [Enabled] check box for [PFS] enables the PFS feature.
11. For [Specify Destination IPv4 Address] or [Specify Destination IPv6 Address], enter
the IP address of the other party to the communication.
Note
• To communicate with all other parties using IPSec, set either [0.0.0.0/0] (for IPv4) or [;;/0] (for IPv6).
12. For [Communicate with Non-IPSec Device], select whether or not to communicate
with non-IPSec devices.

 Loading...


