A.8 Installing the Parallel Port Kit (Optional) 343
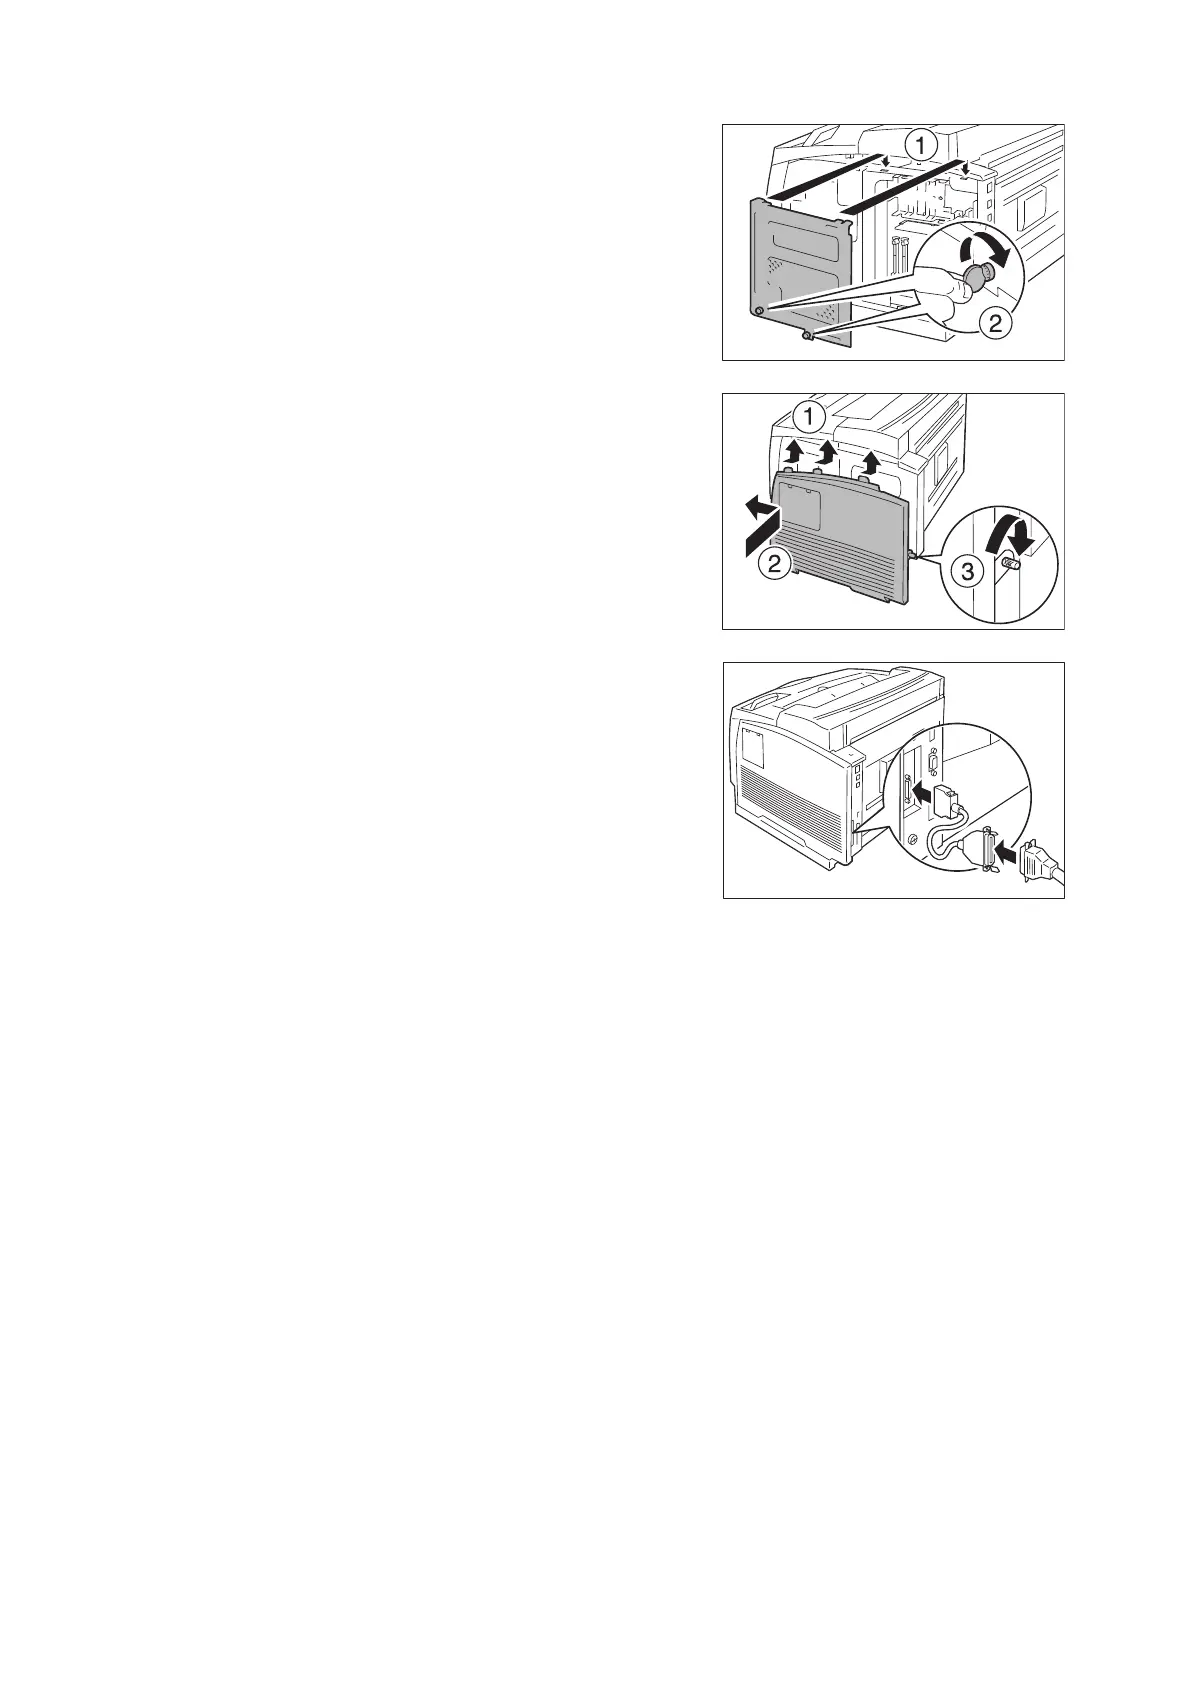
7. Insert the two tabs at the top of the internal
cover into the recess in the printer, and
close the cover. Using a coin, etc., tighten
the two screws at the bottom of the cover.
8. Close the cover by pushing it up so that the
three projections at the top of the right
cover fit into the corresponding recesses on
the printer. Tighten the screw at the rear of
the printer.
9. Connect the conversion cable to the
parallel port kit (optional) connector.
Note
• Connect the parallel cable to the other conversion
cable. For details, refer to “1.2 Connecting a cable”
(P. 29)
10. Connect the power cord. Switch on the
power of the printer by pressing the <|>
side of the power switch.
11. Print the [Configuration Report] and confirm
that [Parallel] is included in the
[Communication Settings] section.
Refer to
• List printing procedure: “Printing a Report/List” (P. 262)
This completes the parallel port kit (optional) installation.

 Loading...


