A.9 Installing the Gigabit Ethernet Board Card (Optional) 347
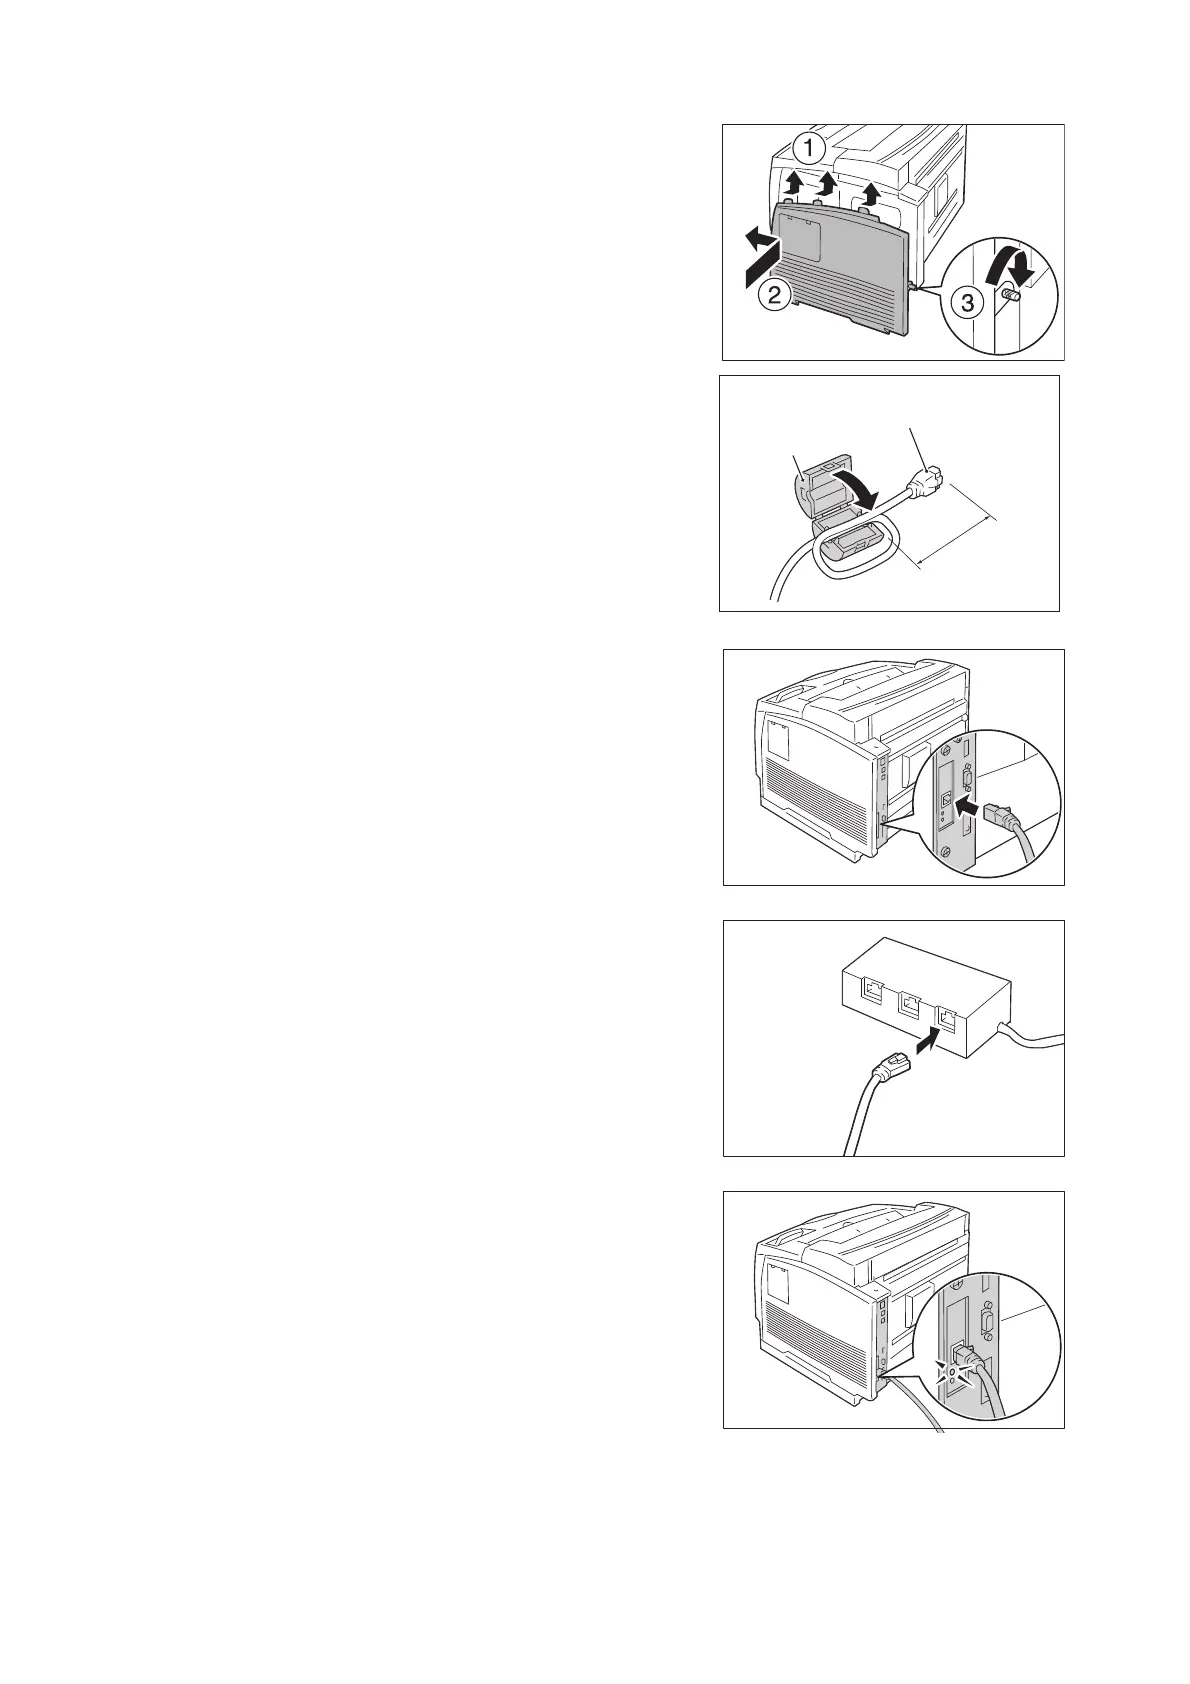
8. Close the cover by pushing it up so that the
three projections at the top of the right
cover fit into the corresponding recesses on
the printer. Tighten the screw at the rear of
the printer.
9. Wind the network cable around the
supplied ferrite core and close the ferrite
core.
Note
• Do not wind the cable to tightly or it may break.
10. Insert the network cable into the interface
connector of the Gigabit Ethernet Board
Card.
Note
• Use of a category 5 (CAT5) cable or enhanced
category 5 (CAT5e) cable is recommended for
connecting with 1000BASE-T. For details on the
cables and connection methods, refer to“1.2
Connecting a cable” (P. 29).
11. Plug the other end of the network cable into
a network device such as a hub.
12. Connect the power cord.
Switch on the power of the printer by
pressing the <|> side of the power switch.
13. Check that the green lamp lights up.
Gigabit Ethernet Board Card installation is now complete.
A connector to be
connected to the printer
Ferrite core
Approx. 7cm

 Loading...


