179
8.7 Lighting
8 Electrics/electronics
MITSUBISHI FUSO body/equipment mounting directives for FE Issue date: 20. 10. 2020
! Only print out complete sections from the current version
8.7.3 Headlamp aiming
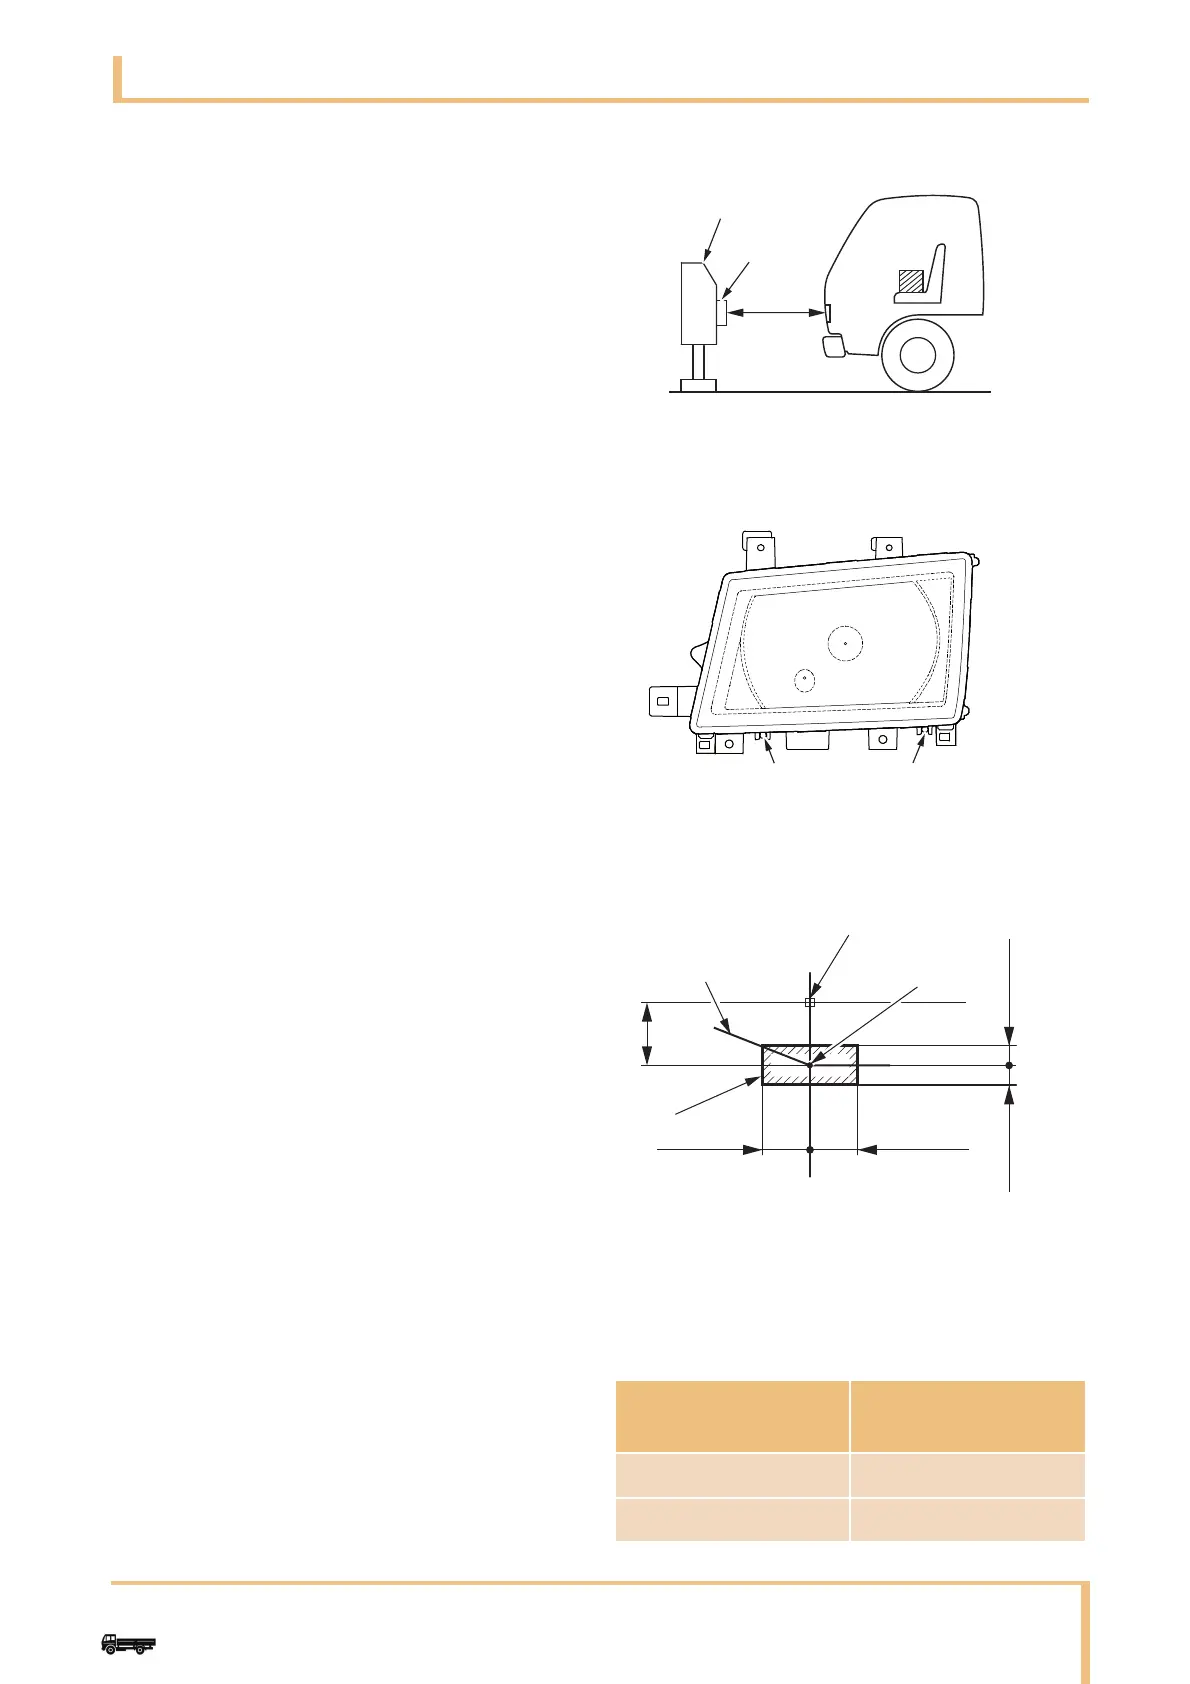
Preparation before Adjustment
• Park the vehicle on a level place.
• Be sure to put tire chocks securely in place.
• Unload the vehicle and make sure no one is in it.
• Inflate the tires to the specified pressure.
• Seat one person of an equivalent mass (75 kg) in
the vehicle.
• Start the vehicle system and check that the battery
is being charged.
• Place convergent lamp tester and the vehicle
facing each other as shown in the drawing.
• Align the center of headlamp bulb and the center of
convergent lens of convergent lamp tester.
(The drawing shows the left-hand headlamp.)
• When adjusting one headlamp, mask the other to
avoid light leakage.
Adjustment
• Do not mask a lit headlamp for more than 2
minutes or the heat generated might cause a fire.
Adjustment of dipped beam
• Turn on dipped beam.
• Make adjustment by the following procedure so
that the elbow point of dipped beam cut-off line is
in the illustrated position.
• Vertical adjustment: Adjust by turning screws A
and B in this order by the same amount.
• Horizontal adjustment: Turn screw B.
• Adjust the optical axes of the dipped beams so that
the cut-off line position can conform to the
standard value.
Initial optical axis
label
Optical axis
adjustment angle
1.0% 0.57°
1.5% 0.86°
N82.10-2818-00
(1 m)
75 kg
1
2
1Lamp tester
2Convergence lens
1
2
3
4
5
0.9 %
(
0.5°
)
0.9 %
(
0.5°
)
0.2 %
(
0.1°
)
0.2 %
(
0.1°
)
1 Cut-off line position
2 Cut-off line
3Center of lamp
4 Elbow point of cut-off line
5 Tolerance of adjustment