EasyManuals Logo

GE LOGIQ P6 Service Manual

GE LOGIQ P6
478 pages
To Next Page IconTo Next Page
To Previous Page IconTo Previous Page
Page #225 background imageLoading...
Page #225 background image
GE HEALTHCARE
DIRECTION 5245279, REVISION 3 LOGIQ™ P6/P6 PRO SERVICE MANUAL
Section 8-2 - DISASSEMBLY/RE-ASSEMBLY 8 - 5
8-2-1-2 Removal procedure (cont’d)
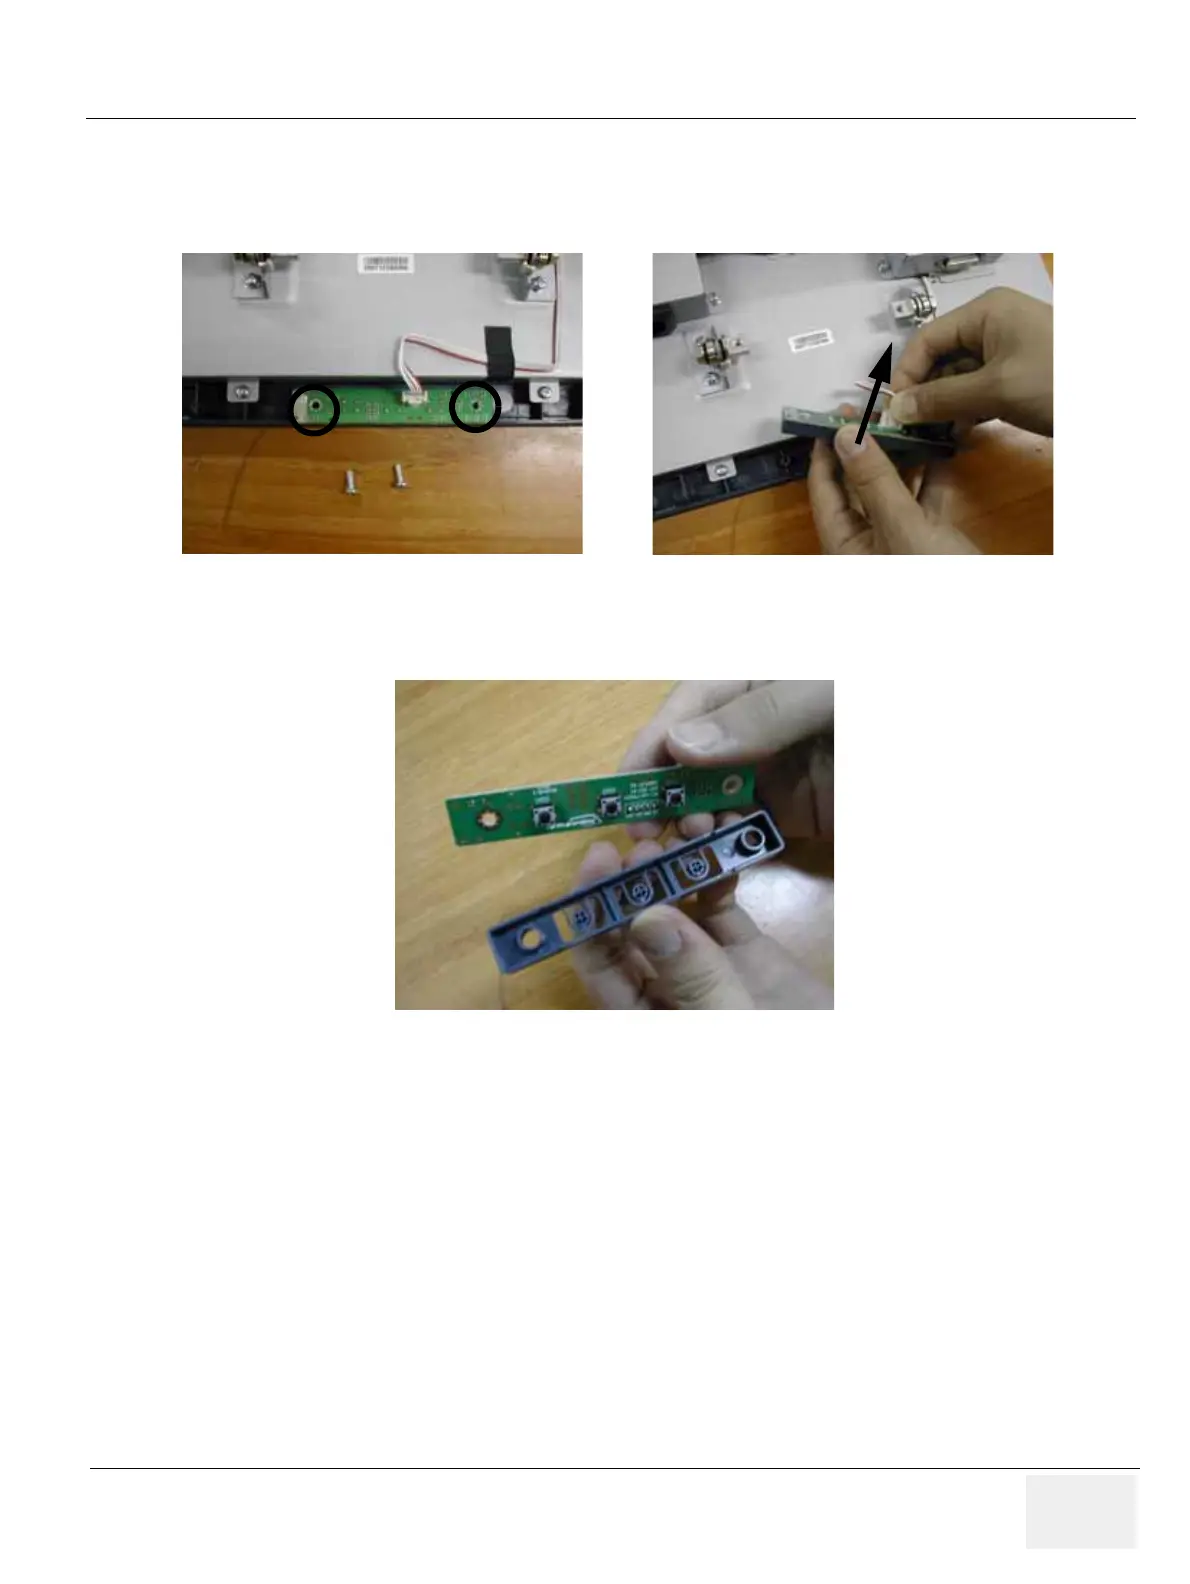
6.) Unscrew 2 screws to remove the OSD key assy and disconnect the connect. Refer to the figure
below.
7.) Separate the 17" LCD tact knob from the OSD key assy. Refer to the figure below.
Figure 8-6 Separating the OSD key assy
Figure 8-7 Separating the 17" LCD tact knob

Table of Contents

Other manuals for GE LOGIQ P6

Questions and Answers:

Question and Answer IconNeed help?

Do you have a question about the GE LOGIQ P6 and is the answer not in the manual?

GE LOGIQ P6 Specifications

General IconGeneral
BrandGE
ModelLOGIQ P6
CategoryMedical Equipment
LanguageEnglish

Related product manuals