– 20 –
Leveling the Range
WARNING:
All ranges can tip. Injury could result. Install the •
supplied Anti-Tip Bracket. See the instructions
included with the bracket.
The range must be level and be supported by •
the legs―not the wheels. The range could move
if the wheels make contact with the fl oor. Be
sure all legs make contact with the fl oor in any
installation.
Note:
All legs must be leveled after the product is •
installed.
Check to be sure the adjoining cabinets/ •
countertops are level, front to back and left to
right across the opening of the range.
Measure the distance from the fl oor to the top of •
the countertop in the left and right rear corners.
Adjust the height of the range to countertop •
height or higher.
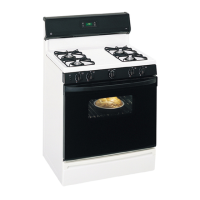
Slide leg
cylinder up.
Thumb Screw
3. Use the supplied wrench to turn the front
leveling legs. Turn clockwise to raise the range
above the wheels. Turn counterclockwise to
lower the legs.
4. Be sure to return the wrench to its storage slot
for future use.
IMPORTANT: This range should always be installed
at countertop height or higher. DO NOT INSTALL
THE RANGE LOWER THAN ADJACENT COUNTERTOP
HEIGHT. The range must be supported by all 4 legs,
regardless of countertop height.
Front leg adjustment:
Note: If toe kick is installed, pull to remove for
access to front leveling legs.
Slide front cylinders up to adjust front leveling 1.
legs. Be careful not to damage cylinder.
A leveling leg wrench is supplied. Reach under 2.
the front of the range near the right side. Locate
and remove a thumb screw, then slide wrench
out of the slot.
(Continued next page)
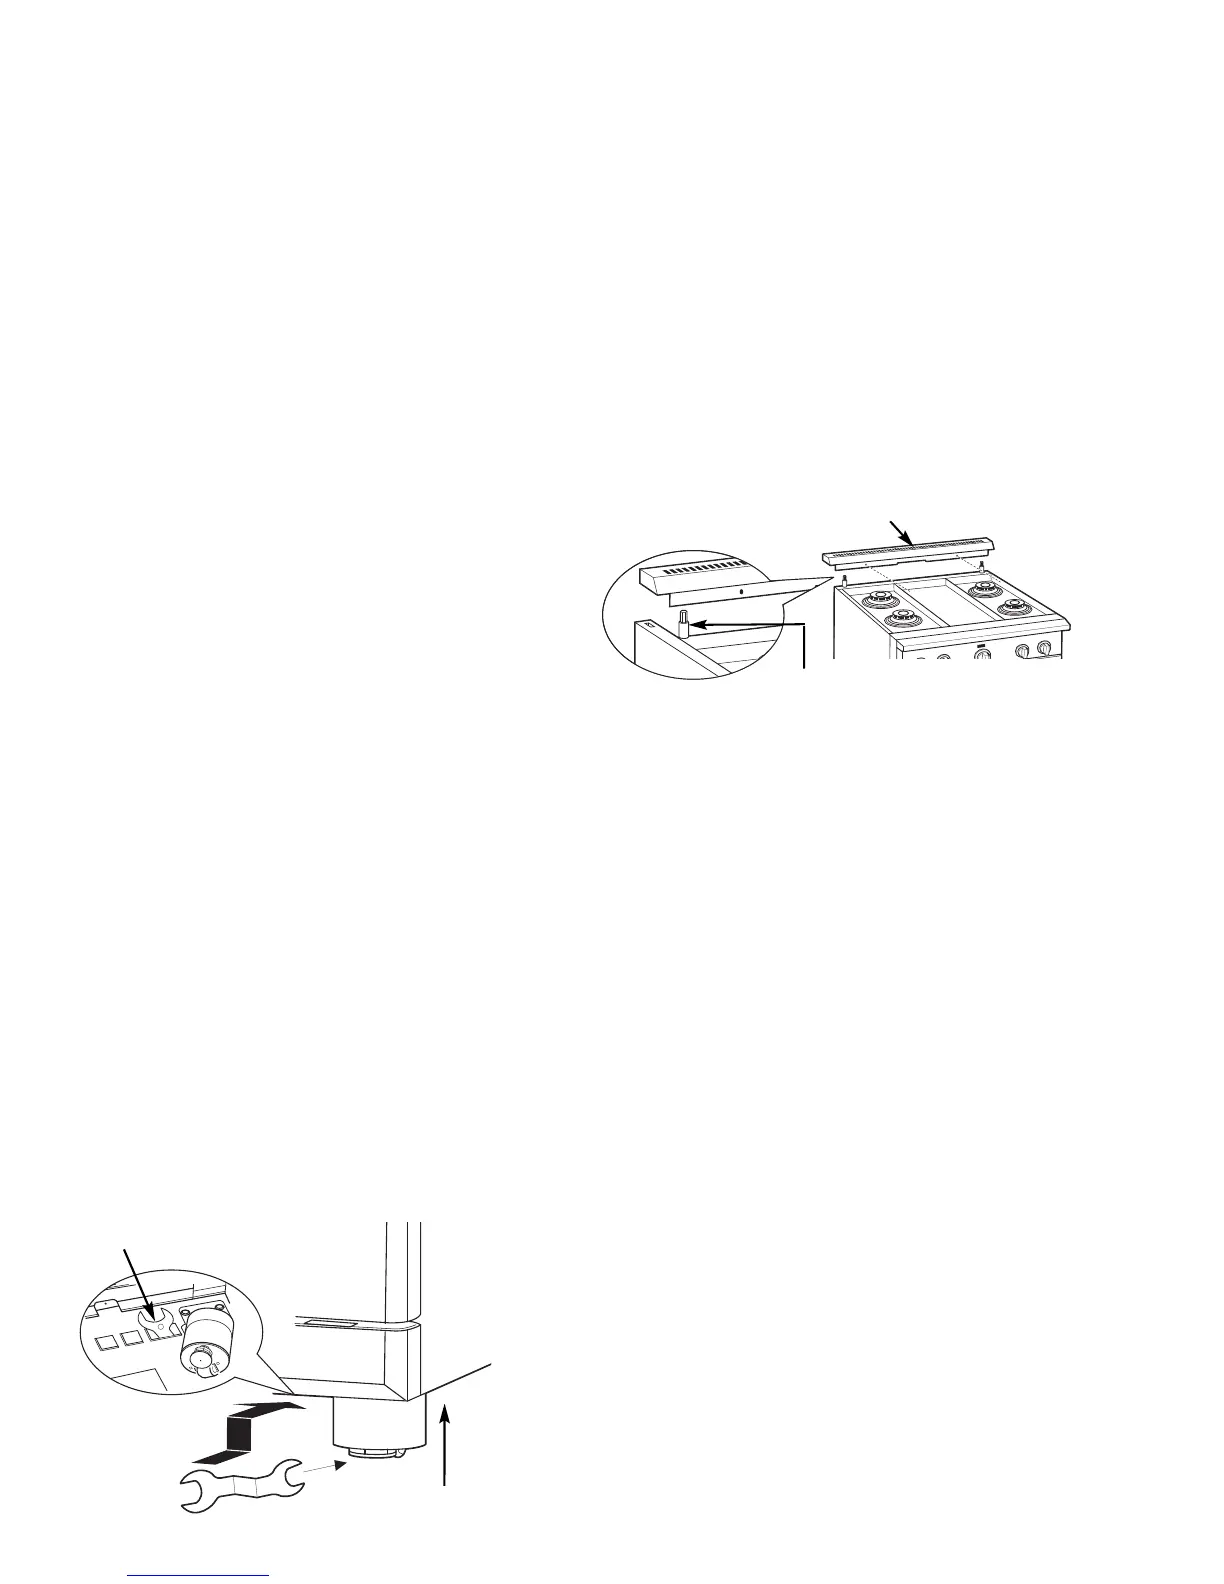
Rear Leg
Extension Rod
Rear Vent Trim
3. Replace the rear vent trim using the original
screws.
Range Toekick
A toe kick, that clips around the front leveling legs, is
supplied with each range. Customer use of the toe
kick is optional.
The toekick is installed after the range has been
leveled.
Toekick installation:
Measure the distance between the fl oor and the 1.
bottom of range.
2. Loosen the two screws on each end. Adjust the
toekick height by sliding the upper and lower
pieces apart to 1/8" less than the measured
height.
Rear leg adjustment:
Remove two screws from rear vent trim. Slide 1.
vent trim forward, then lift up to remove.
Find the two rear leg extension rods. Use a 1/4-2.
in. driver or wrench to adjust the left or right rear
legs.