– 58 –
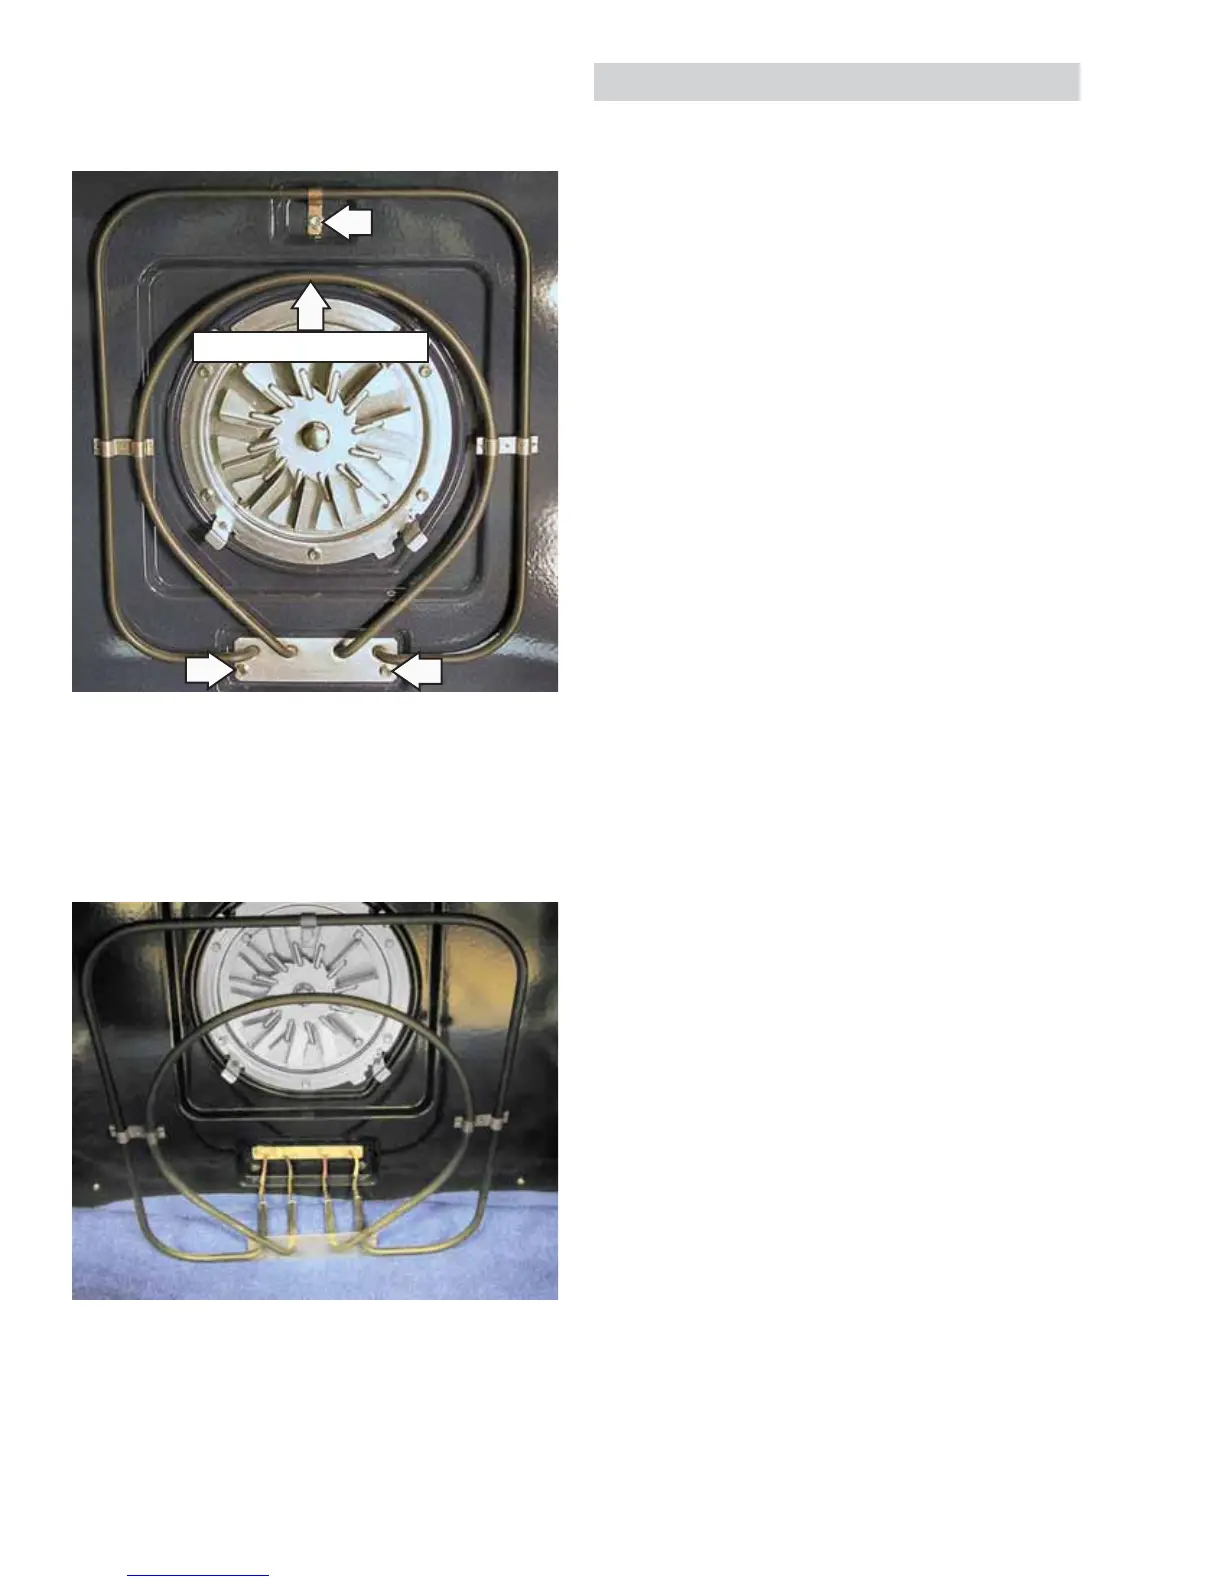
3. Remove the three 1/4-in. hex-head screws that
hold the convection bake element to the back
wall of the oven cavity.
Caution: To avoid scratching the oven fl oor, cover
the fl oor with protective surface.
4. Carefully pull the convection bake element
towards the front of the oven until the element
terminals are accessible.
IMPORTANT: The lower wattage inner element
utilizes
16
-in. terminal connections. The higher
wattage outer element utilizes 1/4-in. terminal
connections.
5. Disconnect the wires from the convection bake
element.
Convection Bake Element
Convection Fan Assembly
The convection fan assembly is located on the
back wall of the oven cavity and consists of the
fan guard, blade, insulation, and motor. The fan
motor utilizes a capacitor that can be accessed
from the recess below the oven. (See Component
Locator Views.) The convection fan assembly can be
removed from inside the oven.
The convection fan operates during the following
modes:
Preheat•
Convection Bake•
Convection Broil•
Convection Roast•
Preheat - the fan will start after a 10-second delay,
and then will always rotate CCW (no direction
changes on any model).
Convection bake and convection roast - fan
directional cycles will not start until preheat has
completed.
Convection broil - fan starts immediately without
preheat.
Convection roast - fan will always rotate CCW (no
direction changes on any model).
Convection fan cycling during convection bake:
12" cavity: cycles 15 seconds CW / 22 seconds •
off / 25 seconds CCW / 22 seconds off.
30" cavity: cycles 35 seconds CW / 20 seconds •
off / 25 seconds CCW / 20 seconds off.
36" cavity: cycles 17 seconds CW / 10 seconds •
off / 25 seconds CCW / 10 seconds off.
Convection fan cycling during convection broil:
12" cavity: cycles 38 seconds CW / 10 seconds •
off / 30 seconds CCW / 10 seconds off.
30" cavity: constant CCW.•
36" cavity: constant CCW.•
Note: The convection fan shuts off when the door is
opened.
(Continued next page)