– 25 –
Oven Operational Notes
Certain modes, when selected, will automatically
enter into a preheat. The temperature knob is used
to set the desired temperature, in 25°F increments,
from 175°F to 550°F. The oven will now begin to
preheat. The temperature display will begin at
100ºF and remain there until the oven exceeds that
temperature. From that point, the display will show
the actual temperature.
The interior lights will turn on and stay on until the
oven is turned off. The convection oven fan will turn
on temporarily during preheat. The control will beep
when the oven is preheated and food can be placed
inside the oven.
Note: A cooling fan will turn on to cool internal
parts. This is normal, and the fan may continue to
run even after the oven is turned off.
Preheat operation consists of multiple phases, •
which are time and/or temperature dependant.
Each phase of preheat utilizes combinations of
inner and outer bake, broil, and inner convection
elements. For example, one phase may use
inner convection and outer broil simultaneously.
Another phase may use inner broil and outer
bake simultaneously.
At the start of Preheat, the convection fan •
will delay running for 10 seconds. It will then
run CCW with no directional changes for the
remainder of Preheat.
Preheat Chart
Mode Preheat
Proof No
Bake Yes
Convection Bake Yes
Convection Roast Yes
Convection Broil No
Std Broil No
Clean No
Sabbath Mode No
Probe Usage Yes
ADJUST BURNER FLAMES
Normally, burners do not need further adjustment.
Make adjustments only when necessary.
A. Turn on the gas. Plug in electrical cord.
B. Turn all burners on highest setting and check
the flames. They should be blue in color. When
using LP gas, the flames may have some yellow
tipping at the ends of the flame. Foreign particles
in the gas line may cause an orange flame at first,
but this will soon disappear.
C. Turn the burner knob to “LO” while observing the
flame.
Adjust the setting of the upper row of flames using
the valve bypass screw as follows:
Adjustments must be made with two other burners
in operation on a medium setting. This prevents
the upper row of flames from being set too low,
resulting in the flame being extinguished when
other burners are turned on.
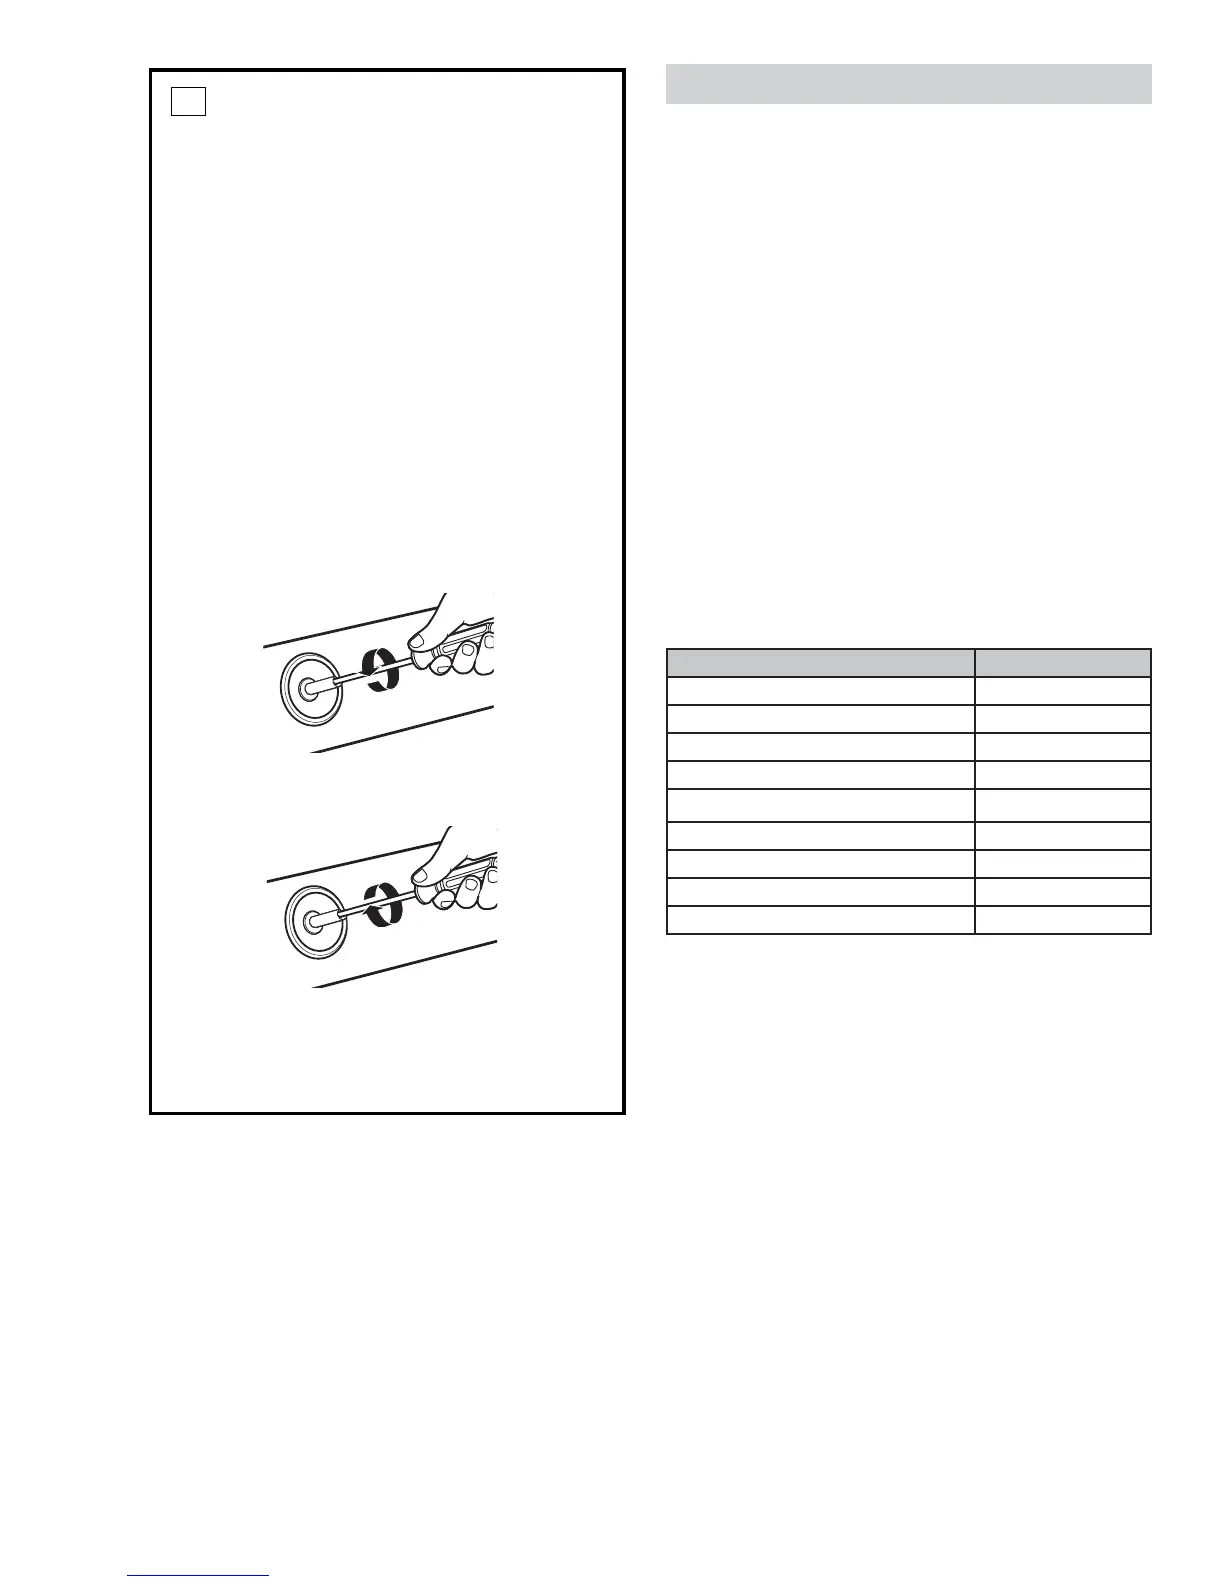
D. To adjust the flame, remove the knobs. Insert a small
flat-blade screwdriver into the hole in the center
of the valve stem to engage screw.
• If the flames are too small or flutter,
turn the screw counterclockwise.
• If the flames are too large, turn the screw
clockwise.
E. Make the adjustment by slowly turning the screw
until flame appearance is correct.
6
Note: Once the conversion is complete and checked,
fi ll out the conversion label and affi x the label near
the rating label. For ranges, place the label beneath
the control panel. For rangetops, place the label on
the bottom of the unit.