– 54 –
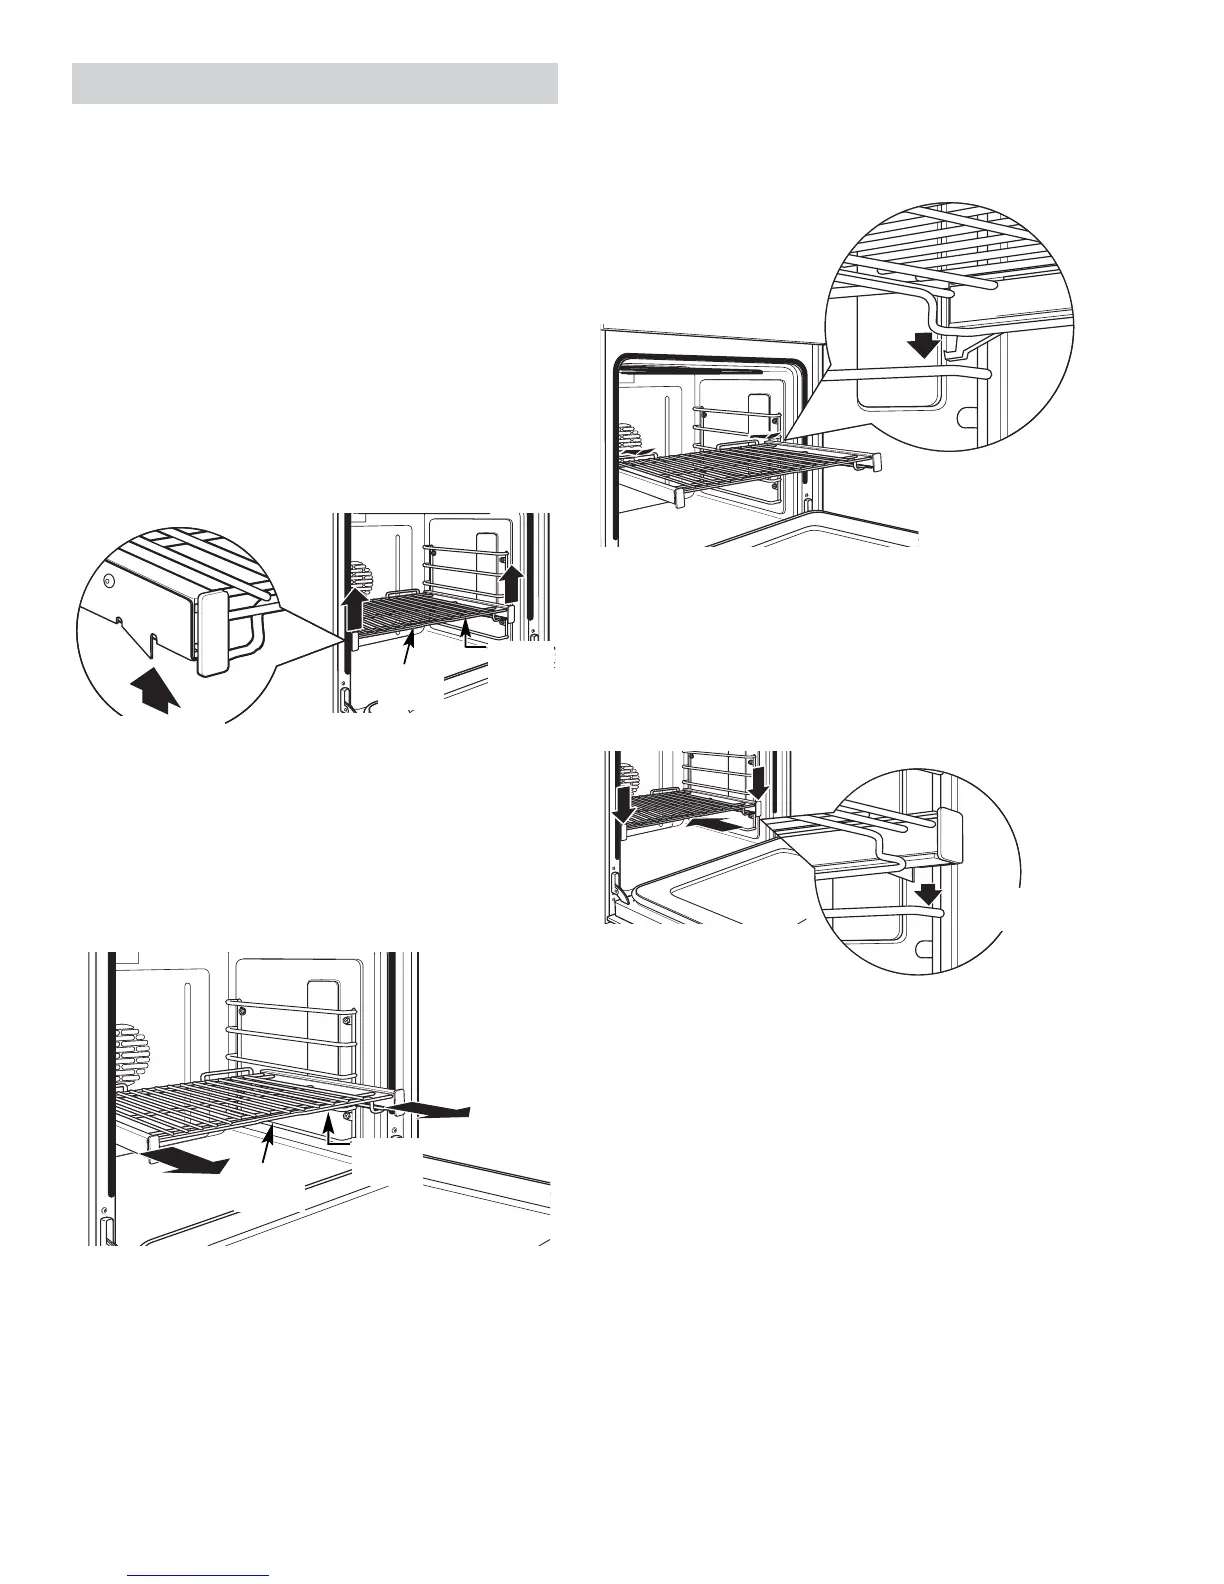
Oven Racks
WARNING: To avoid possible burns, remove or install
the racks before turning on the oven.
To remove a rack:
1. Make sure the rack is pushed all the way into
the oven.
2. Grasp the rack by both its upper front rail and its
lower front rail and lift straight up to unlock the
front rack locks from the rack supports.
3. Firmly holding onto both the upper and lower
front rack rails, pull the rack forward and
remove it from the oven.
To install a rack:
1. Place the rear rack locks over and onto the
rack supports. (Five rack positions are available,
including the top position.)
2. Slide the rack all the way in until the rear rack
locks are secure on the rear rack supports, and
press the front rack locks onto the front rack
supports.
3. Pull the rack all the way out to check that it is
properly engaged.
Lift to unlock front
rack locks from
the rack support
Upper
front rail
Lower
front rail
Front rack lock
Upper
front rail
Lower
front rail
Slide the rack all the way in
and push down to lock the
front rack locks onto the
front rack supports
Front rack
lock
Care and Cleaning
Note:
The racks may remain in the oven during the •
self-cleaning cycle without being damaged.
Periodically, after several self-clean cycles, the •
oven racks may need to be lubricated using the
graphite lubrication shipped with the wall oven.
To order additional graphite lubrication, call
our National Parts Center at 800.626.2002 and
reference WB02T10303.
Lubricating an oven rack:
Remove rack from the oven. 1.
(Continued next page)