344
(X) B pillar inside trim
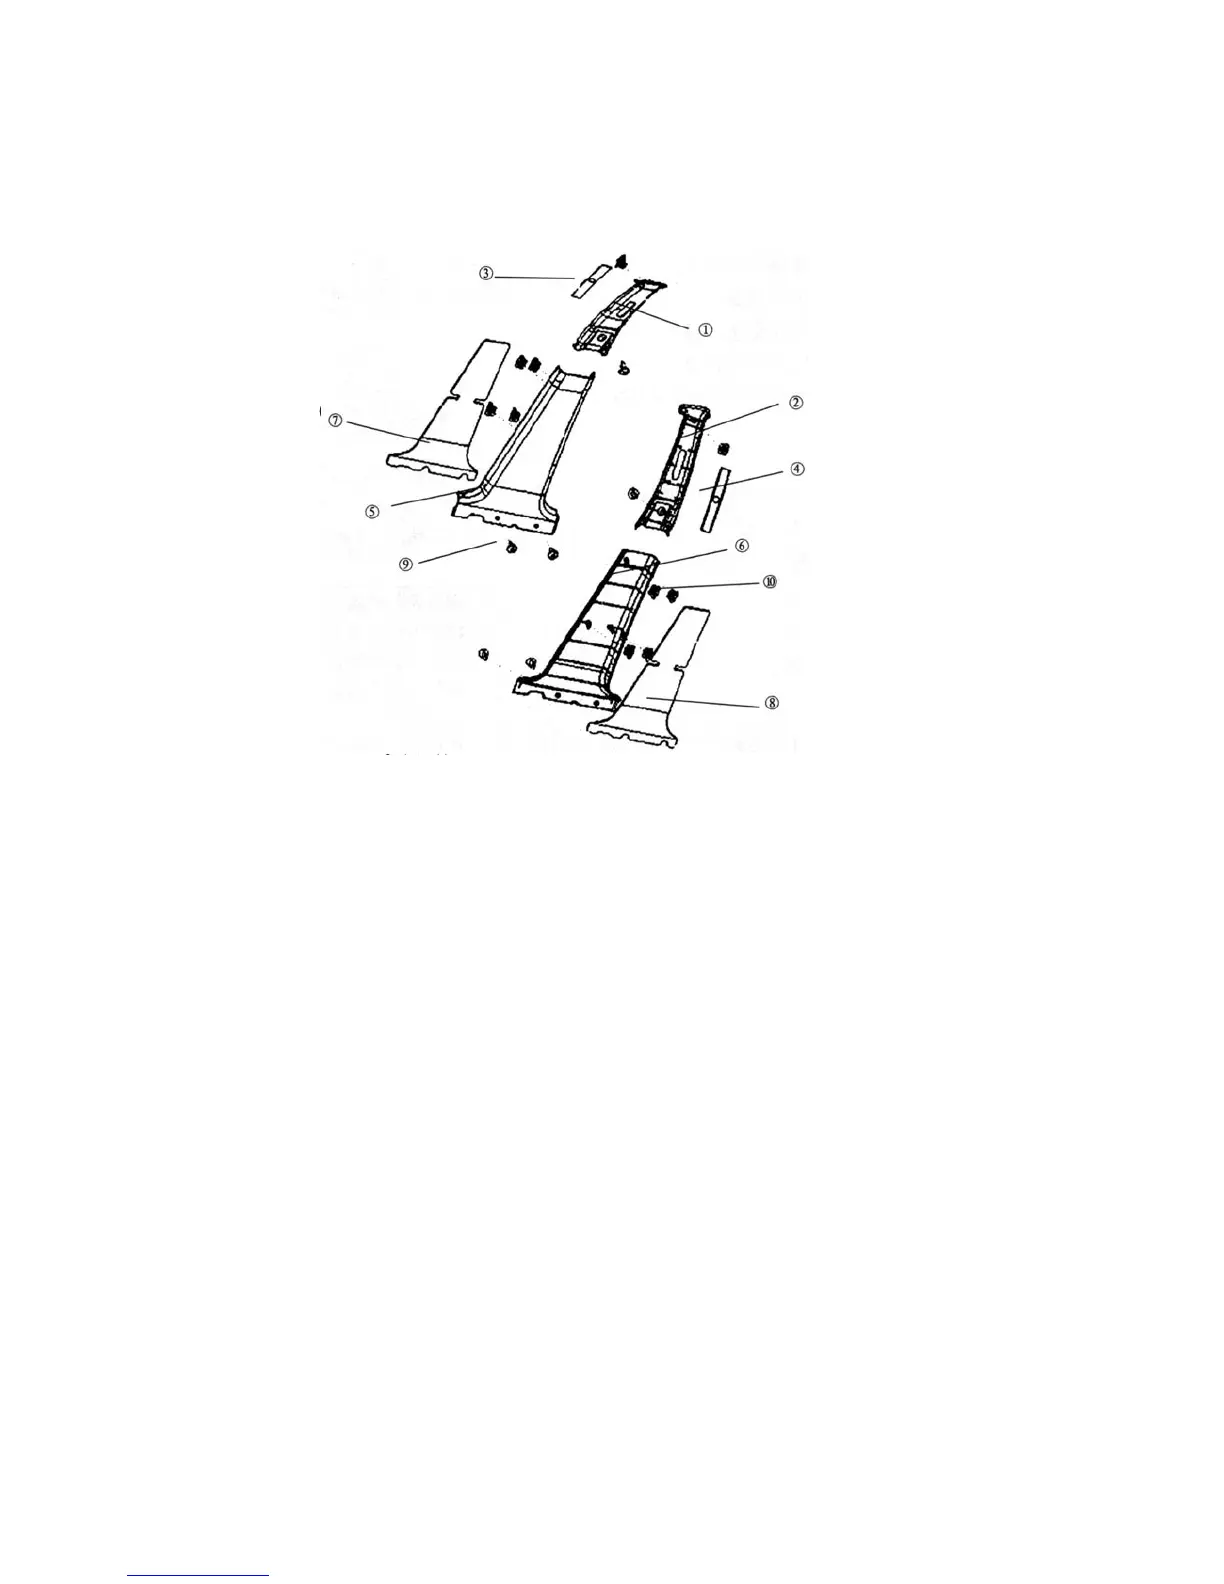
B pillar inside trim diagram:
B Pillar Inside Trim Diagram
1. Right B Pillar Upper Inside Trim 2. Left B Pillar Upper Inside Trim 3. Right Deflector
4. Left Deflector 5. Right B Pillar Lower Inside Trim 6. Left B Pillar Lower Inside Trim
7. Right B Pillar Lower Inside Trim Sound Insulator 8. Left B Pillar Lower Inside Trim Sound Insulator
9. Cross Pan Head Tapping Screw 10. Steel Clip
1.Removal
1 Remove the installed left B pillar lower inside trim, right B pillar lower inside trim tapping screw with a
cross screwdriver;
2 Remove the left B pillar lower inside trim, right B pillar lower inside trim with a opener ;
3 Remove the seat belt swing ring;
4 Remove the right B pillar upper inside trim, leftB pillar upper inside trim tapping screw with the cross
screwdriver;
5 Remove the right B pillar upper inside trim, leftB pillar upper inside trim with a opener.
2.Installation
1 Clip B pillar inside trim to the corresponding position with clip and steel clip in order;
2 Fix the upper inside trim and lower inside trim to the vehicle body with a tapping screw.
2
4
5
3
1
6
10
8
7
9