346
(XII) Roof inside trim
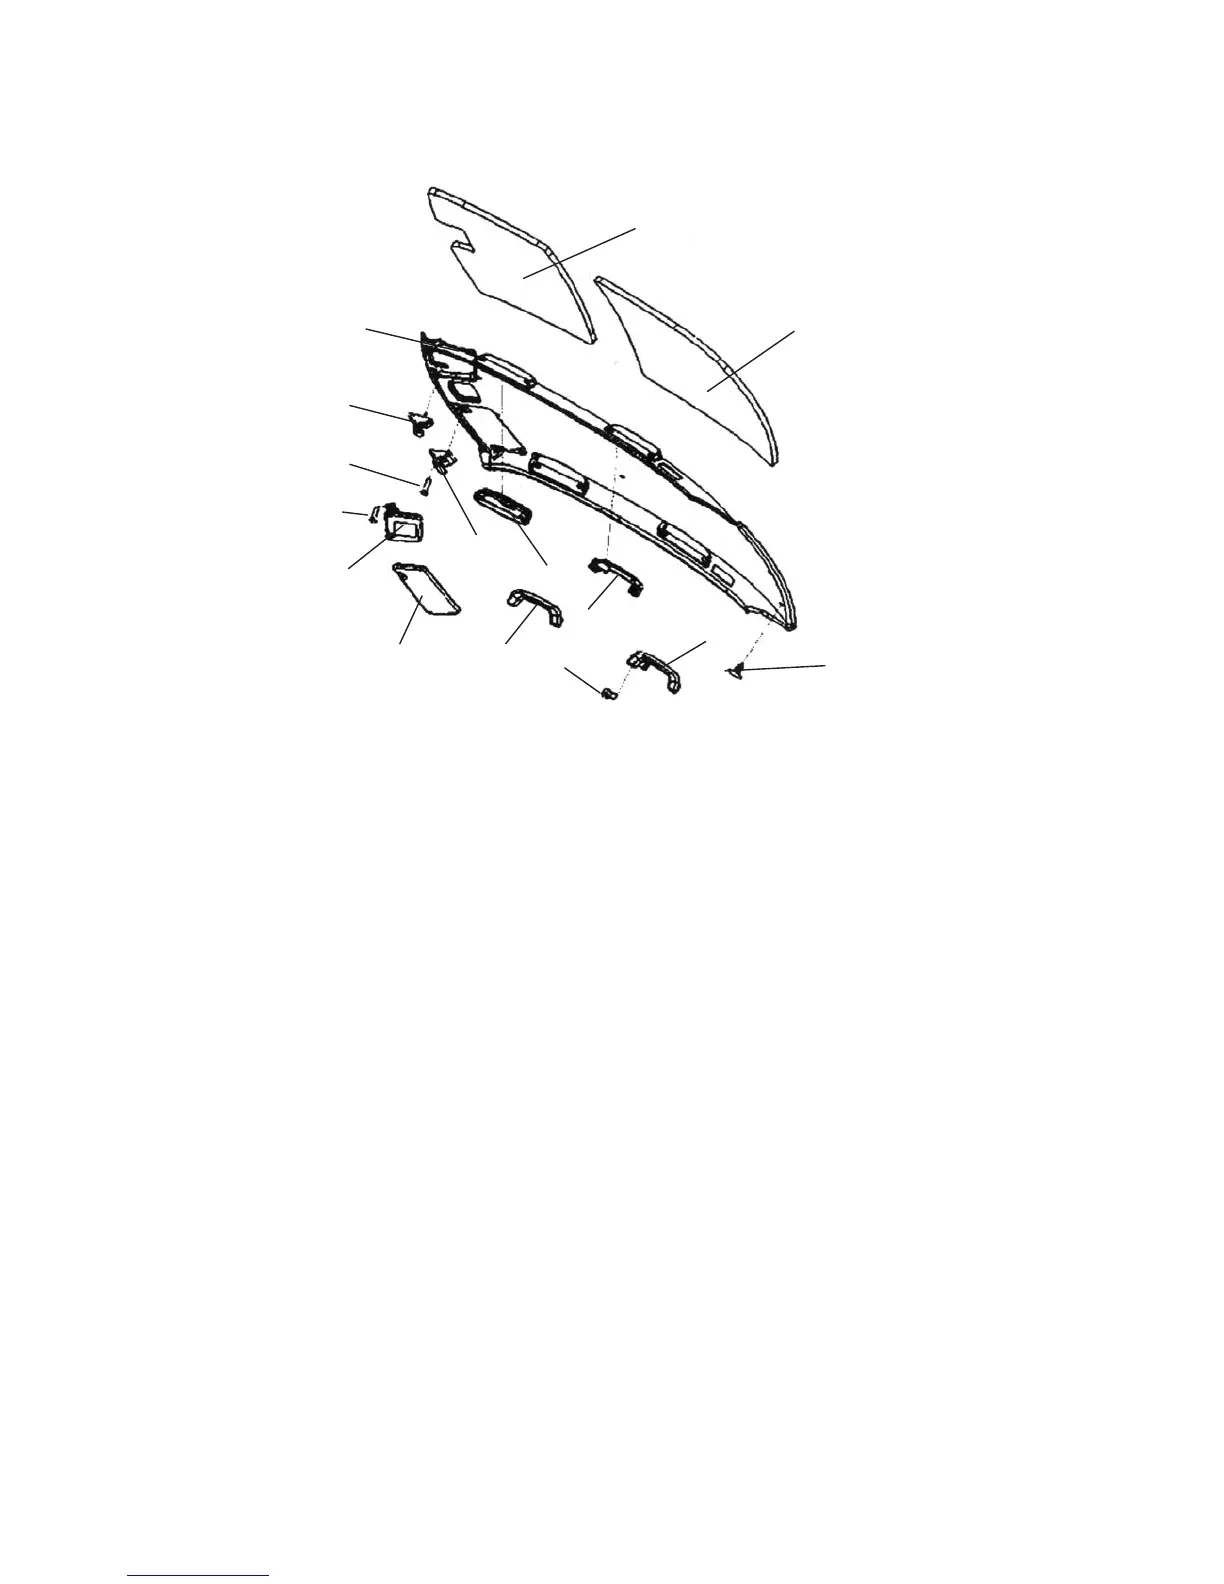
Roof Inside Trim Diagram:
Roof inside trim diagram
1. Roof Inside Trim 2. Left Sun Visor Bracket 3. Right Sun Visor Bracket 4. Cross Semi-
Countersunk Screw 5. Left Sun Visor Assembly 6. Right Sun Visor Assembly 7 . Cross
Counter Sunk Tapping Screw 8. Glass Box Assembly 9. Right Front Handle Assembly
10. Left
Rear Handle Assembly
11. Right Rear Handle Assembly 12. E-Clip 13. Roof Rear Heat Insulator
14. Roof Front Heat Insulator 15. Cross Slot Head Screw
1. Removal
1 Remove the safe handle, map lamp, left/right A pillar inside trim, left/right B pillar upper inside trim, left/
right C pillar upper inside trim;
2 Remove the screw used to install left/right sun visor assembly with a cross screwdriver. Remove the left/
right sun visor assembly
3 Remove the plastic clip used to install roof inside trimassembly with opener. Remove the lower dome
lamp connector and roof inside trimassembly.
2. Installation
1 Install the dome lamp connector into the corresponding hole and clip the plastic clip onto the corresponding
hole in the vehicle body. Fix the roof inside trimassembly;
2 Install the safe handle to the corresponding position on the trim board on the right front pillar with a
tapping screw and clip the safe handle cover;
3 Install the left, right sun visor onto the roof inside trimassembly with a tapping screw and fix it to the
corresponding hole on the vehicle body;
4 Install left/right A pillar inside trim, left/right B pillar upper inside trim, left/right C pillar upper inside trim.
2
 Loading...