Replacing a Check Valve
A check valve can be replaced without dismounting the head; however, the pump must first be
powered off and the hydraulic tubing must be disconnected from the pump head.
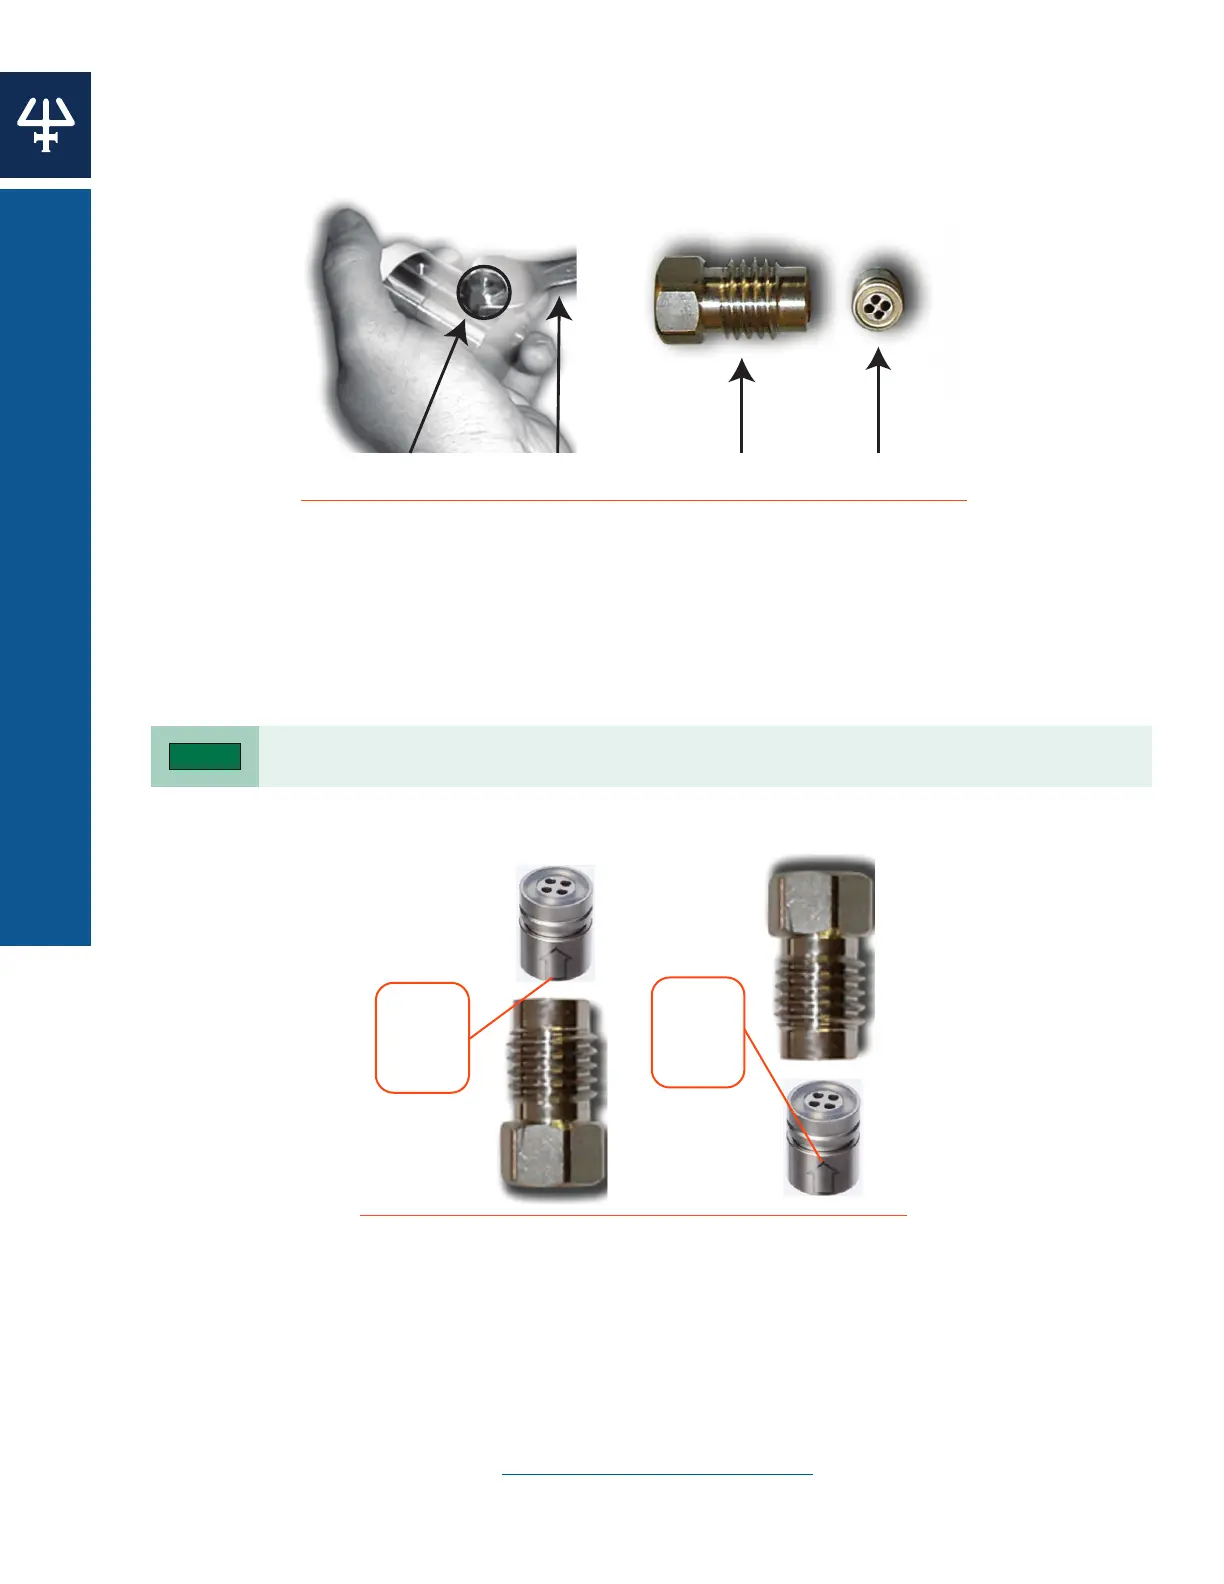
Connector Check ValveArrow Follows Flow Path14 mm WrenchConnector
Figure 52
Check Valve Components
1. Loosen the connector with a 14 mm wrench, and then unscrew completely by hand.
2. Remove the check valve from the connector.
3. Make sure that the connector and pump head housing are clean.
4. Slide a new check valve into the connector.
The arrow on the cartridge must point in direction of solvent flow.
Figure 53
Inlet Check Valve (Left) and Outlet Check Valve (Right)
Arrow
follows
flow
path
Arrow
follows
flow
path
5. Screw the connector into the pump head housing.
6. Carefully tighten the connector using a torque wrench set to 7Nm. Or, turn the connector
using the 14 mm wrench until there is contact, then tighten the connector by turning it
a further 30° in the clockwise direction. If leakage is observed, tighten the connector
progressively until the leakage stops.
7. Run the pump and perform the Leak Test Procedure on page 52.
50
MAINTENANCE | 333/334 HPLC PUMPS
CHECK VALVES