34
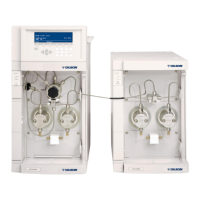
OPERATION | 333/334 HPLC PUMPS
FRONT PANEL AND STARTUP
Front Panel and Startup
The pump has two ON/OFF switches: one on the power receptacle on the rear panel and the
other on the front panel above the LEDs.
Powering the Pumps On
1. Press the switch on the power receptacle to the ‘I’ position; the ‘Power’ LED (green) on the
front panel should light up; if it does not, check the fuses and power connections.
2. Open the pressure, purge, and mixing module (PPMM) valve by turning the knob on the
PPMM fully counterclockwise to direct any flow to the purge outlet.
3. Press the ON/OFF button on the front panel; the ON
indicator light should illuminate on the front panel
and the display on the 333 Pump control panel should
activate.
STARTUP SCREENS
After switching on a 333 Pump, the display briefly shows
the Initialization screen, which displays the current
software version. After a few seconds the Startup screen
will appear.
Priming
Priming helps prevent the introduction of air bubbles into
the system. It is recommended to prime the pump before
using it for the first time, or if it has not been used for
some time.
This is an essential step, which must be carried out before operating the pumps.
Operating the pumps dry, even for a short time, can damage the equipment. Use a syringe to
prime the pump if the pump does not self-prime within two minutes.
Ensure that all plumbing connections have been made as described in INSTALLATION.
Priming the Pump
1. Fill the solvent bottle(s) with degassed, high performance liquid chromatography (HPLC)
grade solvent(s) and immerse the filter connected to the inlet tubing for each pump into
the solvent.
2. Open the purge valve on the PPMM by turning the black knob fully counterclockwise to
direct the flow to the atmospheric purge-outlet. Make sure the purge line is connected to
the purge valve and directed to an appropriate waste receptacle.
3. Use the controlling software to run the pump at the maximum flow rate for the pump
head. If self priming is achieved, skip to step 9. If the pump does not self-prime within two
minutes, stop the pump and continue with manual priming.
4. Disconnect the waste tubing from the purge valve on the PPMM and then connect a syringe.
5. Draw liquid into the syringe. It is likely that it will first draw air, but then liquid droplets
should start to appear.
!
POWER
ON
ERROR
P
R
ON/OFF
!
POWER
ON
REMOTE
ON/OFF
Figure 26
Front Panels with All LEDs Activated