GKB 4CH/8CH VFire Server
100
characters to get the matched DVR/NVRs. Click on one of them to select a new
DVR/NVR. The 1/4/9/16 split-window video display, the camera status, and the
alarm input/output will all switch to correspond to the newly selected DVR/NVR.
There’s “Multiple” in the device list, the user can select it to display camera video
from different DVR/NVRs in 4/9/16 split window display.
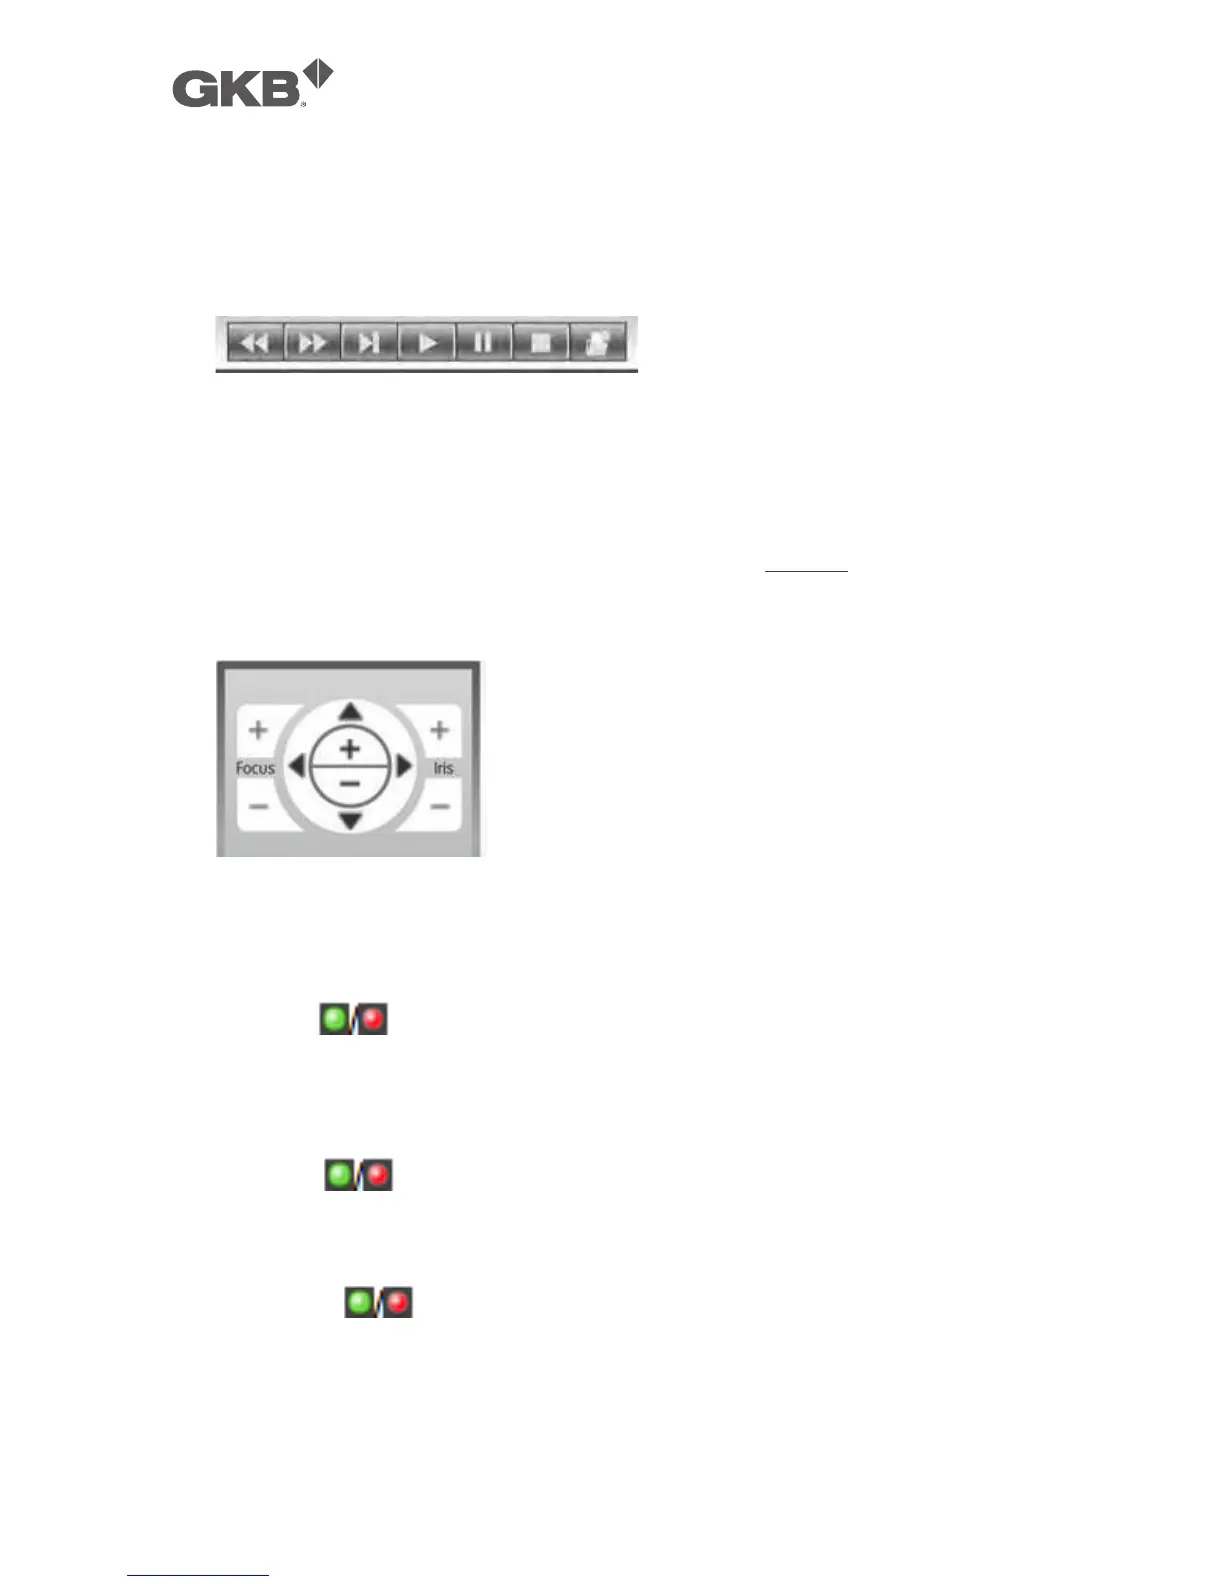
Playback panel for playback buttons, including Fast Backward, Fast Forward,
Single Step, Play, Pause, Stop, and Copy (from left to right). Please note that the
Copy function can be used to archive both live and playback streams. Please
check/uncheck the cameras to be archived when the Copy Dialog is shown, and
then click on OK or Apply button. If the user click on Apply button and select &
highlight one of the cameras, the current copying status for that camera will be
shown in the dialog. For “SelfPlayer” (described in Sec. 8.6) to work correctly,
please copy the file “vcredist_x86.exe” in the CD to Windows directory such as
“/WINDOWS” or “WINNT”.
PTZ control panel. If the camera in the focus window is a PTZ camera, these
buttons in the PTZ control panel can be used for PTZ control. The operations
include Tilt Up/Down, Pan Left/Right, Zoom In/Out, Focus Near, Focus Far, Iris –
(darker), Iris + (brighter).
Camera
Status indicators for cameras 1-8/4 (GREEN for normal, RED for motion) for the
selected DVR/NVR. Click on any of these icons to select the corresponding
camera of the selected DVR/NVR to be displayed in the focus window.
Alarm In
Status indicators for alarm inputs 1-4 (GREEN for normal, RED for alarm) for the
selected DVR/NVR.
Alarm Out
Alarm outputs 1-2 (GREEN for normal state, RED for triggered state) for the selected
DVR/NVR. For Administrator, click on any of these icons to control the
corresponding alarm output from normal to triggered, or from triggered back to
normal.