Model G0750G (Mfg. Since 11/12)
-75-
After initial break in, the V-belts slightly stretch
and seat into the pulley. It is important to check
and adjust them to compensate for this initial
wear. Check the tension thereafter on a monthly
basis. If the belts become excessively worn or
damaged, replace them as a matched set.
Tools Needed Qty
Hex Wrench 17mm ............................................ 1
Tensioning V-Belts
1. DISCONNECT LATHE FROM POWER!
2. Remove the end gear cover.
3. Loosen the motor mount hex bolts (see
Figure 128).
Note: It may be more convenient to access
the motor mount hex nuts if you first remove
the rear splash guard.
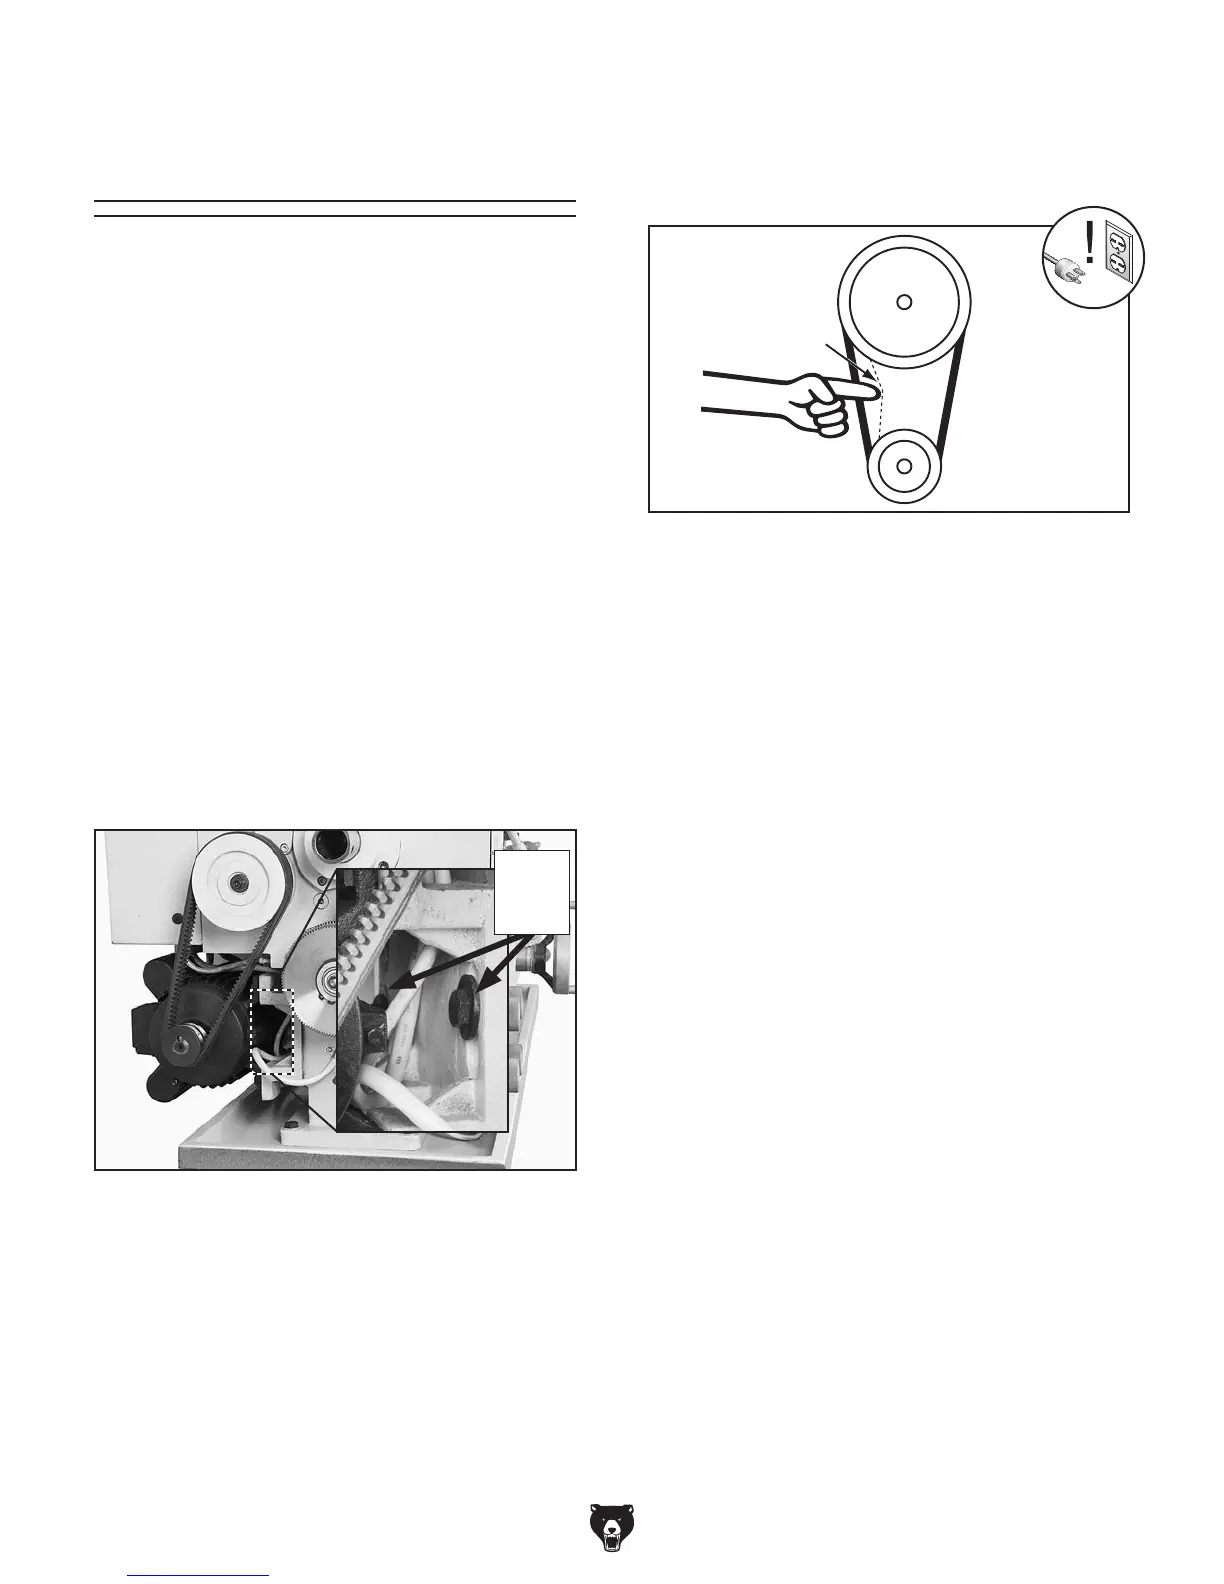
Figure 128. Checking V-belt deflection.
V-Belt Tension &
Replacement
4. Push down on the motor and re-tighten the
mounting hex bolts.
—If there is more than
1
⁄4" deflection when
each belt is pushed with moderate pres-
sure, loosen the motor mount bolts, lower
the motor, adjust belt tension as required,
then tighten the bolts.
6. Secure the end gear cover.
Pulley
Deflection
Pulley
Figure 129. Correct timing-belt deflection.
1
⁄4"
Replacing V-Belts
1. DISCONNECT LATHE FROM POWER!
2. Remove the end gear cover.
3. Loosen the motor mount bolts (see Figure
128), slide the motor up, and remove the
V-belts.
Note: It may be more convenient to access
the motor mount bolts if you first remove the
rear splash guard.
4. Install the new V-belts as a matched set so
they equally share the load.
5. Tension the belts. (Refer to Tensioning
V-Belts on this page.)
6. Secure the end gear cover.
Motor
Mount
Bolts
5. Check the belt tension: Each belt is correctly
tensioned when there is approximately
1
⁄4"
deflection when it is pushed with moderate
pressure, as shown in Figure 129.

 Loading...