-80-
Model G0776 (Mfd. Since 7/14)
Adjusting Half Nut
The half-nut mechanism can be adjusted if it
becomes loose from wear. The half nut is mount-
ed in ways with a gib exerting pressure between
components to reduce sloppy movement. The
half-nut gib is a flat bar-type gib, similar to the sad-
dle gib, and is tensioned with three set screws.
Tools Needed Qty
Hex Wrenches 3, 5mm .............................1 Each
Open-End Wrench 10mm .................................. 1
To adjust half nut:
1. DISCONNECT LATHE FROM POWER!
2. Open half nut and remove thread dial.
3. Loosen hex nuts on set screws shown in
Figure 135.
Figure 135. Typical half nut gib set screws.
Set
Screws
Half Nut
4. Tighten each set screw approximately
1
⁄8 of a
turn, then retighten hex nuts without moving
set screws.
5. Move carriage handwheel until half nut can
fully close, then open/close half nut several
times and notice how it feels. The half nut is
correctly adjusted when you feel a slight drag
while opening and closing it. It should not feel
too stiff or too loose.
6. Repeat Steps 3–5, if necessary, until you
are satisfied with half nut adjustment, then
re-install thread dial.
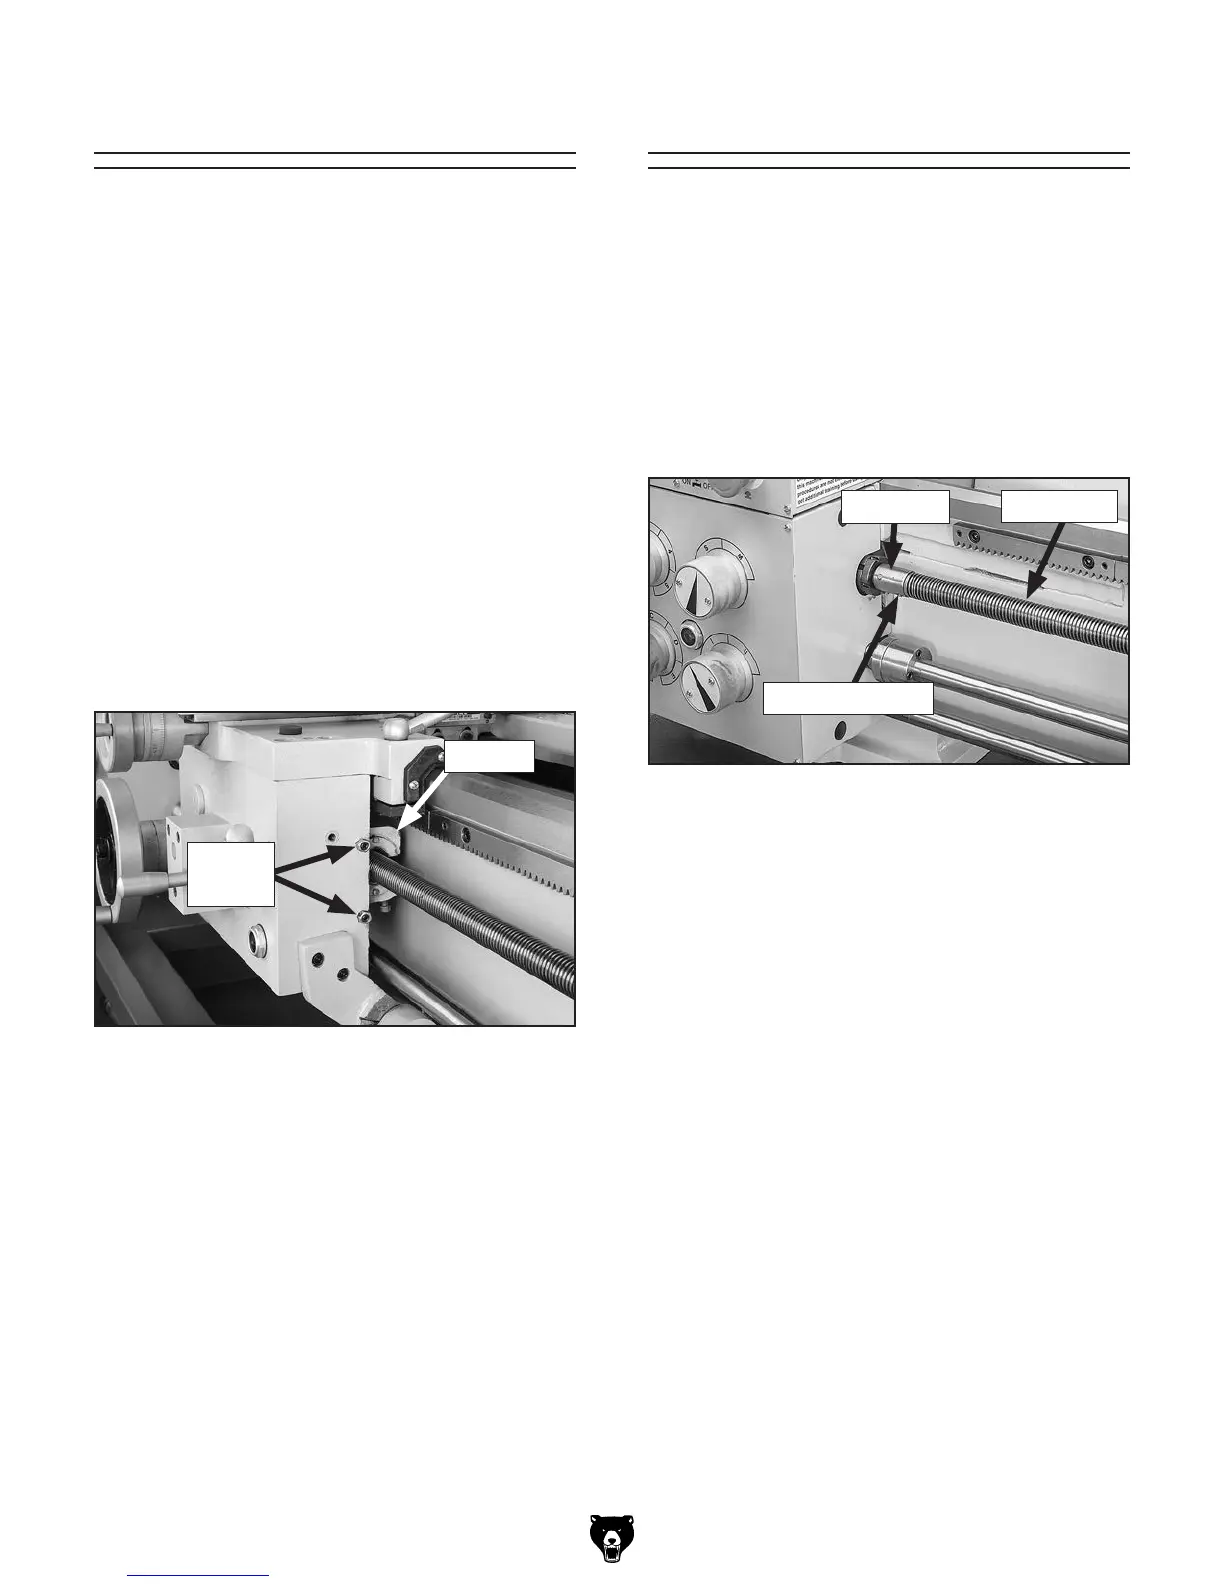
Replacing Shear Pin
A straight 4 x 25mm brass shear pin (Figure 136)
holds the leadscrew and the drive hub together.
The pin is designed to break and disengage the
power transfer to the leadscrew to help protect
more expensive lathe components in the case of
a carriage crash or the lathe is overloaded.
Contact Grizzly Customer Service at (570) 546-
9663 to order a replacement shear pin (Part
P07761102).
Figure 136. Location of leadscrew shear pin.
Drive Hub
Leadscrew
Brass Shear Pin
Tools Needed Qty
Hammer ............................................................. 1
Dowel Punch
3
⁄16" ............................................... 1
Drill Bit
1
⁄8" ......................................................... 1
Hand Drill .......................................................... 1
Wood Screw #8 x 1" (or longer) ........................ 1
Pointed Center Punch ....................................... 1
Standard Pliers .................................................. 1
To replace shear pin:
1. DISCONNECT LATHE FROM POWER!
2. Unlock half-nut lever and disengage gearbox
so leadscrew can be rotated by hand.
3. Rotate drive hub, and inspect it to see if pin is
still stuck in both sides of it.