Operating Manual
27
POWER CLAMP
English
Quality Wins.
© 2021/09 Haimer POWER CLAMP
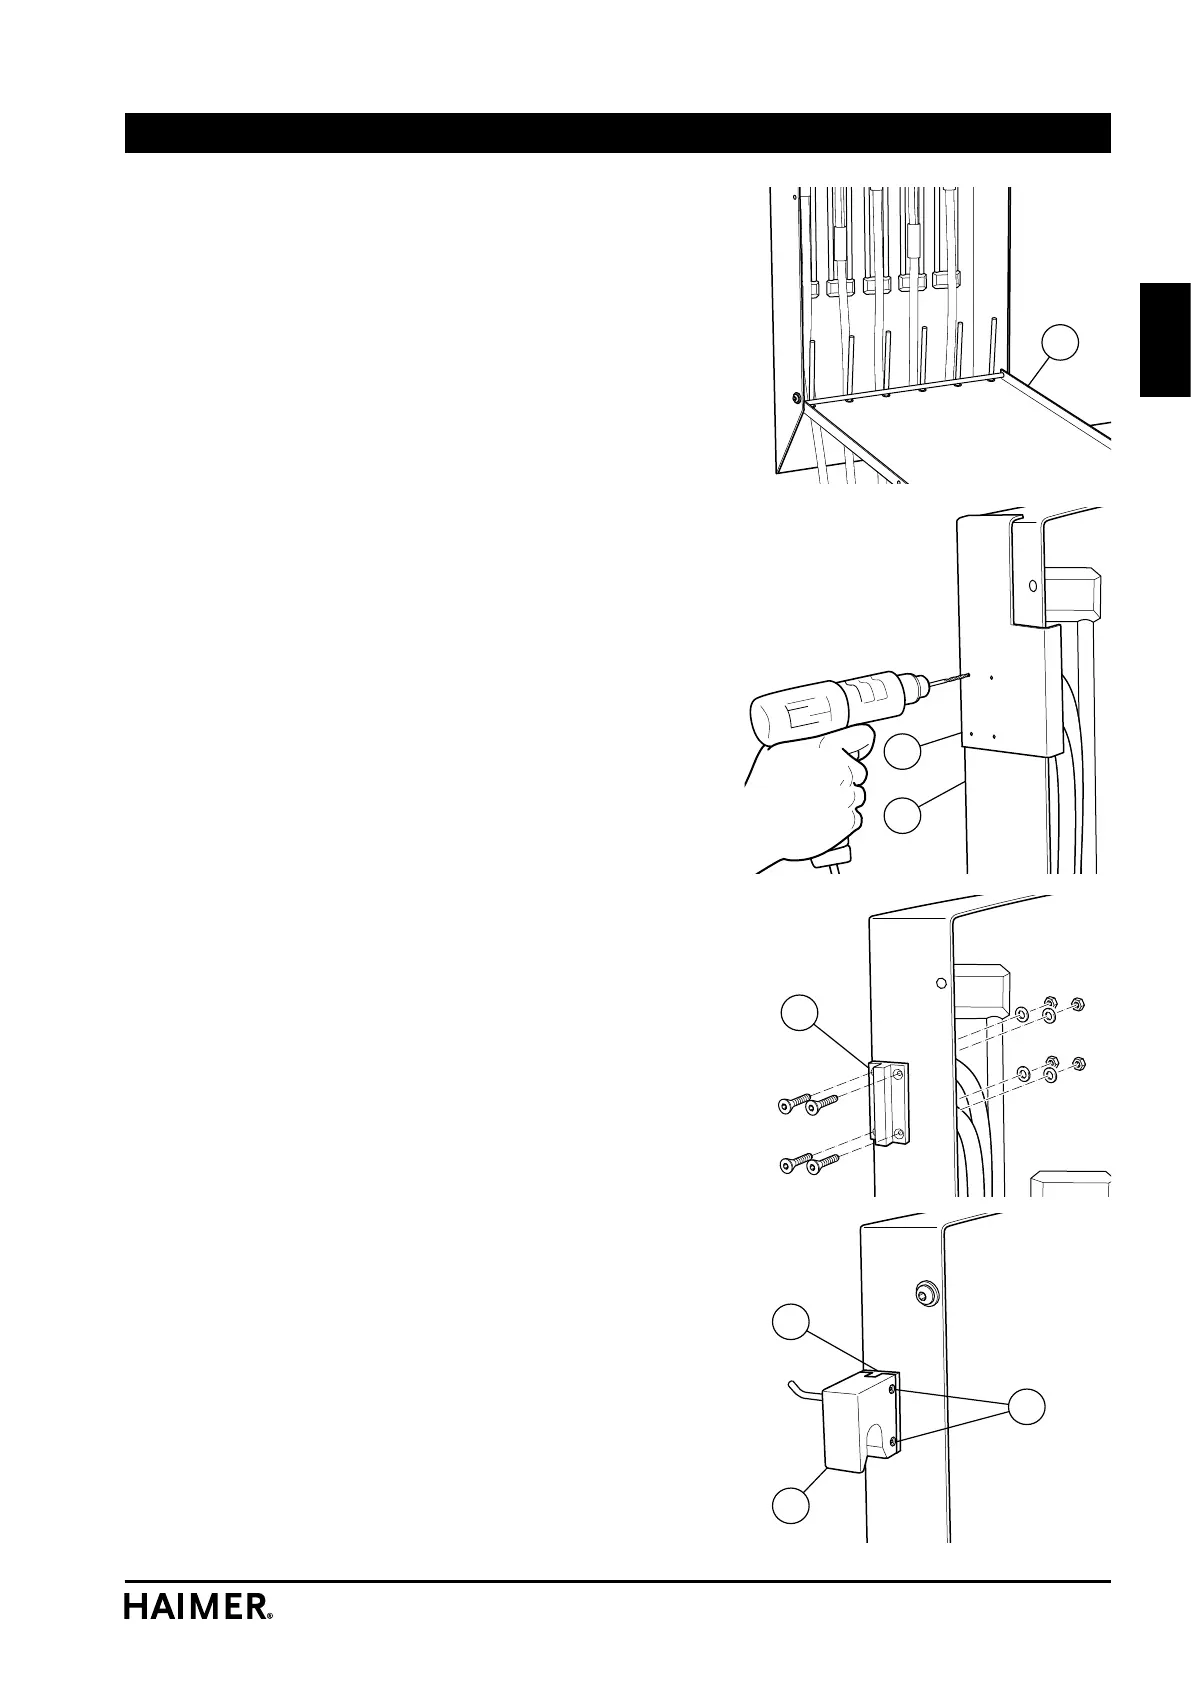
• Tilt the rear panel (70) downwards.
In order to mount the mounting bracket to the hose cabinet,
four mounting holes need to be drilled.
• Place the drilling jig (73) on the hose cabinet (74) as
shown. Countersink each of the four positions with Ø
2.5 mm.
• Remove the drilling jig (73) and enlarge the four bores
to Ø 4.5 mm.
• Mount the mounting bracket T-piece (75) to the hose
cabinet (74) as shown, using the supplied bolts, nuts
and washers M4 (4x).
• Tilt the rear panel (70) upwards again, and fasten it
with the tapping screws (71) that were removed before.
When closing the rear panel, make sure the hoses are
properly passing between the prongs.
• Insert the plug-on bracket with hook (76) on the T-piece
(75). Make sure that the hook is pointing forward, and
the semicircular recess is pointing downward.
Secure by tightening both threaded pins (77).
73
74
75
75
76
77
70
Start-up