Operating Manual
23
POWER CLAMP
English
Quality Wins.
© 2021/09 Haimer POWER CLAMP
Front view
Top view
• Align the linear unit (6) so that the coil (13) is centred
over the chuck (52). Tighten the four bolts (50).
• Connect the coil with the plug (4) at the housing and
close the retaining clip.
• Motor coil VS 32 M: Attach the motor connection (32)
at the motor controller (33) (back of the machine)
• Plug in the mains plug.
Only POWER CLAMP Profi Plus:
The two coil connections have plugs of different sizes. This
prevents the plugs from being confused with one another.
The plug connections at the POWER CLAMP Profi Plus are
arranged such that only one connection can ever be used
at one time. This prevents both coils from being connected
at the same time.
Attention! The electronics of the POWER CLAMP Profi
Plus must be cooled by the SPEED COOLER to prevent
them from overheating. A temperature monitor would
otherwise switch the device off after a short time and
only allow it to start again after a brief cooling down
phase. The POWER CLAMP Profi Plus may therefore
only be operated together with the SPEED COOLER
when the latter is switched on.
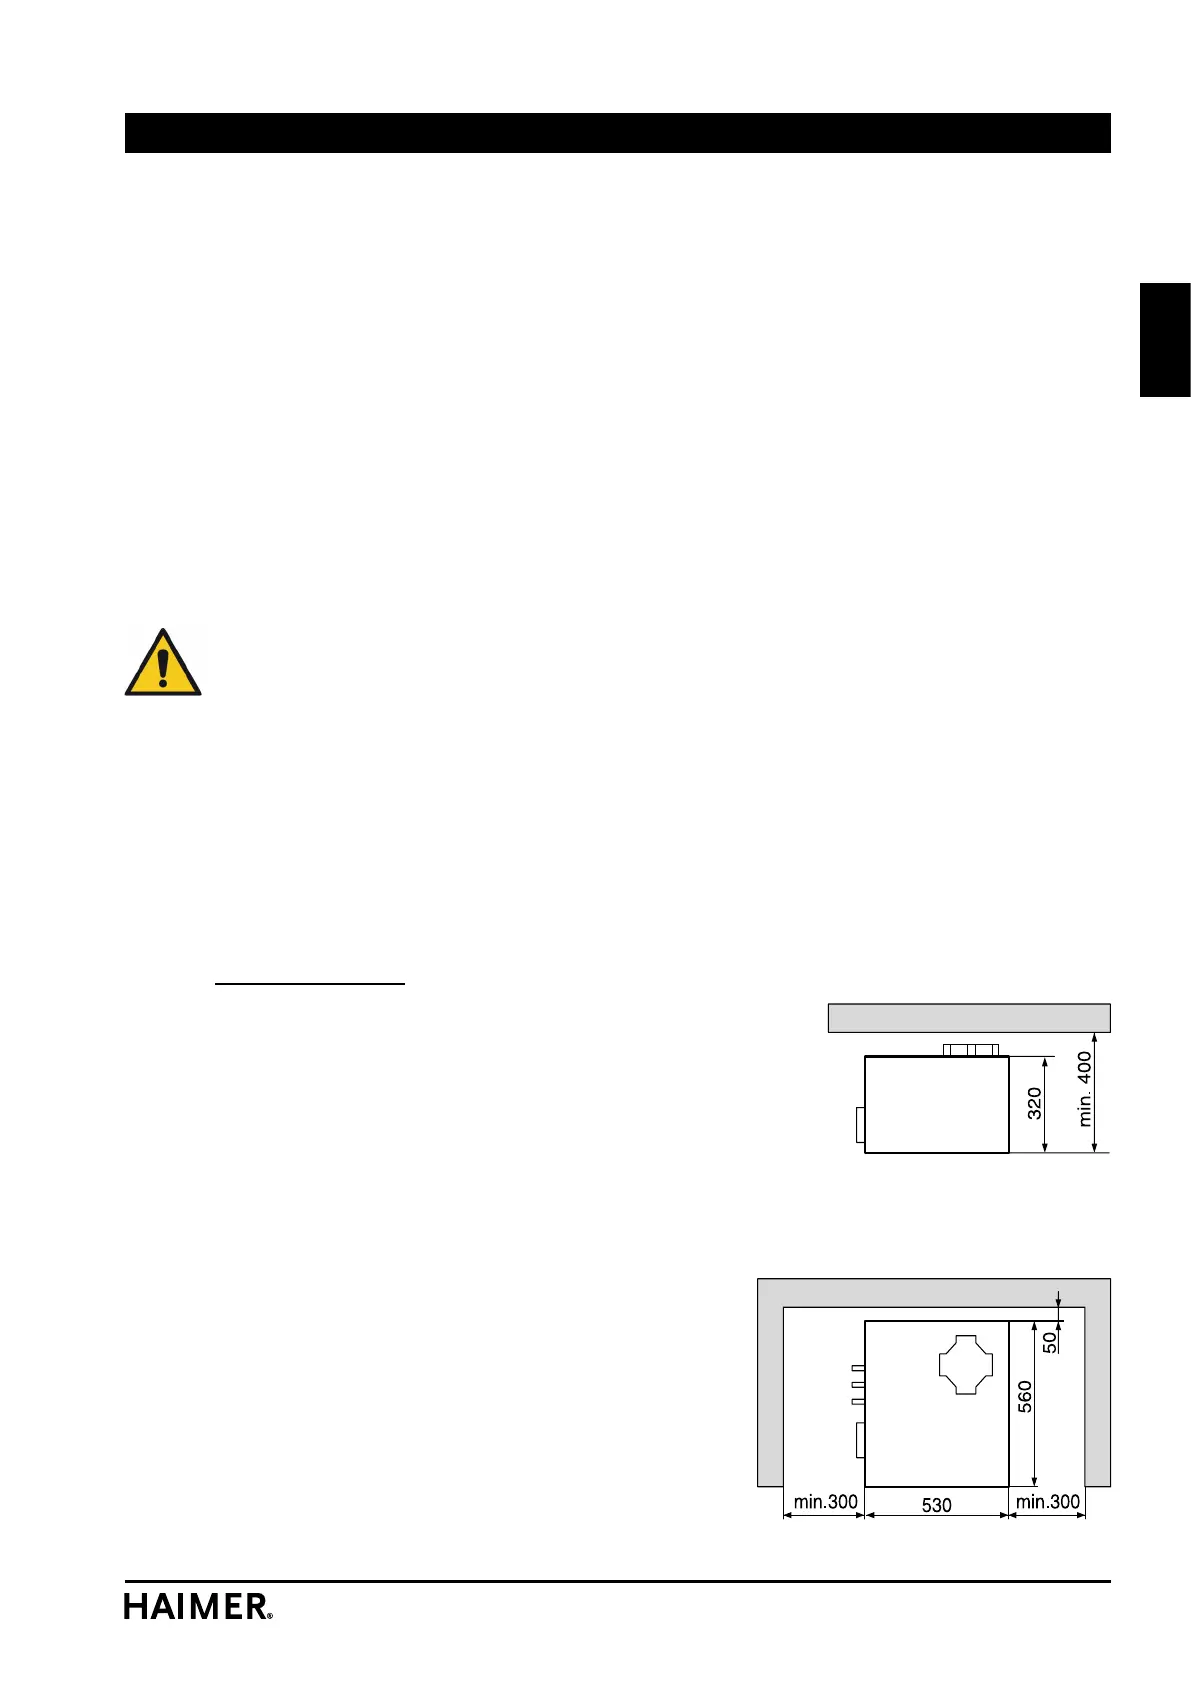
4.2.2 SPEED COOLER (option)
Space requirements:
Important! The SPEED COOLER cools the water from
the cooling circuit with ambient air. Ensure that there
is sufficient room to allow the air to circulate freely
(see the top view). Otherwise the cooling capacity
will not be adequate.
• Place the SPEED COOLER on a suitably stable and
horizontal structure near to or underneath the POWER
CLAMP.
• Fill the SPEED COOLER with a mixture of tap water
and antifreeze (ordinary antifreeze as used in car
radiators). Mixing ratio water: antifreeze = 3 : 1
As a rule, new machines have already been filled
with antifreeze. The cooling body only needs to
be topped up with tap water in such cases.
Filling is done via the screw closure at the top of the
device. The cooling coil in the water tank must be
completely covered.
Start-up