38
Operating Manual
POWER CLAMP
English
Quality Wins.
© 2021/09 Haimer POWER CLAMP
5.3 Work procedures
5.3.1 Selecting and changing the coil
The POWER-CLAMP was designed in the first in-
stance for shrink fit chucks with an outside contour
as per DIN 69882 – 8. In addition, there is a large
selection of shrink fit chucks and extensions that can
likewise be used with the POWER CLAMP. (e.g.
S chuck, Mini Shrink). Please contact the manufacturer
regarding chucks of any other dimensions.
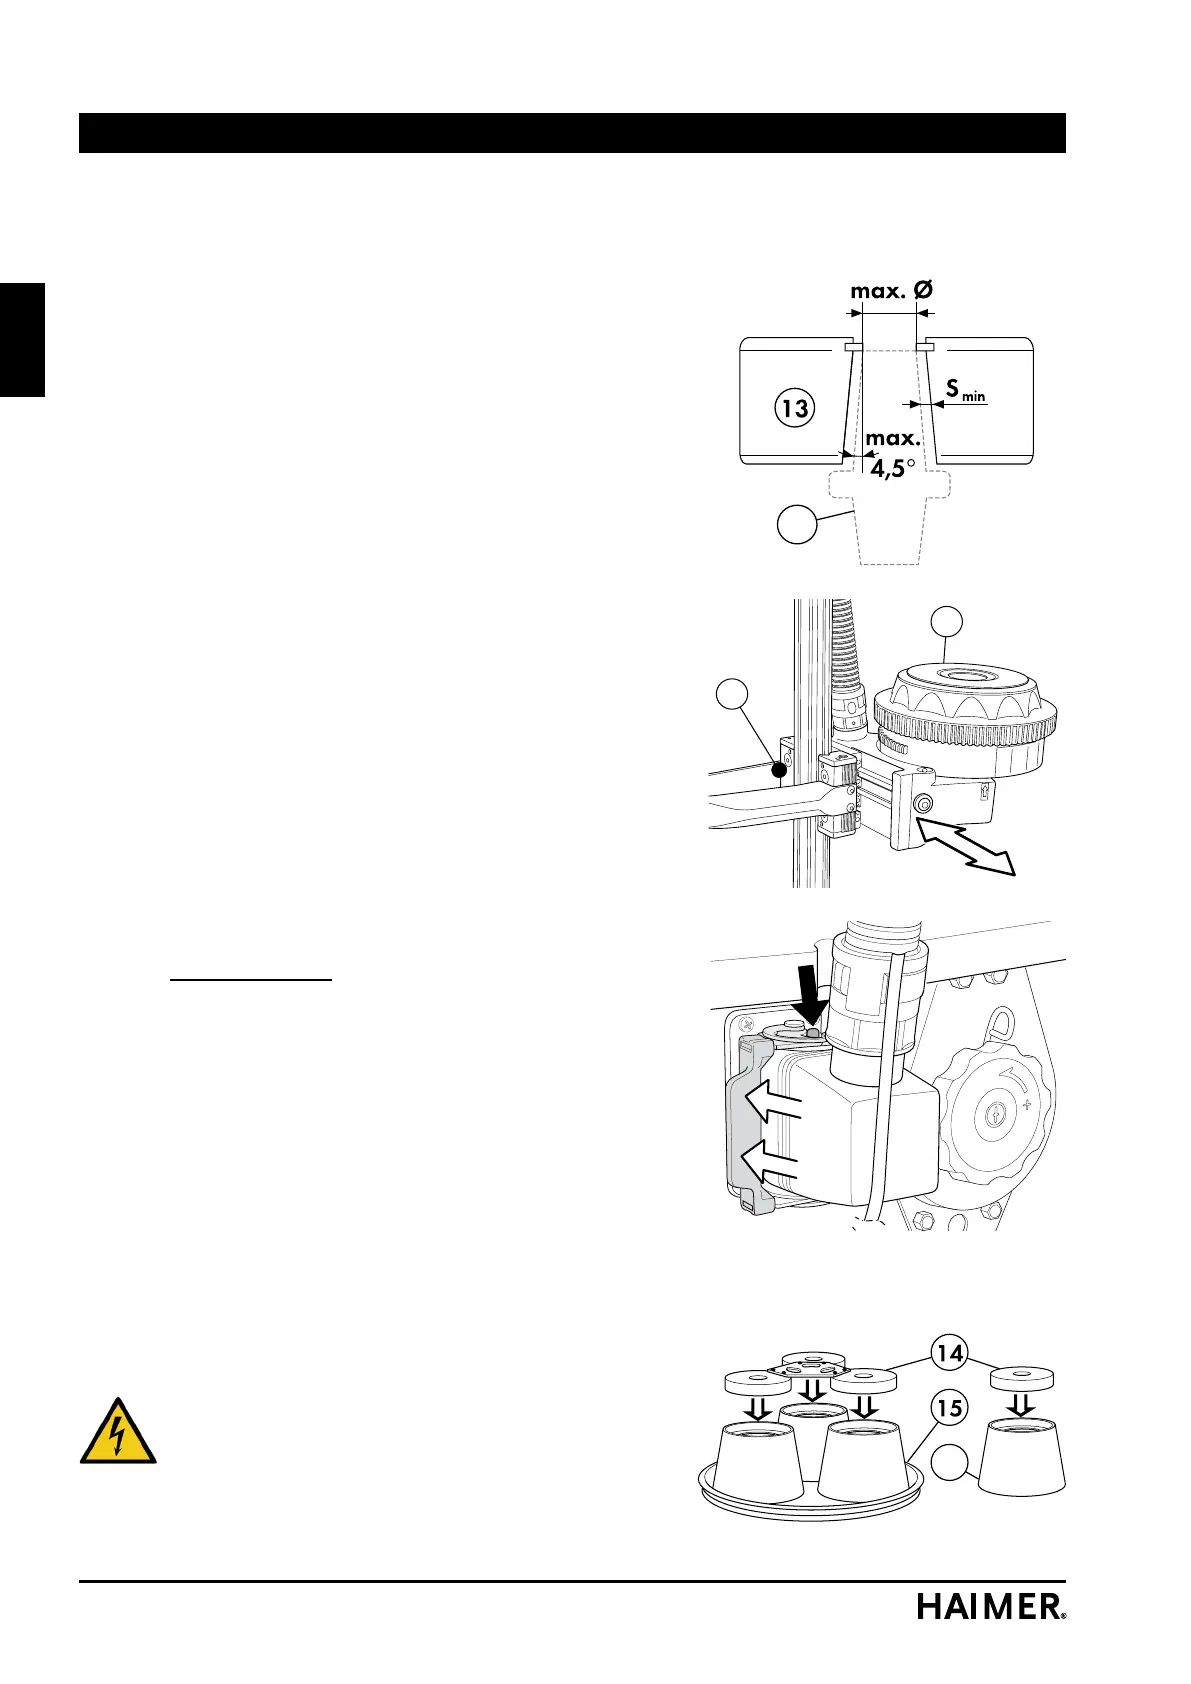
The chuck (52) may not under any circumstances touch
the inner wall of the coil (13). This results in a maximum
permitted size of the chuck (see illustration).
Coil for clamping Ø 3 - 16: max. Ø 44
S
min
= 3 mm
Coil for clamping Ø 3 - 32: max. Ø 45
S
min
= 3 mm
Coil for clamping Ø 40 - 50: > Ø 45 to
(only Profi Plus) max. Ø 82
S
min
= 7 mm
• Switch off the machine
• Open the retaining clip at the coil plug
• Pull out the coil plug
• Pull the locking bolt (19)
• Pull the coil (13) forwards out of the holder
• Install the other coil in the reverse order
Only coil 20 kW:
If the coil heats up strongly in operation then the cooling air
line can be connected as well at the coil plug:
Compressed air, max. 2 bar and unoiled.
Note: The retaining clip at the coil plug must al-
ways be clicked into place correctly. Otherwise
there is a risk that the contacts of the plug will melt.
5.3.2 Putting a tool holder in place
The tool holders (14) are marked with the size of the chuck
taper. It is essential to use the correct tool holder for the
respective type of shrink-fit chuck. Otherwise the
chuck is not centred correctly in the coil. The chuck could
touch the inside of the coil and melt away the insulation
of the coil winding.
IIn extreme cases there could be a risk of fatal
electric shock due to exposed live parts!
•
Insert the correct chuck support (14) from above into the
chuck holder (42) or turntable (15).
Operation
19
13