HQ Innity User Manual | 1 9
1 . Locate four 2.5mm screws and the 2.5mm hex wrench. You’ll also need the display with the hinges
aached to the boom row of connectors on the back of the display, plus the longer set of display
cables.
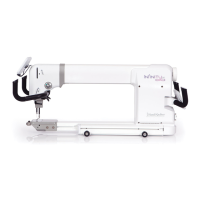
2 . Insert the 2.5mm hex screws into the openings
on the display’s metal hinge. Align the screws
in the hinge with the holes on the display
bracket. Use the 2.5mm hex wrench to fully
ghten the screws.
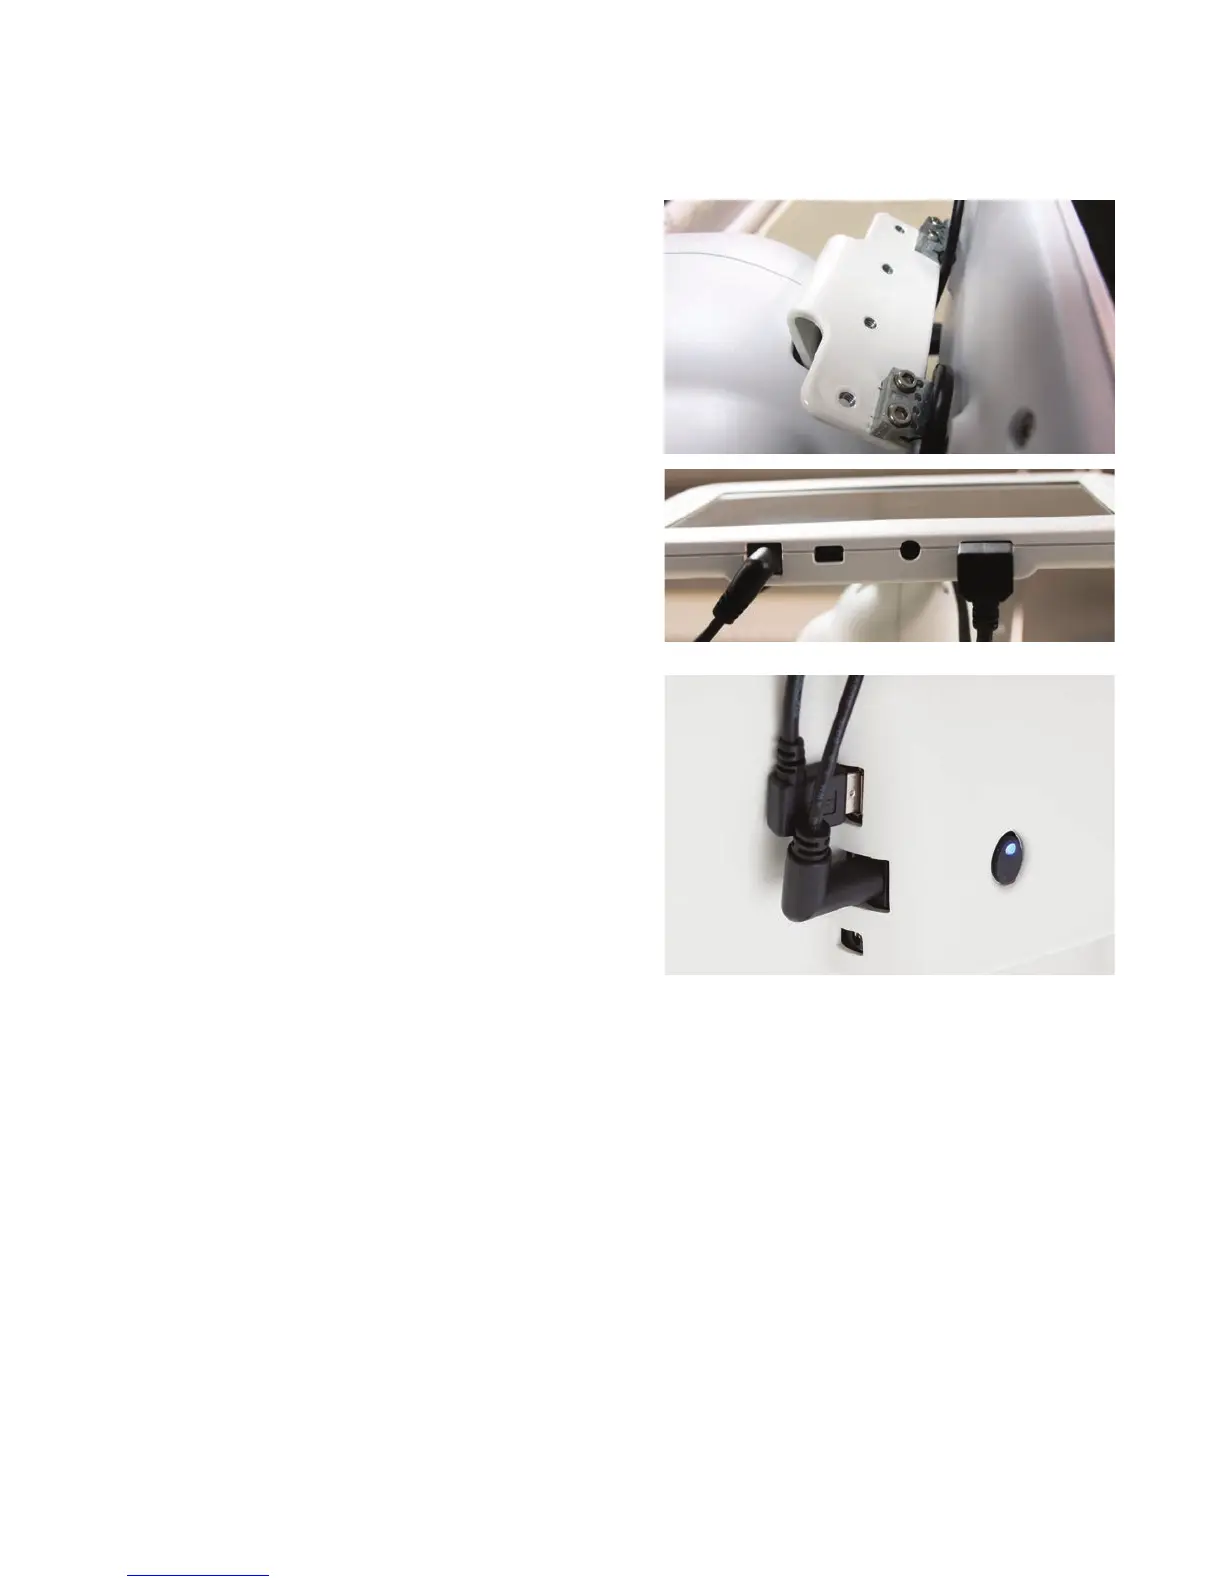
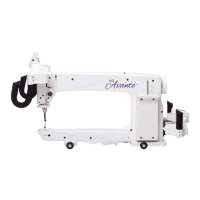
3. Plug the power and USB cables into the boom
of the display and into the front-le side of
the Innity.
 IMPORTANT: If you have HQ Pro-Stcher, you will install the HQ Pro-Stcher tablet computer
to the front of the machine instead of the 7-inch display. See the instrucons that come with
HQ Pro-Stcher for more informaon about installing the tablet computer.
To install the rear display
ONLINE: For more informaon about installing the front display, watch the video Installing the
Rear Display at: hp://www.handiquilter.com/videos/hq-innity/214/.
1 . Locate four 2.5mm screws and the 2.5mm hex wrench. You’ll also need the display with the
hinges aached to the top row of connectors on the back of the display, plus the shorter set of
display cables.