1 8 | www.HandiQuilter.com
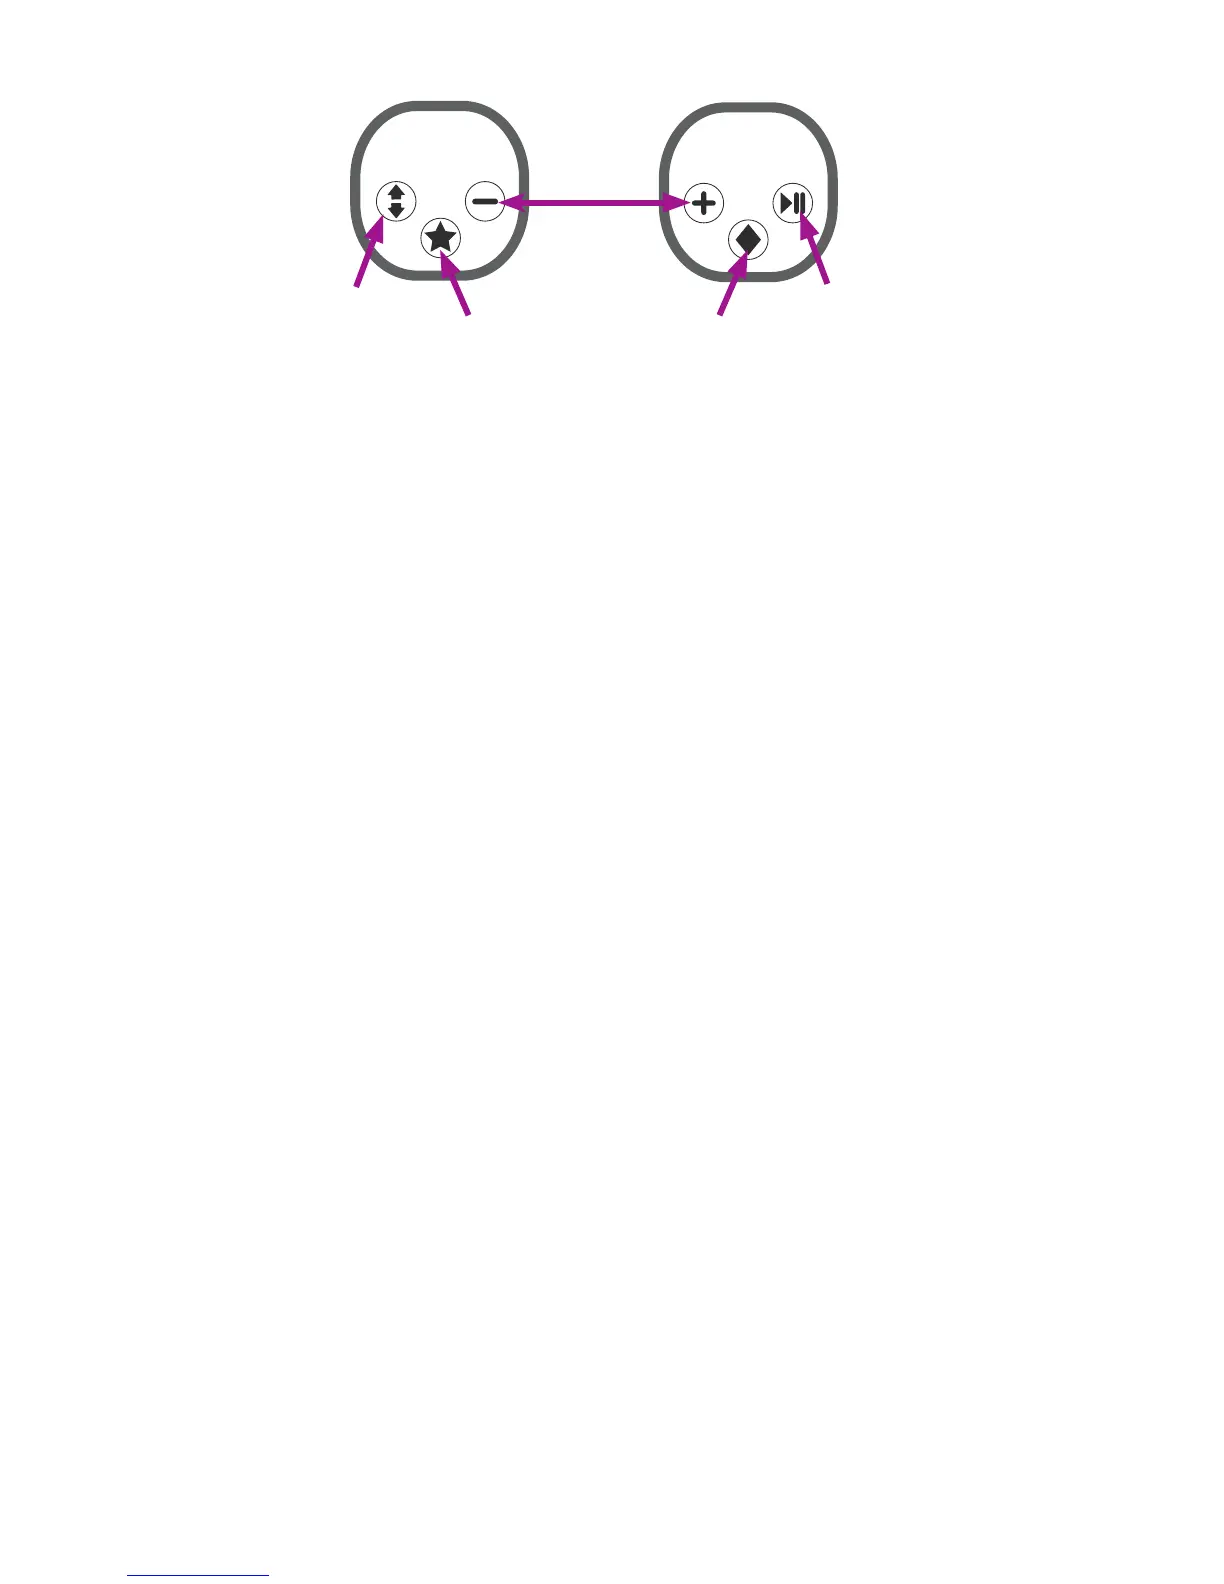
Cycles the
needle up or
down
Congurable
buon
Starts or stops
stching
Congurable
buon
Increases or
decreases
stching
speed
(Manual
mode)
Increases or
decreases
stches
per inch
(Regulated
mode)
NOTE: Pressing the plus or minus buons on the handlebars also increases or decreases tension
aer you press the Easy-Touch Tension™ buon on the Main screen. As long as the East-Touch
Tension bun is enabled, pressing the plus or minus buons controls the tension seng.
For more informaon about conguring the handlebars and buons, see To customize the handlebar
buons i n t h e Toolbar Opons secon of this manual.
Install the handlebar labels according to what you want each handlebar to do. For example, if you are
right-handed, you may want the right handlebar to control starng and stopping the stching.
NOTE: The tradional handlebar conguraon has the Start and Pause buons on the right
handlebar and the Needle Up and Down buons on the le handlebar.
To aach labels to the handlebars
U CAUTION: Be absolutely certain of your handlebar label choice before installing the labels.
Once they are stuck down they cannot be removed without damaging the switch.
1 . Peel o the paper backing o the labels and place them on the front handlebars according to
how you plan to congure the funcons.
2 . Repeat for the rear handlebars, making sure that you match the placement from the front
handlebars.
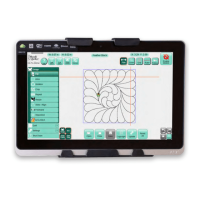
Touch-Screen Displays
The Innity comes with two idencal 7-inch touch-screen displays – one for the front of the machine and
one for the back of the machine.
To install the front display
ONLINE: For more informaon about installing the front display, watch the video Installing the Front
Display at: hp://www.handiquilter.com/videos/hq-innity/213/.