60 | www.HandiQuilter.com
5 . Es mate how much bobbin thread you think you’ll use for
eo s and decrease the bobbin capacity by that much. Press
the minus (–) bu on to decrease the capacity. Or, touch the
Bobbin Capacity box to pop up an onscreen number pad and
enter the number directly.
6. When you are ready to use a full bobbin with that type of
thread, insert the full bobbin and press the Reset Bobbin
bu on on the Main screen
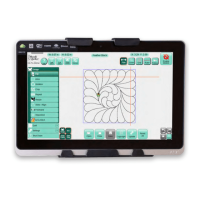
7 . Make sure the alarm icon is enabled (green), or on. If not,
touch the alarm icon to toggle it on. When the bobbin level
reaches zero, the low-bobbin alarm will sound if it is
t u r n e d o n .
NOTE: If you turn on or o the low-bobbin alarm on this screen, it is also turned on or o on the
A l ar m s s c r e e n .
The next me you use one of the threads for which you’ve set up a low-bobbin threshold, touch the bobbin
name box and choose the speci ed thread name by touching it. Insert a full bobbin with that thread into
the machine and press the Reset Bobbin bu on on the Main screen.
To delete a low-bobbin con gura on
• Touch the bobbin name box and choose the speci ed thread name by touching it. Then touch the
Delete Bobbin bu on.
To edit a low-bobbin con gura on
• Touch the bobbin name box and choose the speci ed thread name by touching it. Then touch the
Edit Bobbin bu on. Make any changes using the pop-up keyboard.
Handlebar bu on op ons
Your In nity came with labels for the handlebars because you can decide which func ons you want on the
right and le handlebars. For example, use the le handlebar for star ng and stopping your quil ng and
the right handlebar for moving the needle up and down to pull up the bobbin thread, or vice versa. For
more informa on about the handlebar labels, see To a ach labels to the handlebars in the Installa on and
Setup sec on of this manual.
A er you have placed the labels on the handlebars, use the handlebar customiza on se ngs to con rm
your handlebar bu on choices and to make other customiza ons as to what the star and diamond bu ons
on the handlebars will do.
8 . 8