48 First Steps with the iTNC 530
1.3 Programming the First Part
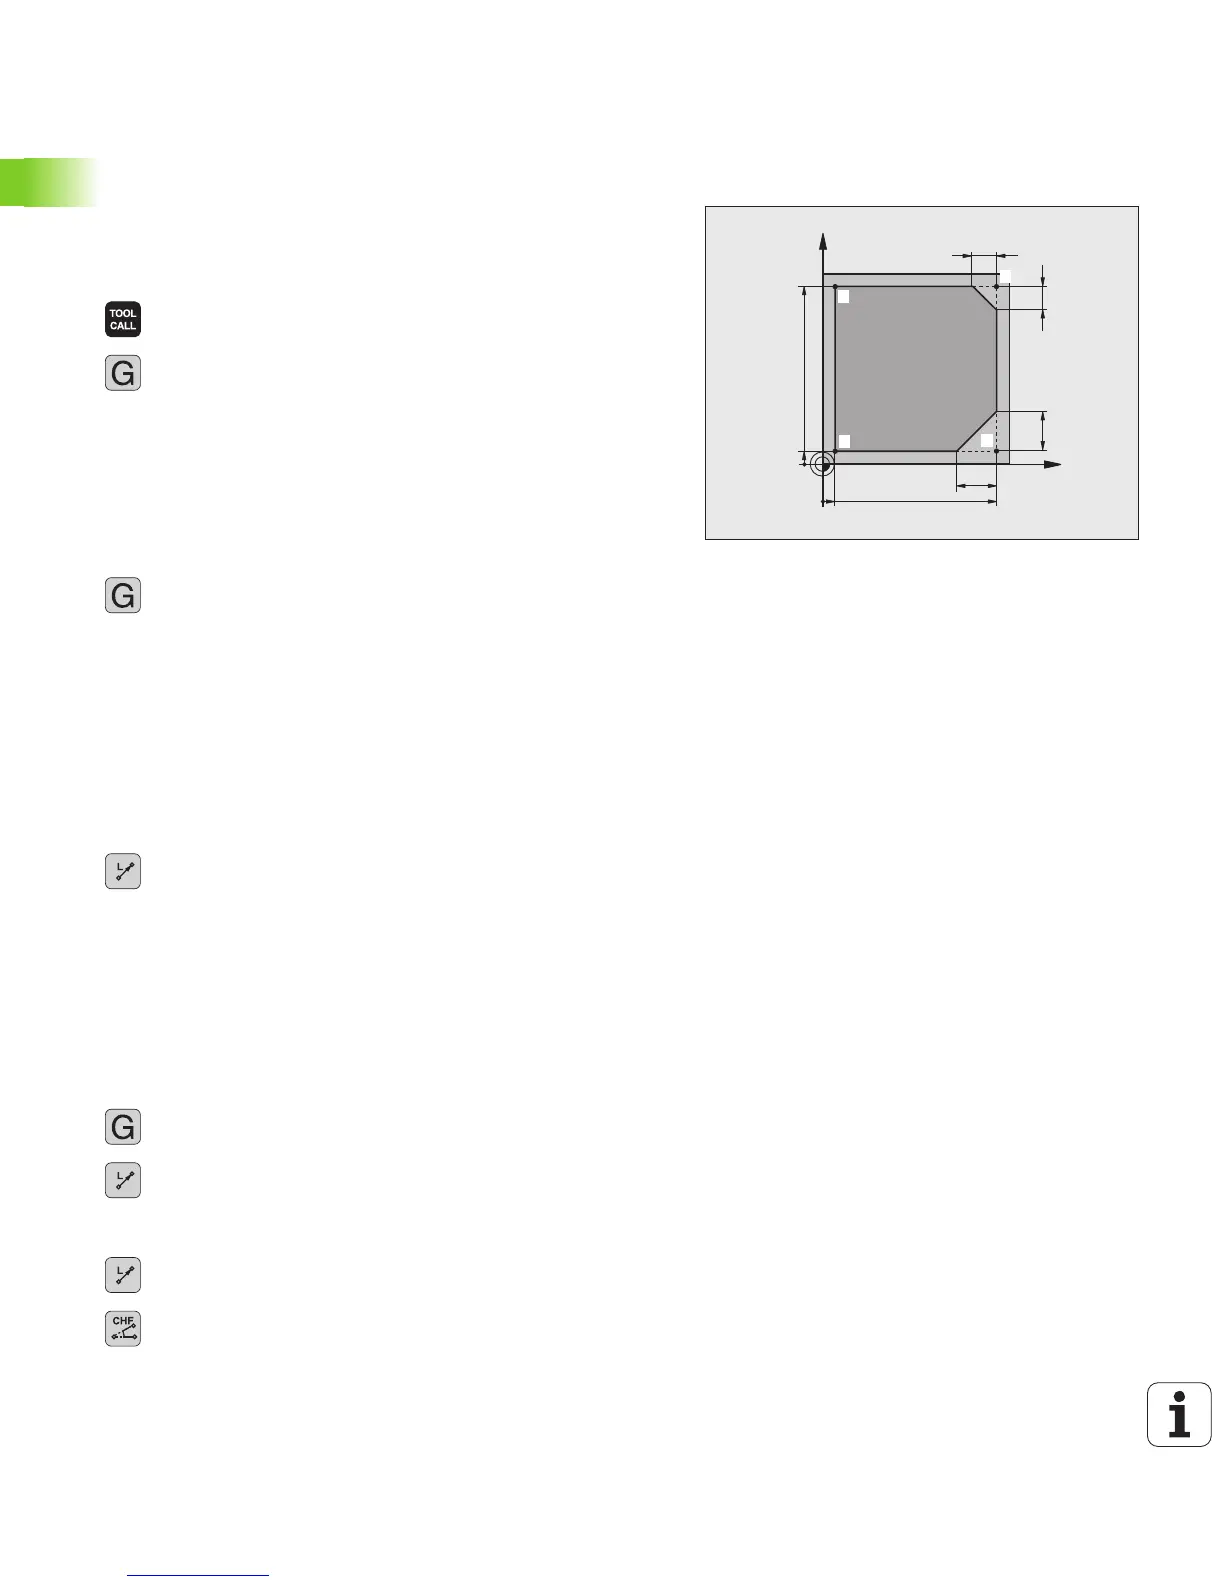
Program a simple contour
The contour shown to the right is to be milled once to a depth of 5 mm.
You have already defined the workpiece blank. After you have initiated
a dialog through a function key, enter all the data requested by the
TNC in the screen header.
U Call the tool: Enter the tool data. Confirm each of your
entries with the ENT key. Do not forget the tool axis
U Retract the tool: Press the orange axis key Z in order
to get clear in the tool axis, and enter the value for the
position to be approached, e.g. 250. Confirm with the
ENT key
U Confirm Radius comp.: RL/RR/no comp? by pressing
the ENT key: Do not activate the radius compensation
U Confirm the Miscellaneous function M? with the
END key: The TNC saves the entered positioning
block
U Preposition the tool in the working plane: Press the
orange X axis key and enter the value for the position
to be approached, e.g. -20
U Press the orange Y axis key and enter the value for the
position to be approached, e.g. -20. Confirm with the
ENT key
U Confirm Radius comp.: RL/RR/no comp? by pressing
the ENT key: Do not activate the radius compensation
U Confirm the Miscellaneous function M? with the
END key: The TNC saves the entered positioning
block
U Move the tool to workpiece depth: Press the orange Y
axis key and enter the value for the position to be
approached, e.g. -5. Confirm with the ENT key
U Confirm Radius comp.: RL/RR/no comp? by pressing
the ENT key: Do not activate the radius compensation
U Feed rate F=? Enter the positioning feed rate, e.g.
3000 mm/min and confirm with the ENT key
U Miscellaneous function M? Switch on the spindle and
coolant, e.g. M13. Confirm with the END key: The TNC
saves the entered positioning block
U Move to the contour: Define the rounding radius of
the approaching arc
U Machine the contour and move to contour point 2: You
only need to enter the information that changes. In
other words, enter only the Y coordinate 95 and save
your entry with the END key
U Move to contour point 3: Enter the X coordinate 95
and save your entry with the END key
U Define the chamfer at contour point 3: Enter the
chamfer width 10 mm and save with the END key
 Loading...