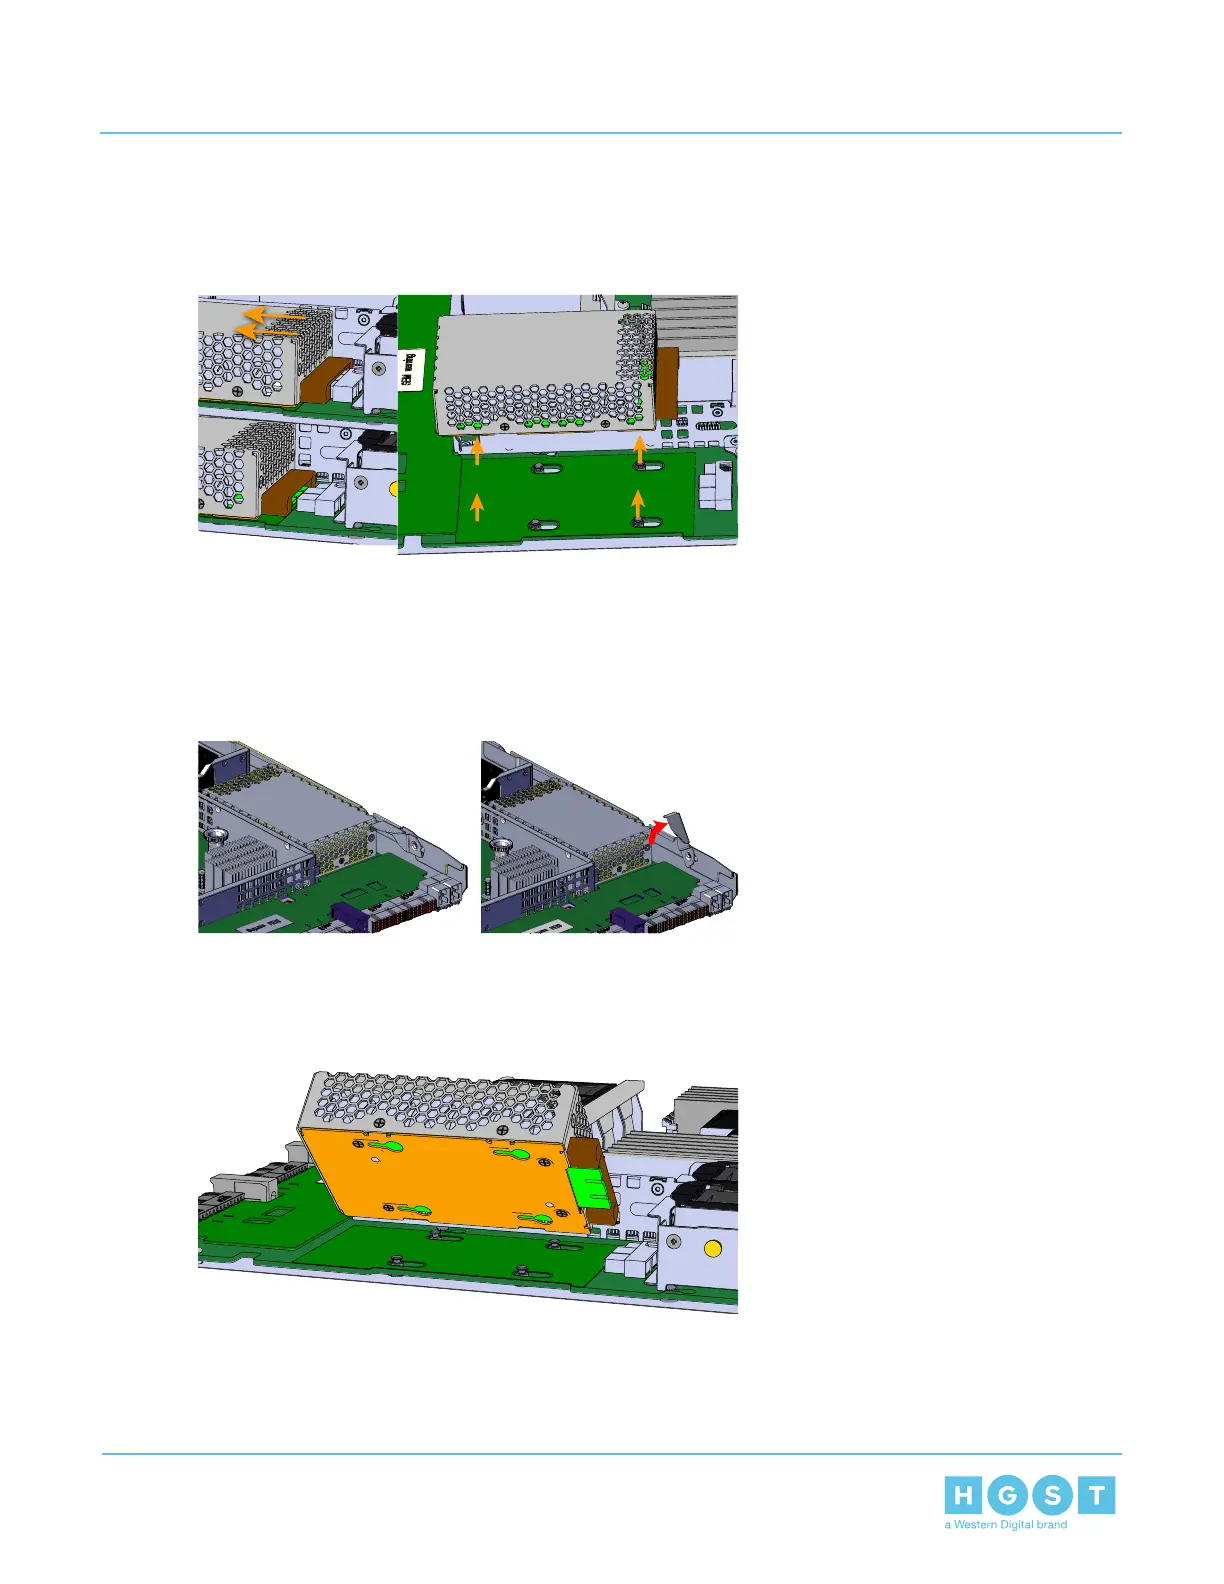
4. Unlatch the Battery Backup from the canister by sliding it backwards and lifting it out of the Compute
Canister.
Figure 185: Removing the Battery Backup
5. Identify the location of the Battery Backup on the replacement Compute Canister.
6. Install the Battery Backup into the Compute Canister.
a) Rotate the Battery Backup latch up and out until fully open.
Figure 186: Open the Battery Backup Latch
b) Line up the keyholes on the bottom of the Battery Backup with the keys on the Compute Canister.
Figure 187: Battery Backup Keyholes
120
3 Part Replacement
User Guide 3.13 (Optional) Battery Backup Replacement
 Loading...