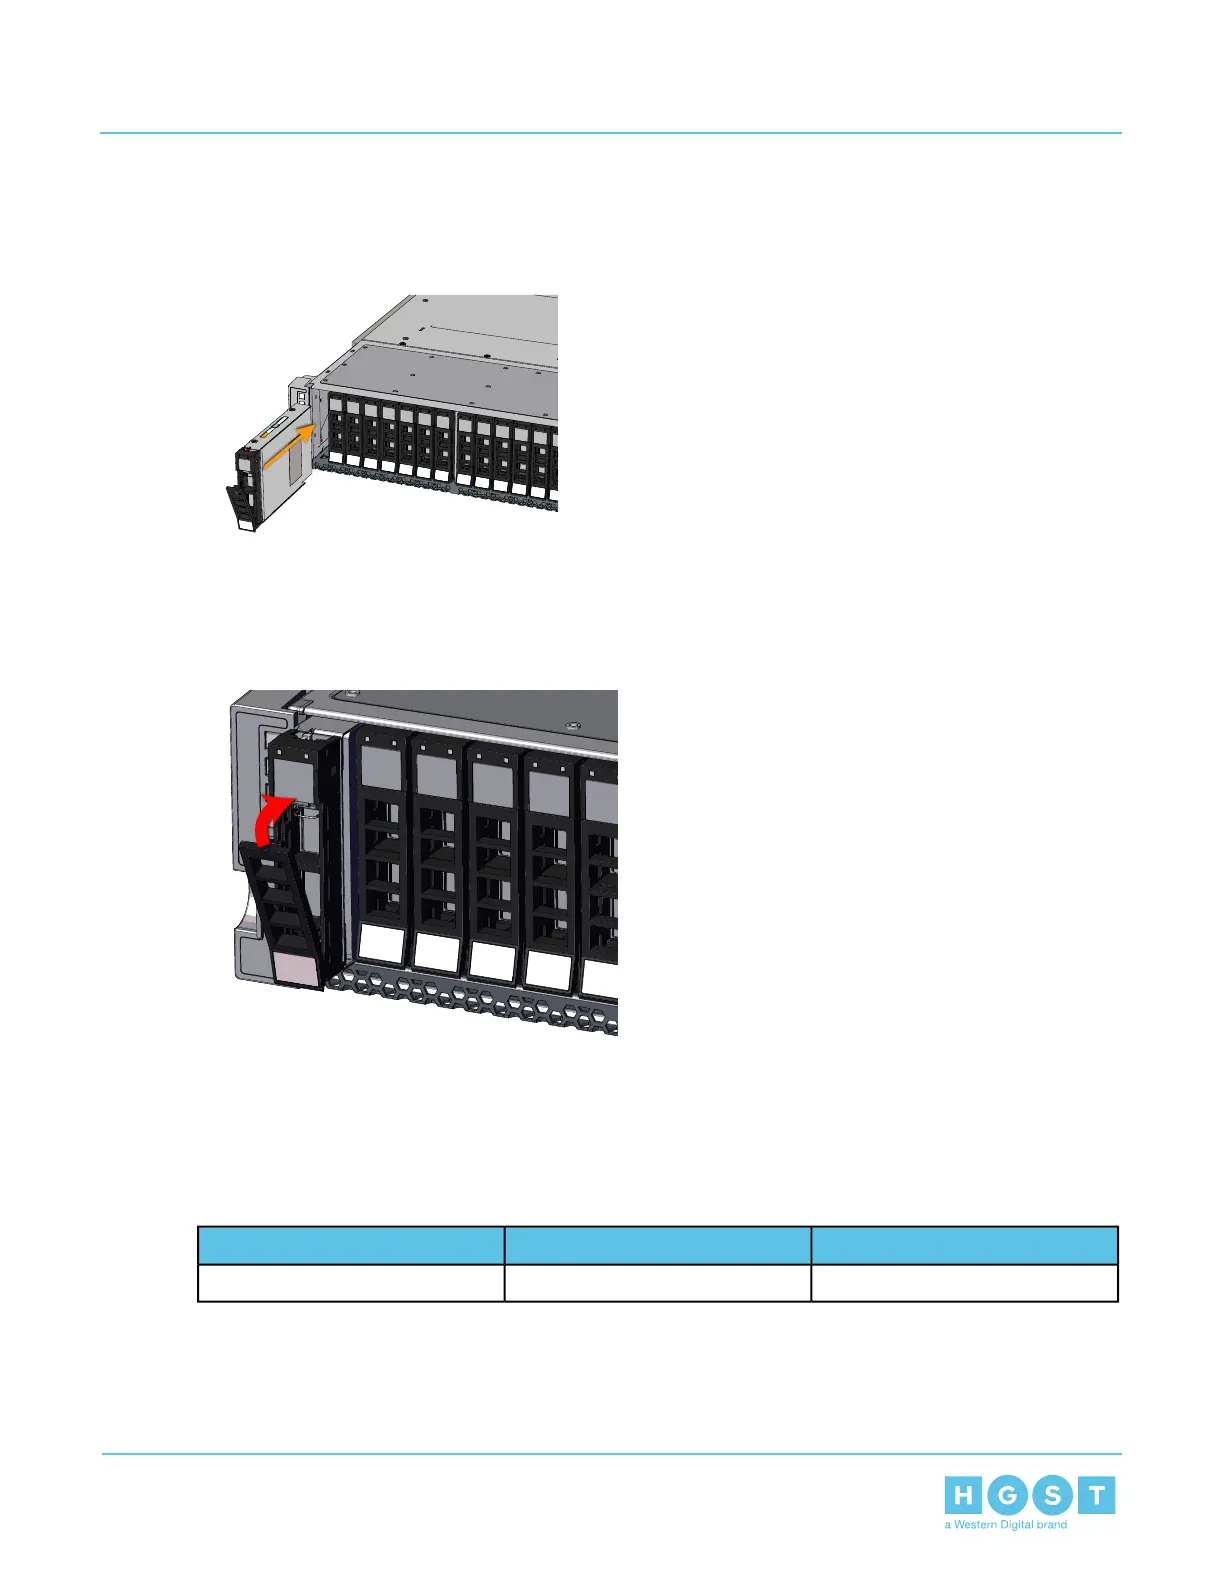
b) With the drive carrier button on top, slowly slide the drive into the open drive slot using the drive carrier
release until the drive release engages.
Figure 30: Drive Assembly Installation
c) Seat the drive by pressing the lever into the drive carrier. This will allow the drive to make the connection
with the connector on the drive board without causing damage.
Figure 31: Drive Assembly Lever
4. Verify the drive is functional by verifying the Amber drive carrier LED is no longer indicating a fault.
3.2 Drive Blank Assembly Replacement
Table 30: Replacement Procedure Info
Time Required# of People RequiredRequired Tools
3 minutes1None
1. Locate the failed drive assembly blank.
2. Uninstall the drive blank assembly.
37
3 Part Replacement
User Guide 3.2 Drive Blank Assembly Replacement
 Loading...