3 Piping work and refrigerant charge
Piping connection for outdoor unit
SMGB0136 rev.0 - 07/2021
48
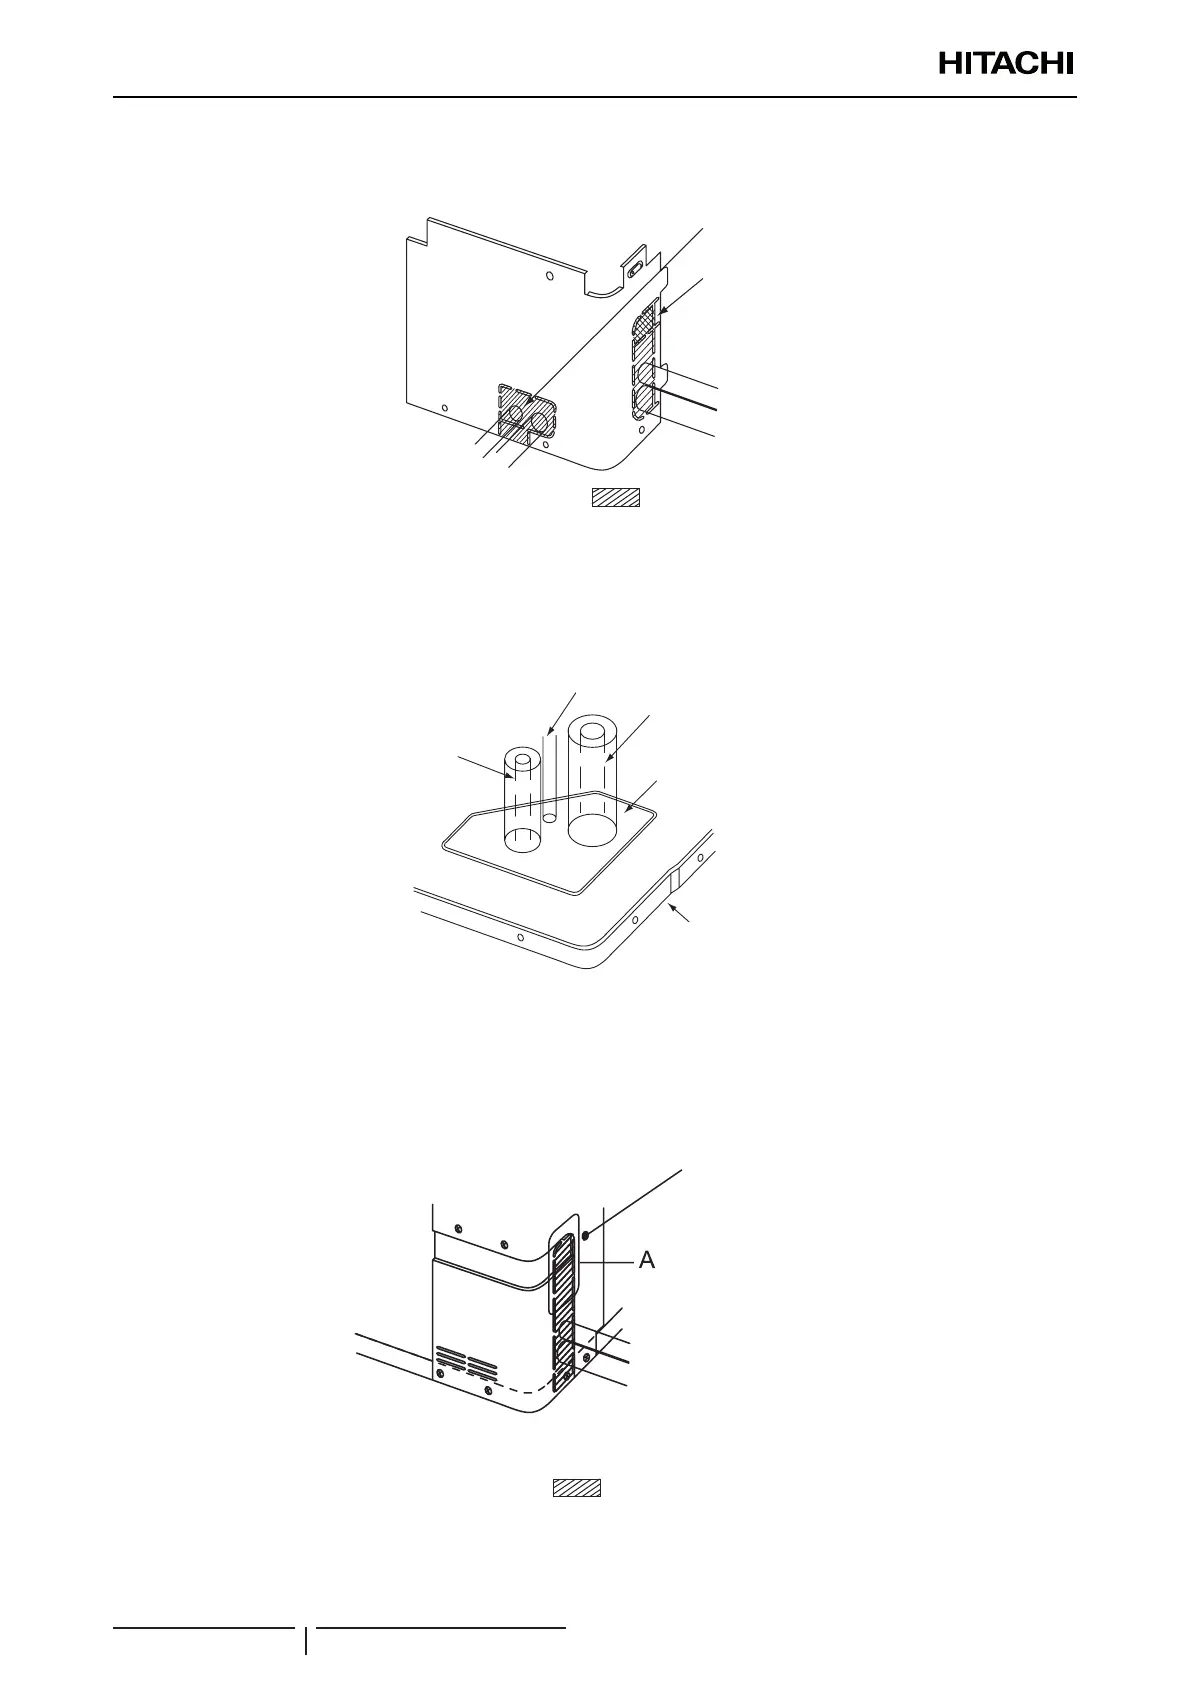
For the front and side piping
Select the correct knock-out size depending on whether it is for power wiring or transition wiring
Front piping hole
Rigth side
piping hole
To use racking or conduit tubes, check the size and remove part following the slit.
? NOTE
Place insulation (eld supplied) to protect cables and pipes from being damaged by plate edges.
For the downward piping
After removing the bottom of the piping cover, perform piping and wiring works.
Gas piping
Knock-out hole
Bottom base
Cables
Liquid piping
? NOTE
Cables shall not contact directly to the pipes.
For the rear side piping
After removing the rear-side piping cover, punch out the “A” holes along the guide line.
Rear Cover
? NOTE
Remove the rear pipe cover under the rear cover and remove part following the slit.
4 Mount the piping cover in order to avoid water entering into the unit. Seal the holes where pipes and wires are
inserted, by using insulation (eld-supplied).
5 If the eld-supplied piping is connected with stop valves directly, it is recommended to use a tube bender.