Serial essernet
®
interface (SEI1)
50 FB 798819 / 05.18
9.2 Mounting – with housing Part (No. 788606)
0
1
2
3
4
5
6
7
8
9
0
1
2
3
4
5
6
7
8
9
X3
ON
1 2
6
9
Trouble / Fault
Power
essernet
®
serial essernet
®
interface
1
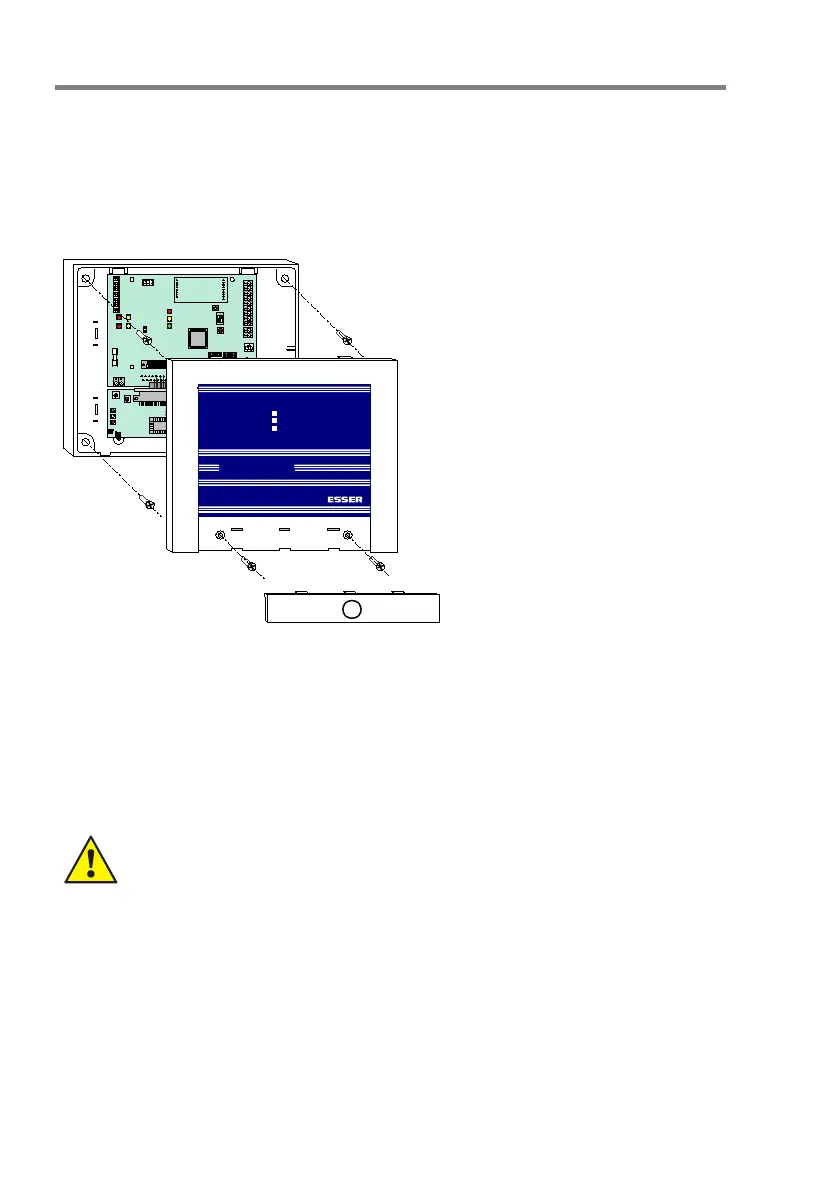
• Open the housing
• Observe the installation
environment specifications, hold
the housing horizontally (align
using a spirit level) against the
mounting surface and mark the
four mounting holes
• Drill through the marks for the
mounting holes to create four holes
and insert suitable dowels.
• The type of dowel best suited to
this purposes depends on the
mounting surface's material (cavity
wall, concrete, wood etc.) and must
be chosen accordingly.
• Install housing base and insert
connecting cable
• Place the essernet
®
module on the
connector X14 of the SEI1 board
and carefully place both boards
together in the holders and fix them
with the enclosed screws in the
housing
• Strip and connect cable within the
housing
• After completing the work, close the
housing and clip on the cover
Fig. 5: Installation of the SEI1 in the optional housing (Part No. 788606)
Place the essernet
®
module on the connector X14 of the SEI1 board and carefully place both
boards together in the holders and fix them with the enclosed screws in the housing
Mounting and installation must be carried out while the unit is not energised!
Risk of damage!
Please observe the measures necessary to prevent the built-up of static charges.