Honeywell MAXPRO Intrusion MPIP2000U/3000U Series Installation and Setup Guide
800-23044 Rev. A draft_11 77
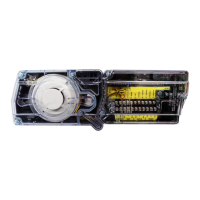
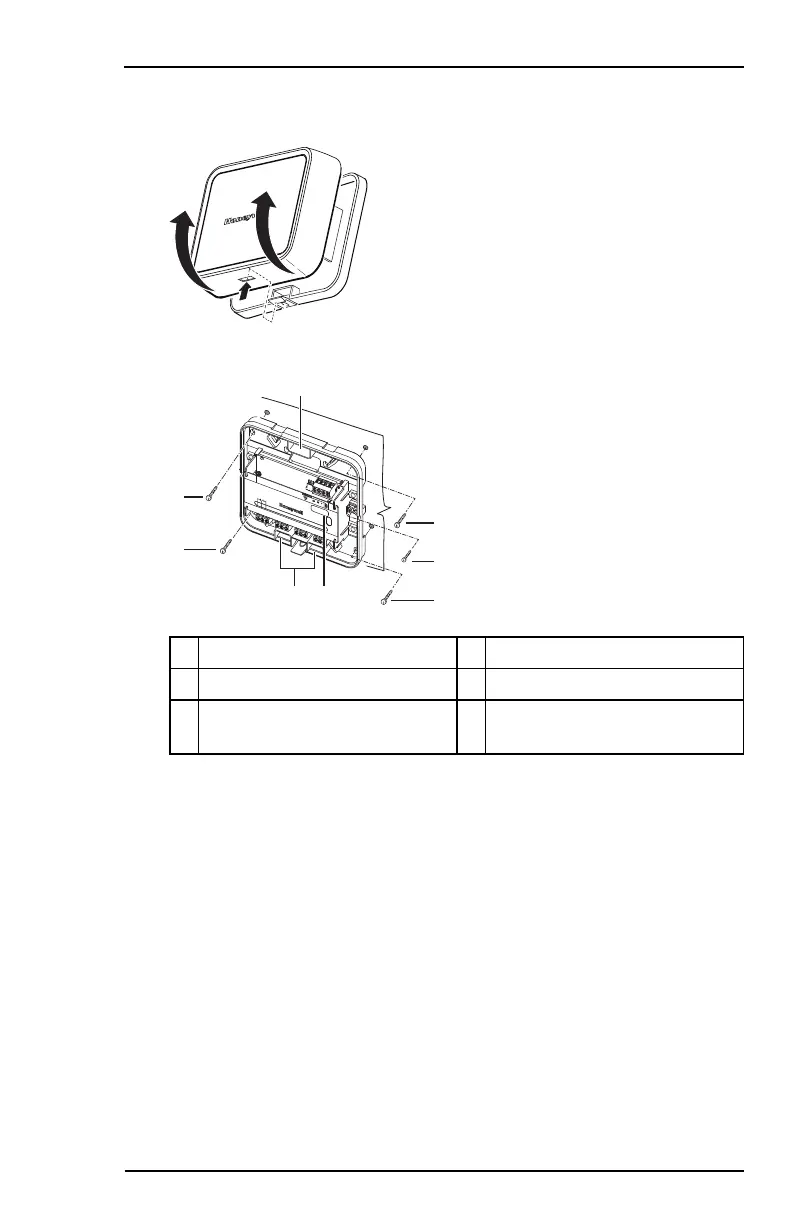
To mount the device on the wall in its own enclosure, proceed as follows:
1. Press the tab at the bottom of the lid andremove the lid.
2. Fix the device to the wall using the 4large screws(A).
IB2
Scan for Quick
In
stall Using
Installation
Manager
BUS
Relays
C
NO
NC
C
NO
NC
C
NO
NC
C
NO
NC
A
A D
B
B
B
B
C
A Opening for wiring (x3) D LEDindicator
B Mounting screw (x4) E Lid screw (x1)
C Tamper screw (x1). Required
for off-wall tamper protection.
3. Screw the tamper screw(C) into the wall. This screw provides off-wall
tamper protection.
4. For wiring, see Summary of Connections on page78.
5. Use cable ties to bundle and fix wiring. The PCB holder has various
attachments point for this purpose.
6. Click the lid back in place and fix it using the small lid screw(E).
 Loading...