AM-1224 Installation and programming manual PAGINA - 23
AM-1224_manu Doc. M-124.1-AM1224-ENG Rev A.1 NOTIFIER ITALIA
Detector line
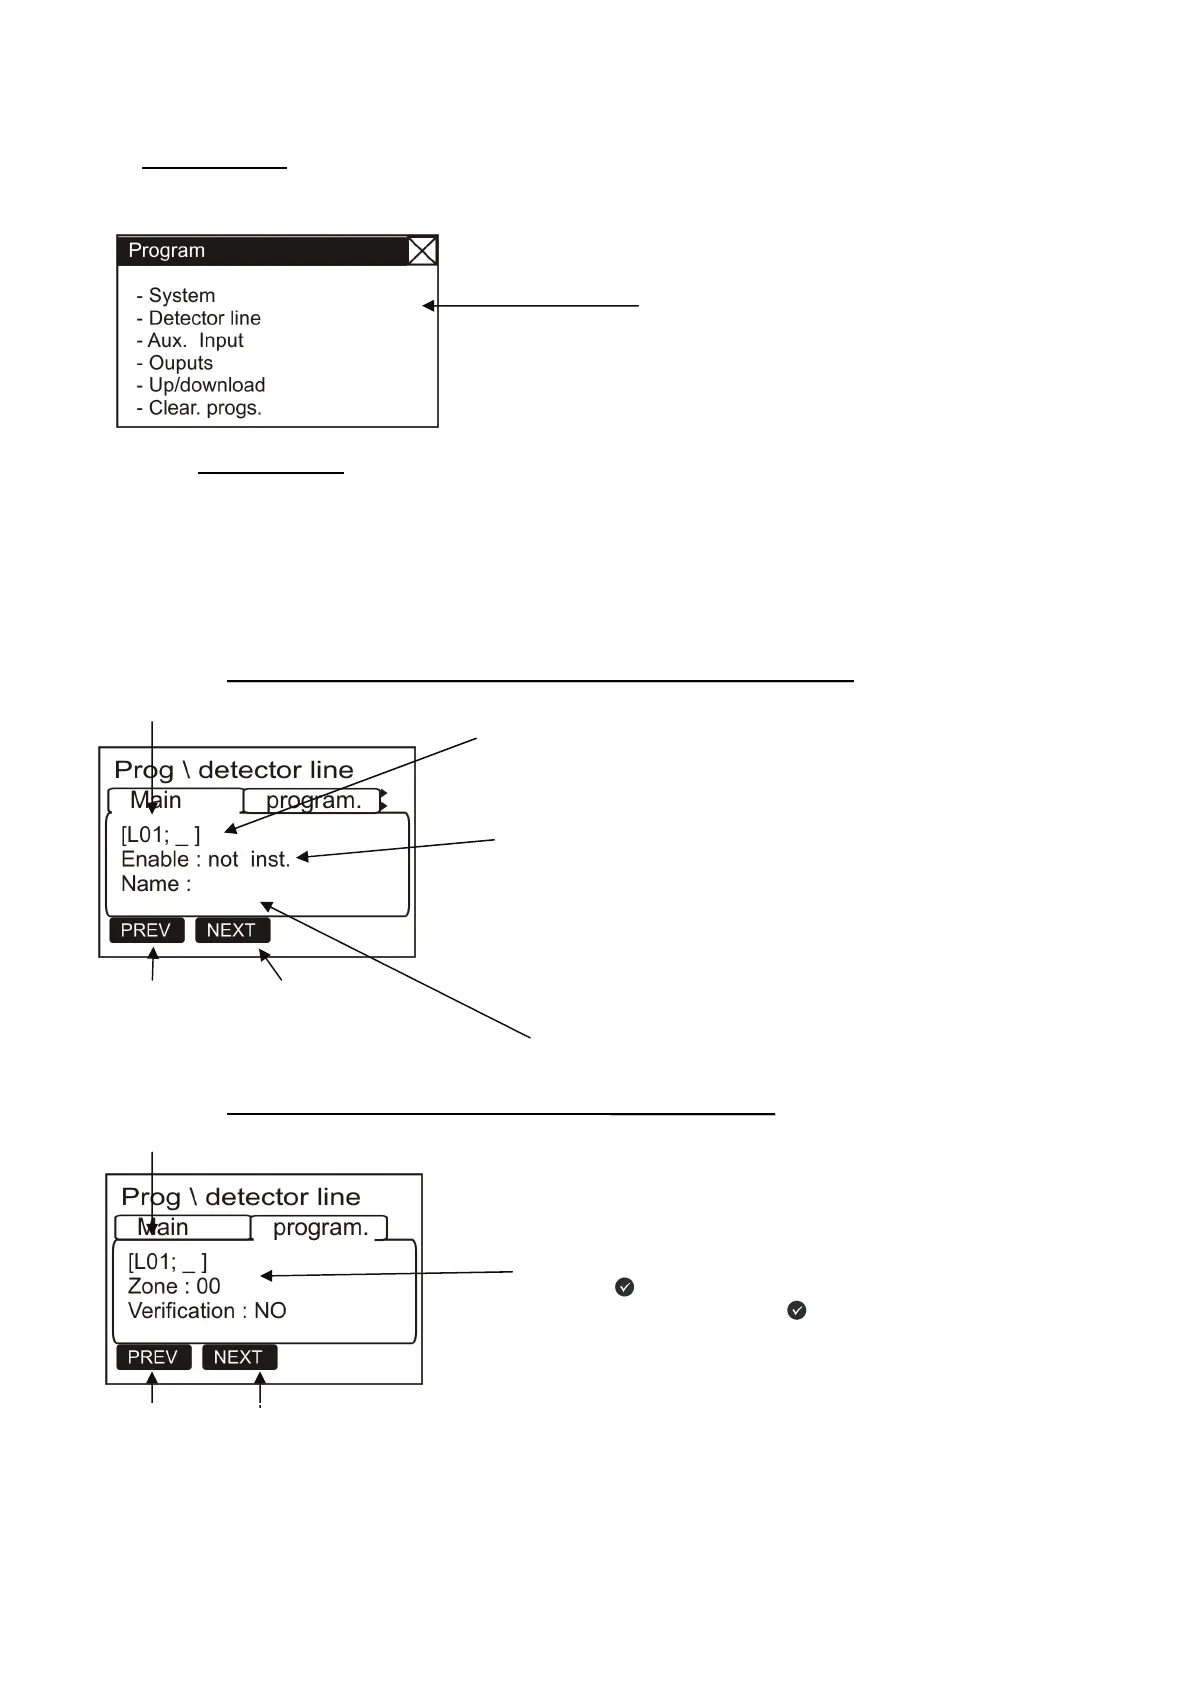
From program menù:
Detector line
Selecting “Detector line” the screen of line configuration will appears, as shwn in following picture. (“Enable
line”, ”Line name” , “zone assignment” and “Verification option” )
This procedure consists of 4 folders programming (to access to the folders use arrow keys 4). To enter data
see the editing mode, described above in the section describing the keyboard data entry operation.
The default display shows the first line. To select another line should use the function keys.
o
o
F
F
i
i
r
r
s
s
t
t
f
f
o
o
l
l
d
d
e
e
r
r
o
o
r
r
m
m
a
a
i
i
n
n
f
f
o
o
l
l
d
d
e
e
r
r
.
.
(
(
T
T
y
y
p
p
e
e
a
a
n
n
d
d
w
w
r
r
i
i
t
t
i
i
n
n
g
g
a
a
s
s
s
s
o
o
c
c
i
i
a
a
t
t
e
e
d
d
w
w
i
i
t
t
h
h
t
t
h
h
e
e
l
l
i
i
n
n
e
e
)
)
o
o
Second folder or programmation folder.
(
(
Z
Z
o
o
n
n
e
e
a
a
s
s
s
s
o
o
c
c
i
i
a
a
t
t
i
i
o
o
n
n
)
)
Line numer
Editable label max.16 characters
_ = Line disabled
P = Line Enabled
Press F1 to
configure
previous line
Press F2 to
configure
next line
Number of zone assigned.
To assign the number of “Zone” for the selected line press
enter key
and use arrow keys to change the number of
zone. Finally press enter key
to confirm the configuration.
To each zone can be associated max. 5 lines.
Program menù
Type = not inst. ( la linea non segnala i guasti e allarmi )
Type = allar. sens. (dedicated line for conventional detector with fault
and alarm signalling).
Type = allar. puls. (dedicated line for conventional manual call point
with fault and alarm signalling).
Type = attiv. puls. (dedicated line for N.O . blanced contact.
Any activation will be no reported on the display, in the history log, event
will be recorded and the associated output to CBE follows the state of
contact).
Line number
Press F1 to
configure
previous line
Press F2 to
configure
next line
 Loading...