Rack Air Duct kit 90
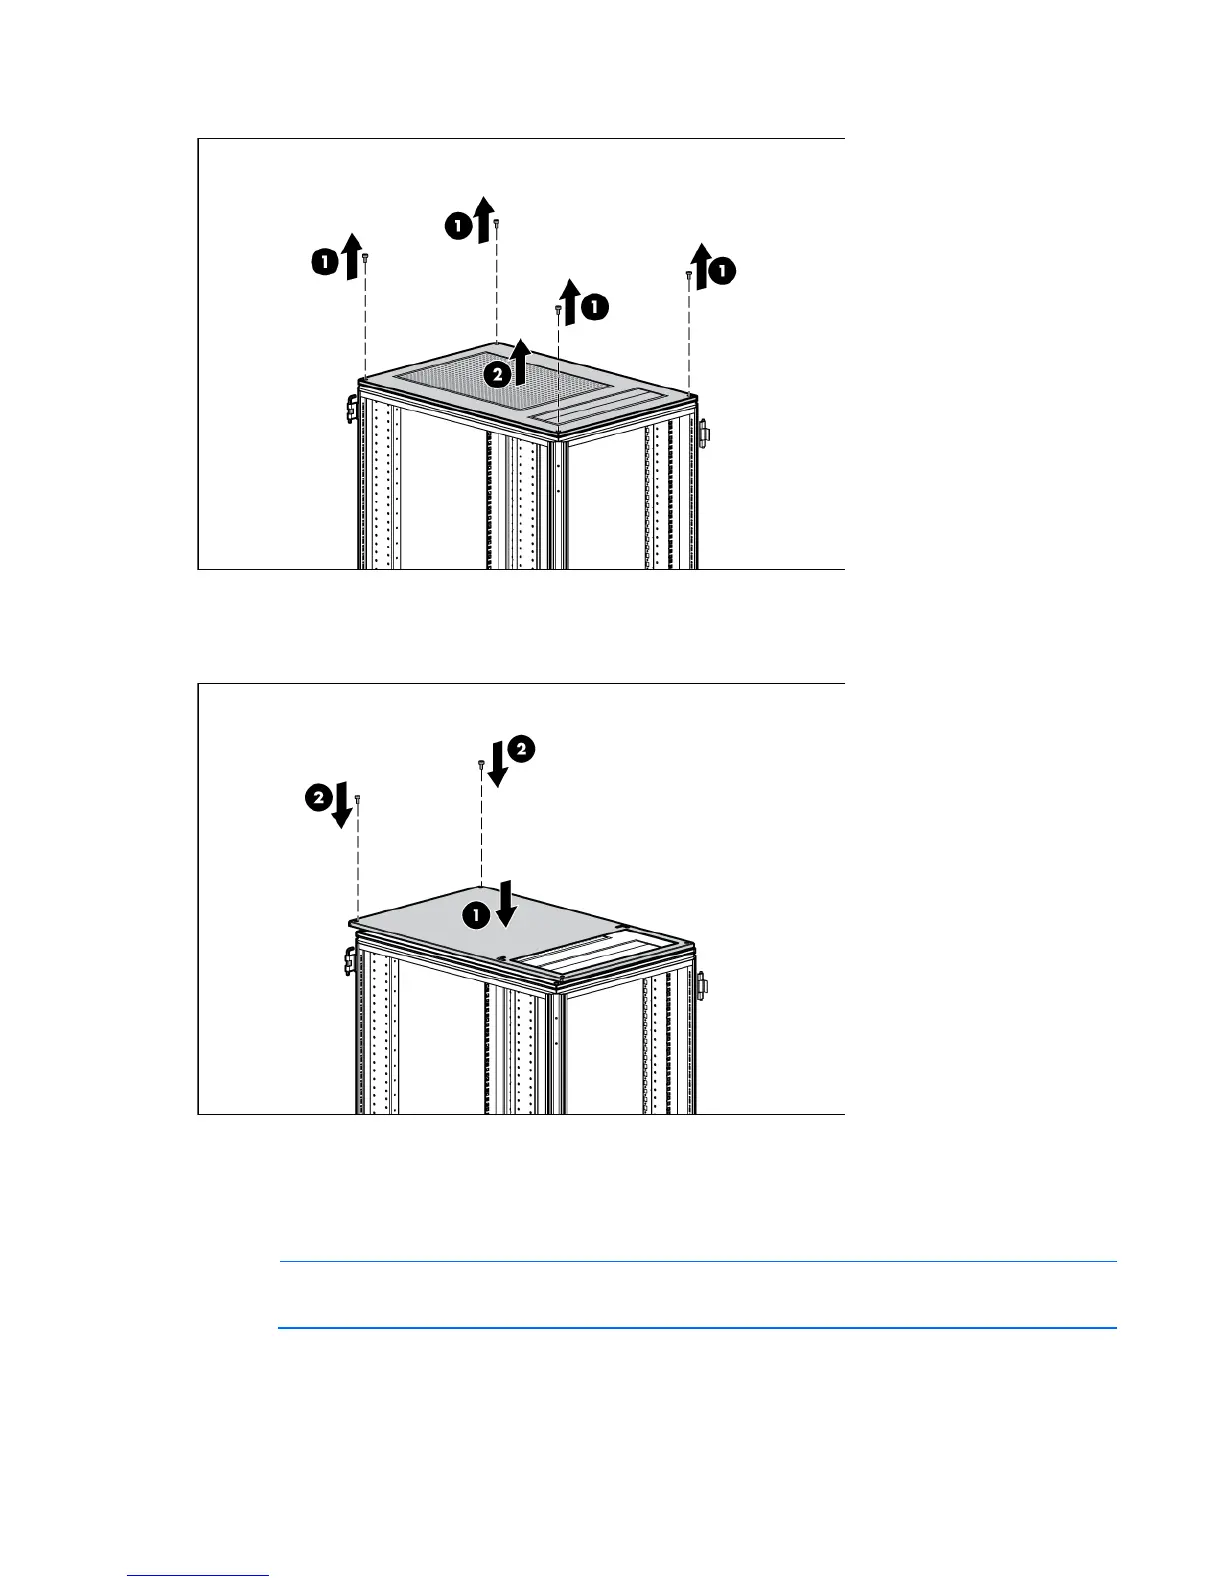
2.
Remove the perforated top plate of the rack (2).
3. Align the solid plate with the top of the rack (1).
4. Using a T-30 Torx screwdriver, insert and tighten two of the four M-12 bolts (from step 1) into the two
corner holes at the front of rack (2).
Installing the solid rack base plate
1. From the rear of the rack, insert the left side plate into the rack, and set the plate on the lip of the rack
frame (1).
NOTE:
When you insert the sheet metal screws to secure the base plates, you can either use the
top hole or the side hole, depending on your space allotment.
2. Using a T-25 Torx screwdriver, insert and tighten one M5.5 self-tapping screw at the rear, left corner
and one M5.5 self-tapping screw at the front, left corner to secure the left side plate to the rack frame
(2).
 Loading...