4-16
Compaq Professional Workstation SP750 Maintenance and Service Guide
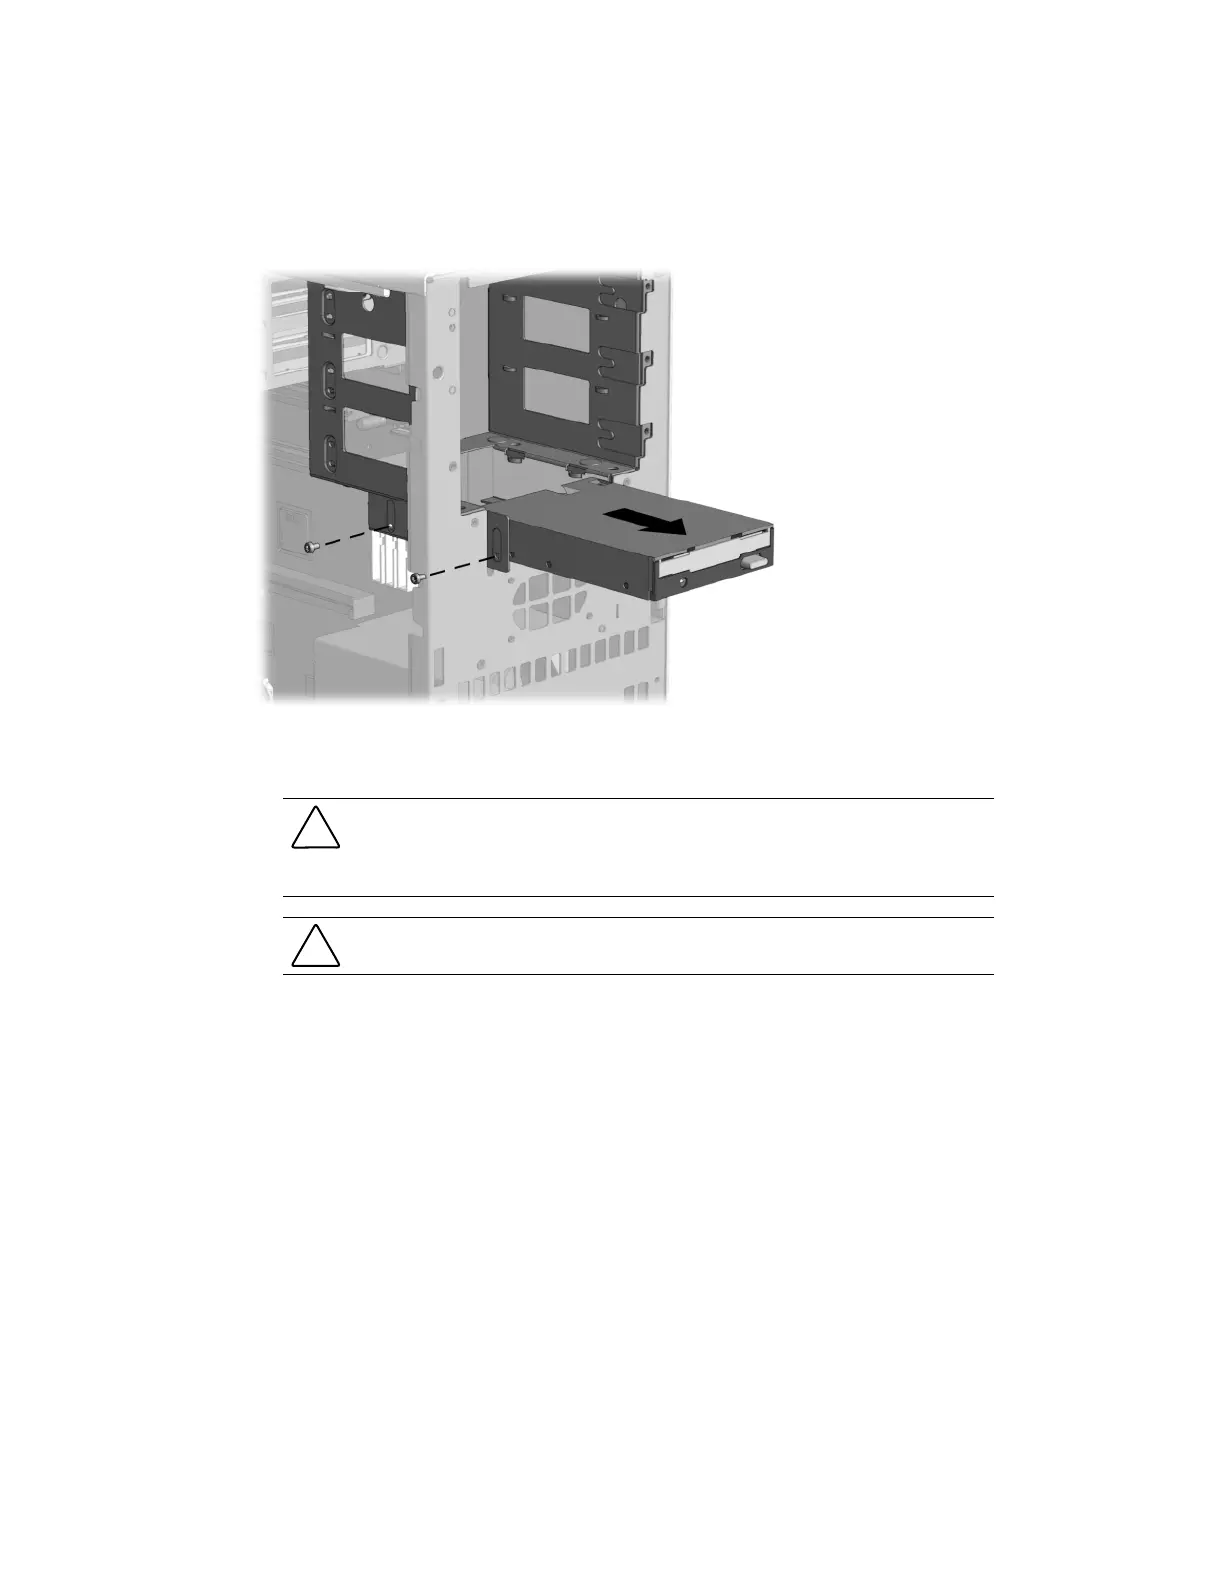
4. Remove the two screws that secure the diskette drive.
5. Pull the diskette drive straight out of the drive cage.
Figure 4-13. Removing the diskette drive
To replace the diskette drive, reverse the above procedure.
CAUTION:
Use only 3/16-inch or 5-mm long screws. Longer screws can damage the internal
components of the drive. If you are replacing the drive with a new one, transfer the guide screw
from the old drive to the new one. Be sure the guide screw is placed in the first hole on the
right side of the drive. Note that extra guide screws are provided on the side of the air plenum.
CAUTION:
When servicing the workstation, be sure cables are placed in their proper locations
during the reassembly process. Improper cable placement can damage the computer.
 Loading...