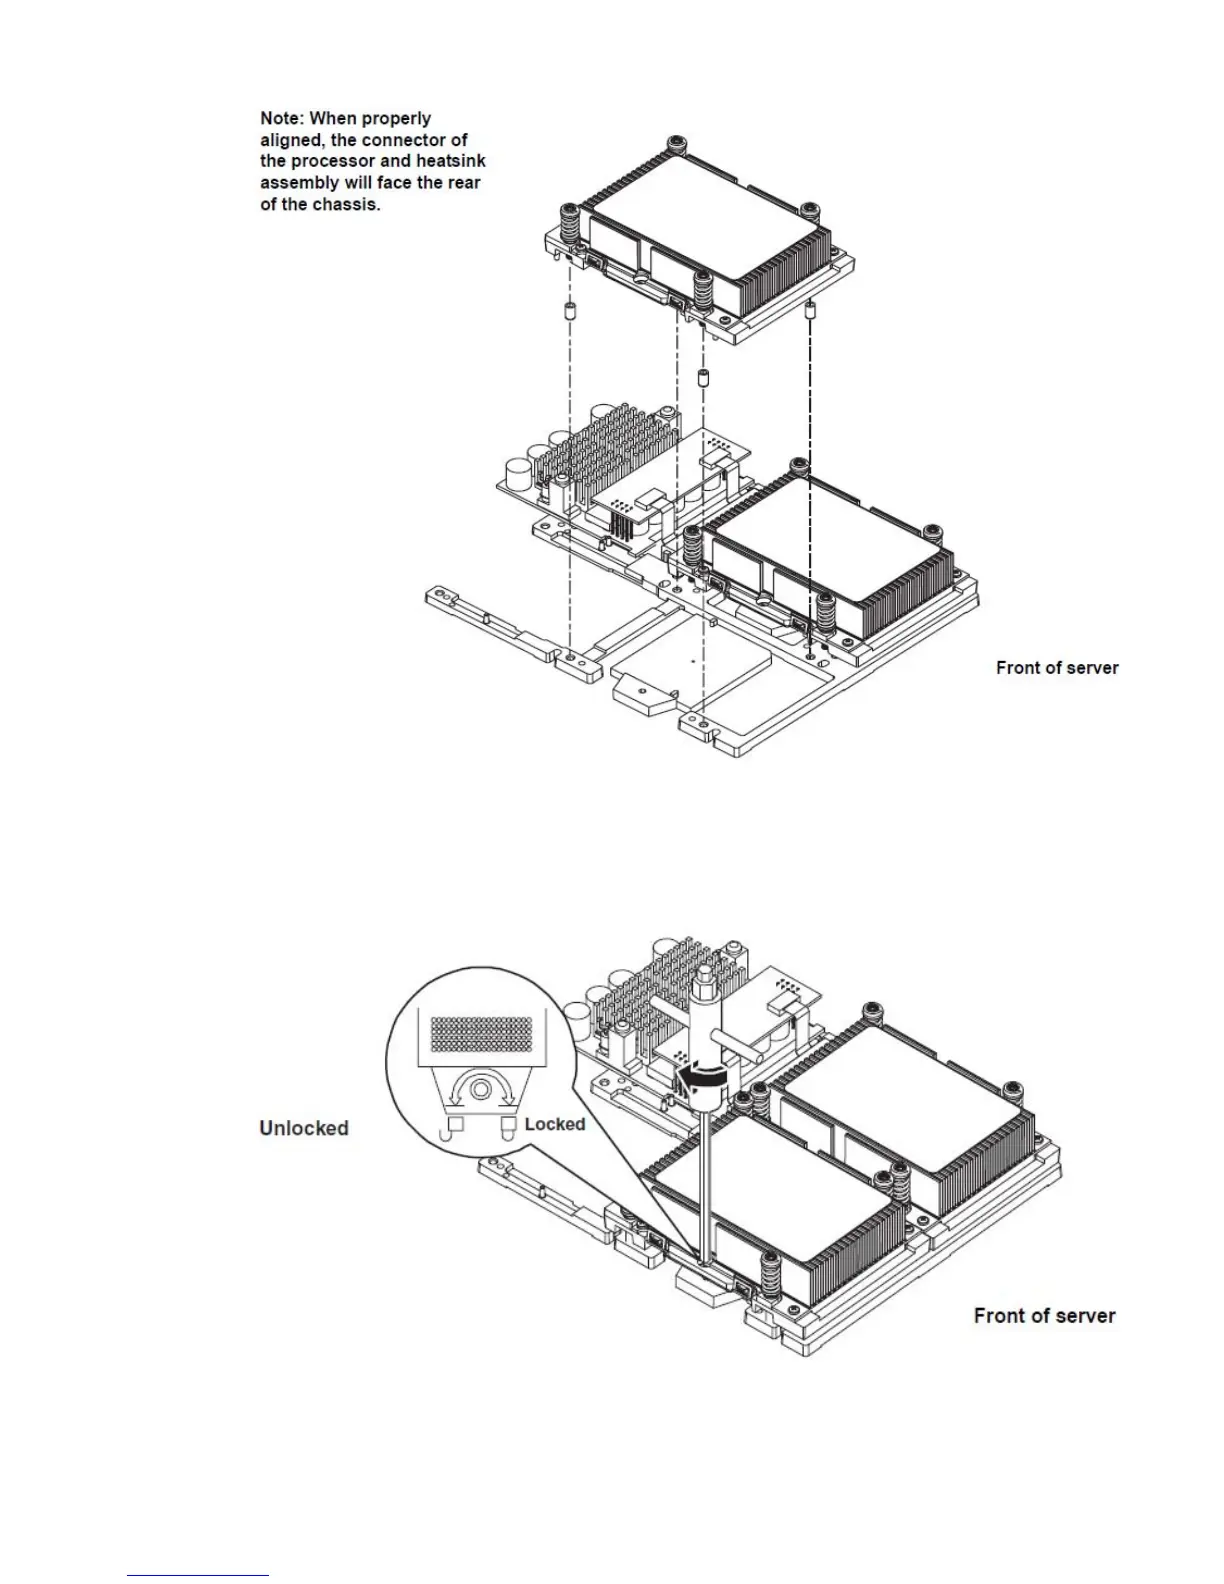
Figure 37 Locking the Processor Assembly in Place
6. Use the special processor tool shipped with your replacement processor assembly to lock the
processor in place on the system board. To do this, insert the special processor tool into the
hole that runs down the side of the heatsink and rotate it clockwise 180 degrees.
Figure 38 Locking the Processor Assembly in Place
7. Screw in the four captive screws on the processor.
Removing and Replacing a Processor 41

 Loading...


