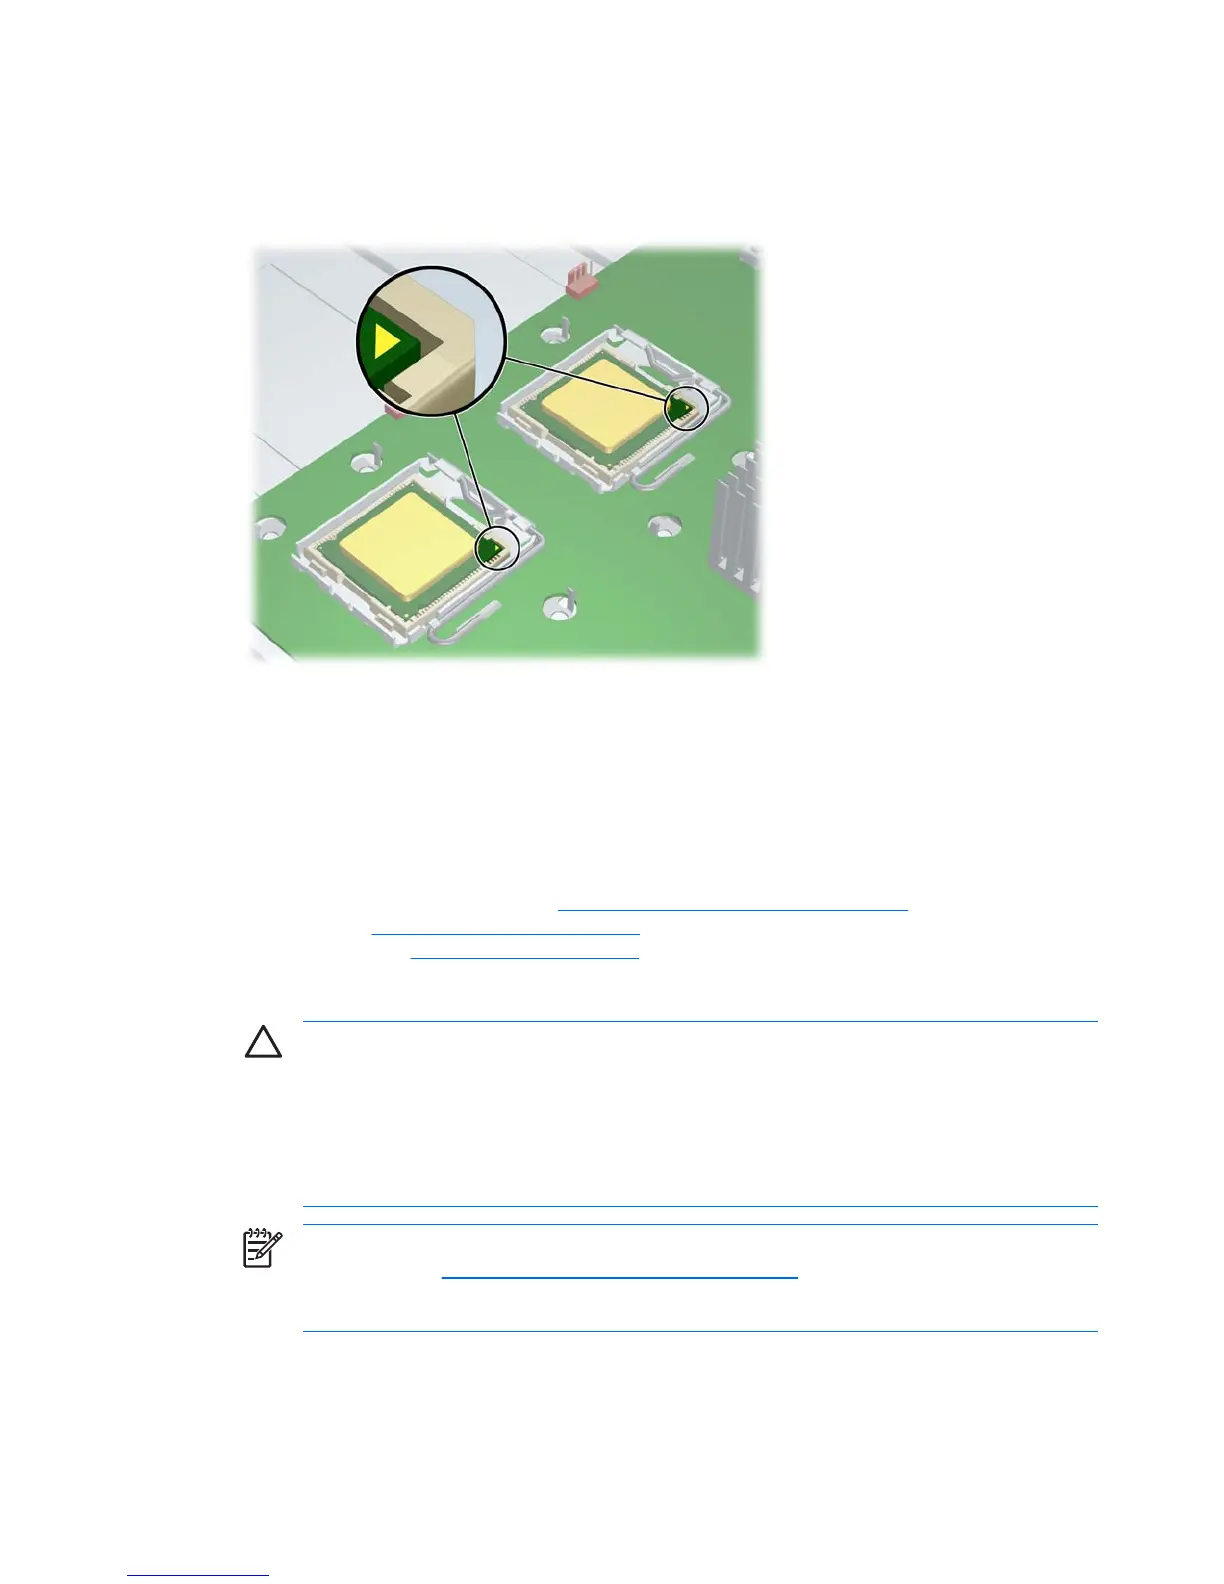
3. Align the triangle on the top of the processor with the triangle on the corner of the processor socket
and install the processor into the socket. Ensure that the underside of the processor is level with
the top of the processor socket. Lightly press down on the top of the processor while closing the
socket lever.
Figure 4-51 Seating the processor
4. Be sure the processor is properly seating in the socket by carefully trying to lift the processor out
of the socket with your fingers. A properly seated processor does not lift out of the socket.
System board
Removing the system board
1. Disconnect power from the system (Predisassembly procedures on page 57) and remove the side
access panel (
Side access panel on page 63), remove all expansion boards, graphics cards, and
the CPU heatsink (
CPU heatsink on page 91).
2. Disconnect all cabling from the system board.
CAUTION Be sure you can differentiate which power cable was disconnected from the
PCI Express x16 graphics card and which power cable was disconnected from the system
board. These two cables have different pin counts and different colors. The PCI Express
power cable has a 6-pin black connector, and the system board power cable has an 8-pin
white connector. When power is present, you must never connect the PCI Express power
cable to the system board. If you do so, the system board can be damaged and your warranty
voided.
NOTE Make note of the cable connections before disconnecting them from the system
board. Refer to
Power connections to drives on page 83 for more information.
NOTE Ensure CPU heatsink has been removed.
3. Slide the system board forward 1 to disengage the metal mounting standoffs from the chassis.
96 Chapter 4 Removal and replacement procedures ENWW

 Loading...


