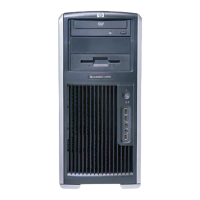
3. Lift the DIMM straight up 2 and remove it from the unit.
Figure 4-18 Removing the DIMM
NOTE DIMMs and the DIMM sockets are keyed for proper installation. Be sure these guides
line up when installing a DIMM.
Installing memory module
CAUTION HP only ships DIMMs that are electrically and thermally compatible with this product.
Third-party DIMMs might not be electrically or thermally compatible, so they are not supported
by HP.
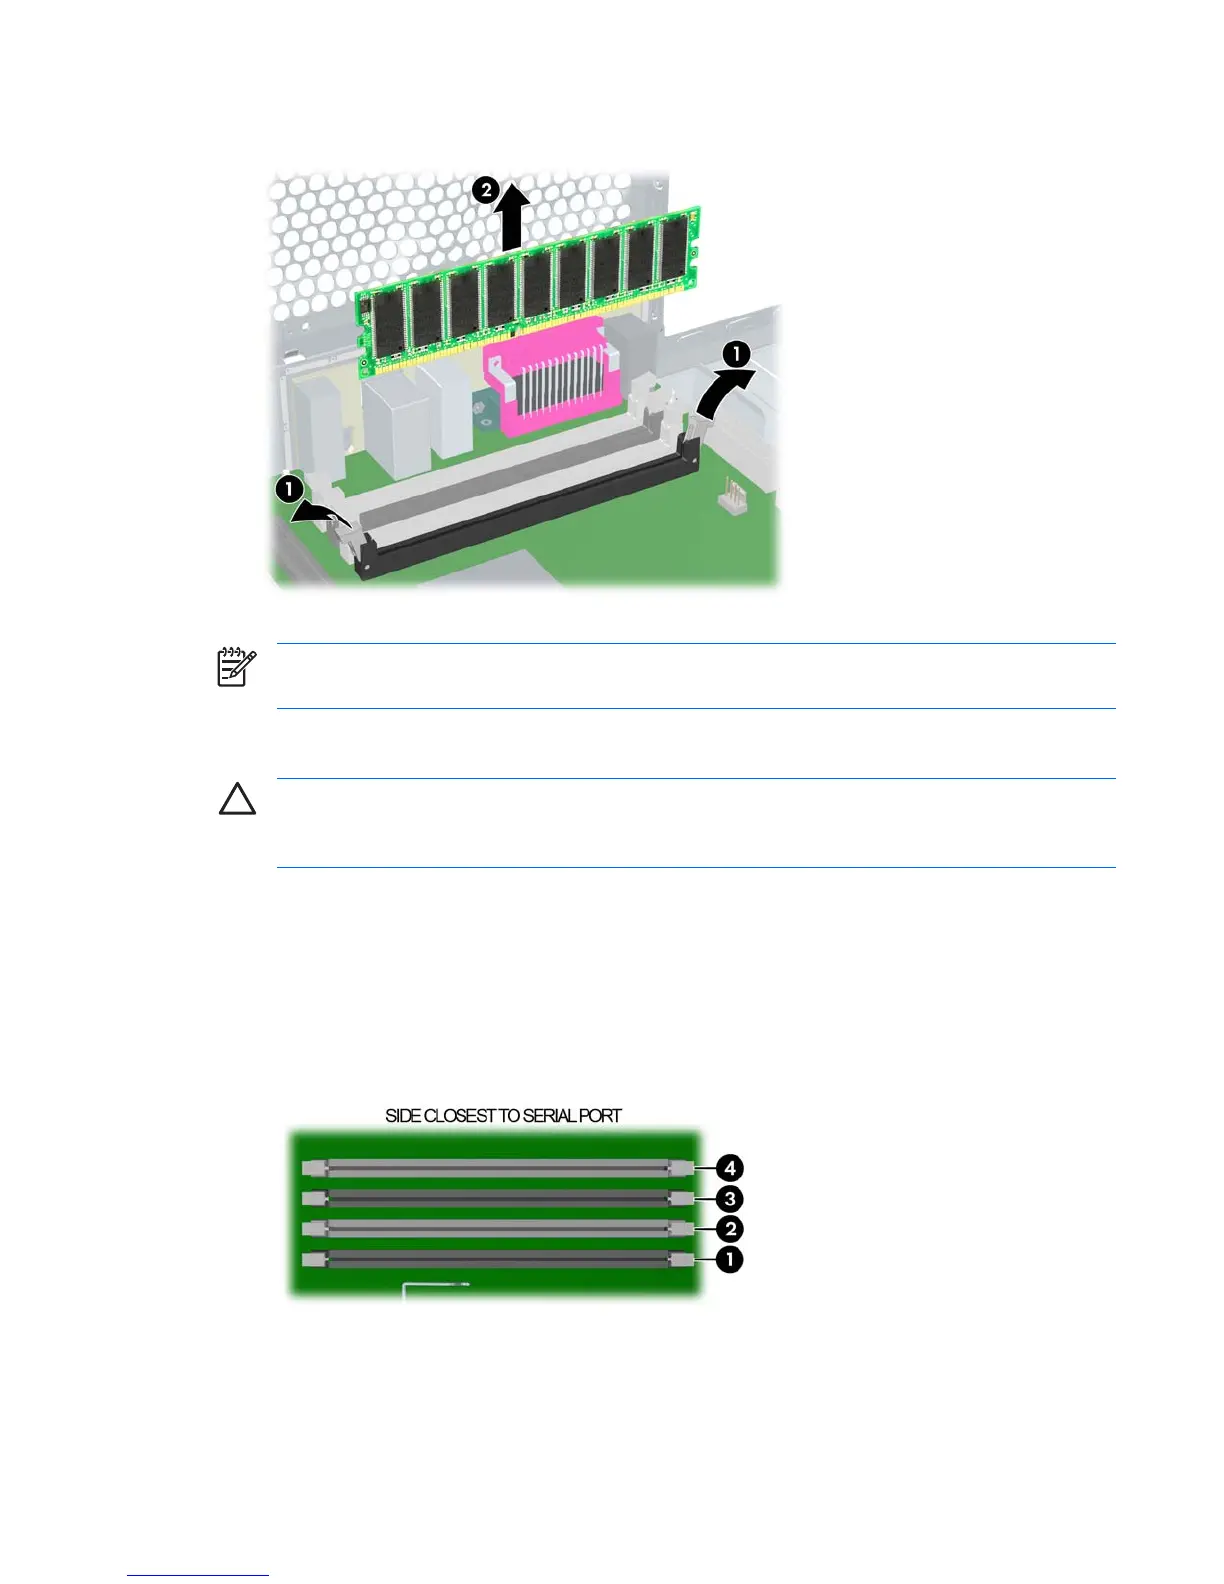
You must load memory modules in valid configurations:
●
If loading only one DIMM, install it in slot 1.
●
If loading two DIMMs, install them in slots 1 and 3.
●
If loading four DIMMs, install them in all slots.
●
Load the memory module pairs in order of size, from smallest to largest.
Figure 4-19 Identifying the memory slots
ENWW Removal and replacement of components 73
 Loading...