Fig. 18: Pairing a SOLAR03 remote unit - Step 4
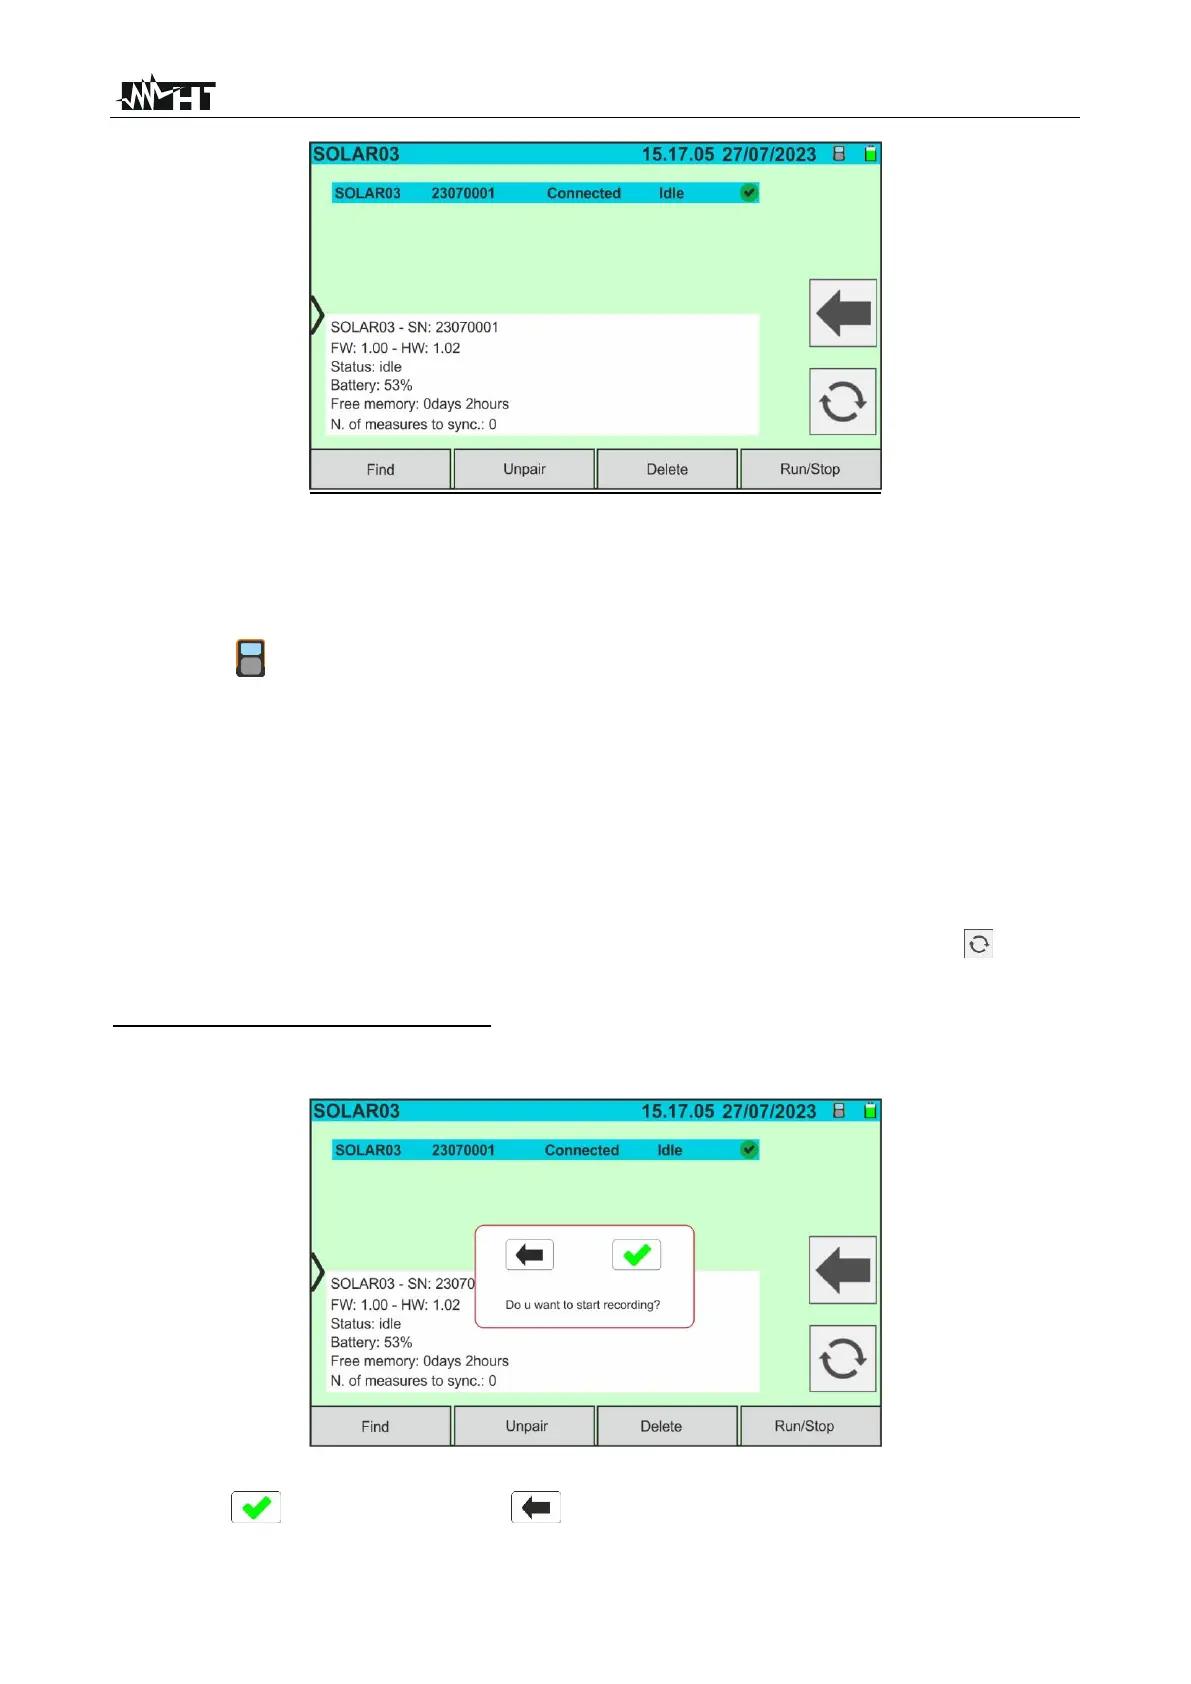
7. From this point on, the two devices are paired and it is not necessary to repeat the
above steps. To connect the instrument and the remote unit, simply switch them on,
bring them close together and wait for the automatic connection. The following
information is available for the paired and connected remote unit:
➢ Icon in the top right corner of the display
➢ Model and serial number
➢ Internal FW and HW version of the unit
➢ Status: Idle (the instrument does not query the unit for irradiance/temperature
values) or active (unit that provides irradiance/temperature values on
measurements stored in the instrument to define values under STC conditions)
➢ Battery charge percentage indicator
➢ Indication of the space available in the internal memory for storing recordings in
terms of days/hours
➢ Number of measurements stored in the instrument that need synchronising with the
irradiance/temperature values received from the remote unit. Tap on the icon to
synchronise measurements
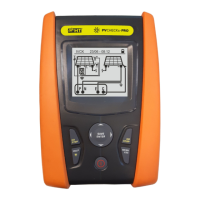
Recording activation on remote unit
8. To start recording on the connected remote unit, tap on the “Start/Stop” key. The
following screen will appear:
Fig. 19: Recording Activation on Remote Unit - Step 1
9. Tap on to confirm or tap on to exit without proceeding. If yes, the following
screen will appear: