6.3.1. How to define a new PV module
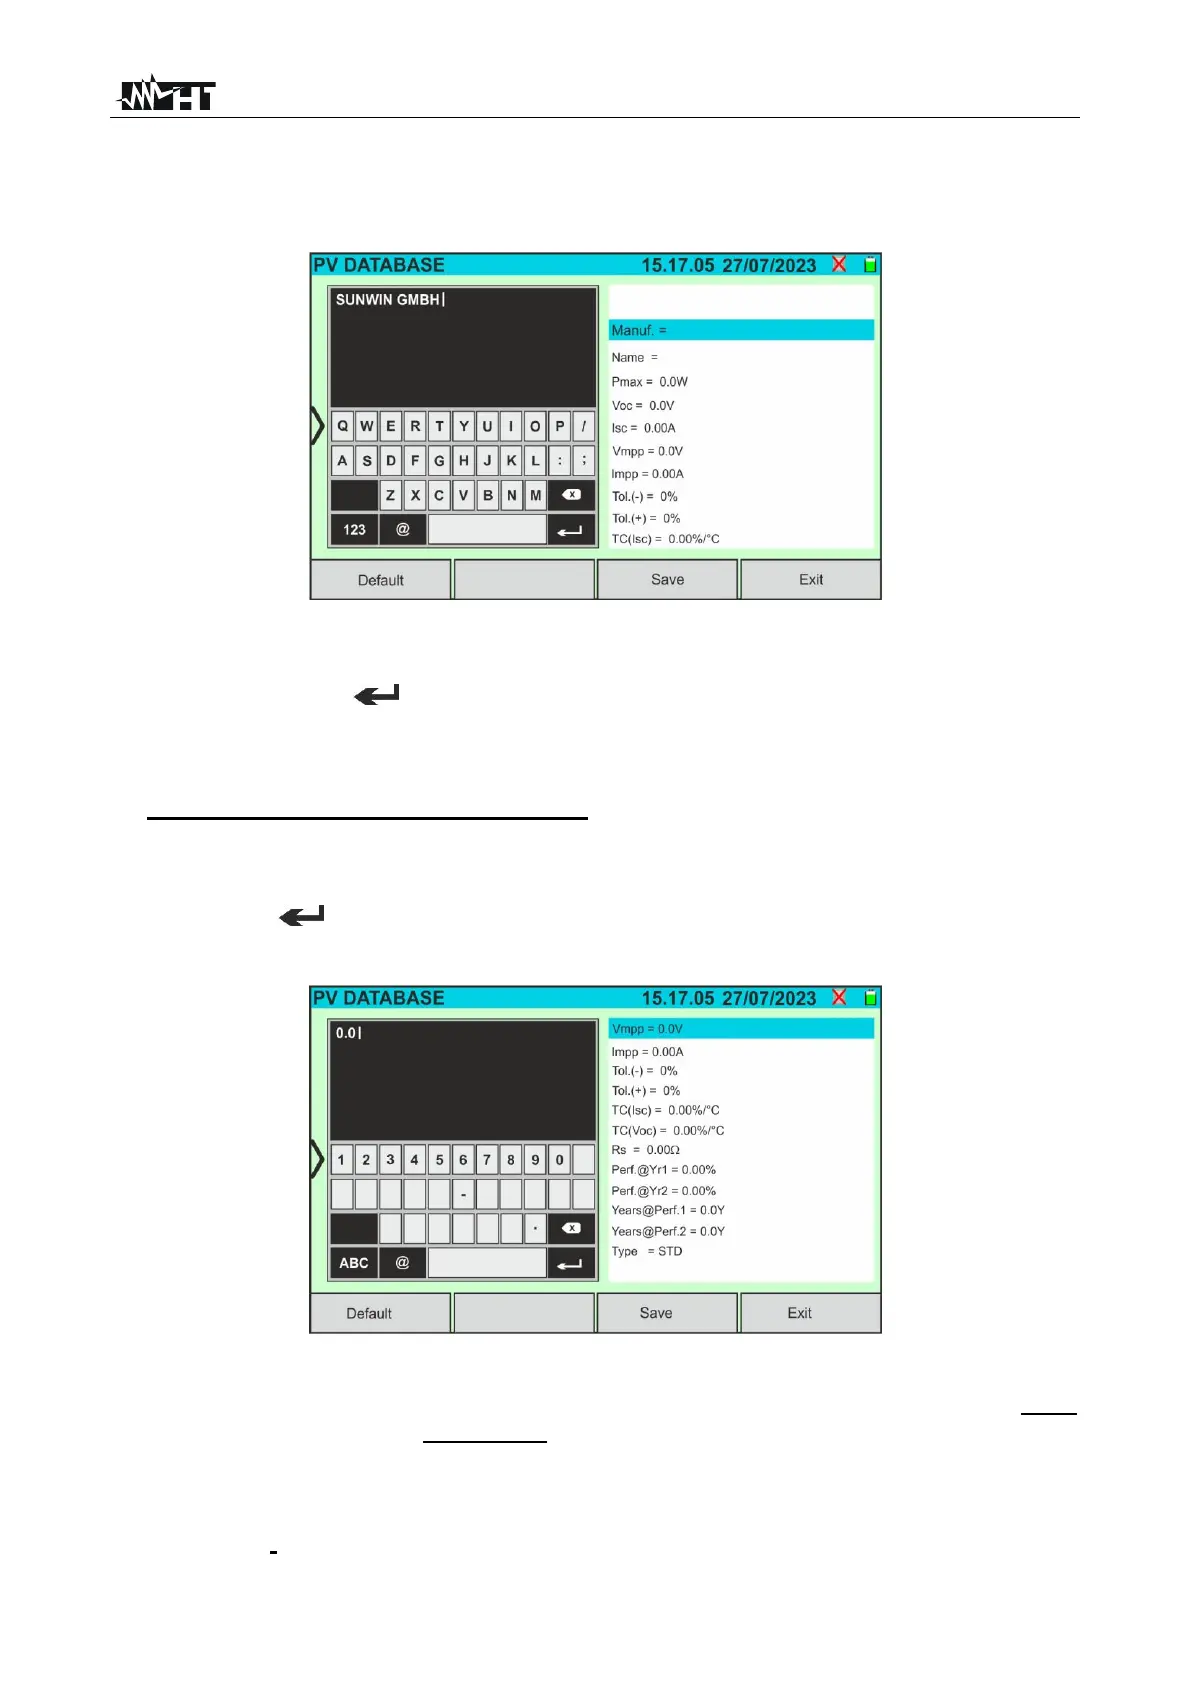
1. Tap on the "New” button on the main screen to open the programming screen. The
following window will appear on the display:
Fig. 25: Creating a new PV module - Step 1
2. Use the alphanumeric virtual keyboard to set the name of the manufacturer and the
model. Tap on the (ENTER) button on the virtual keyboard to confirm each value
and move on to the next item
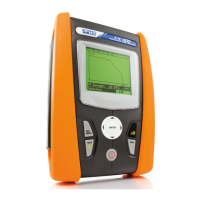
3. Use the virtual numeric keypad to set the parameter values for the module according to
the module data sheet, as shown in Fig. 26.
4. If certain parameters are unknown, tap on the “Default” key to enter the
corresponding default value present in Table 1 (these values may also not be correct
for the module being tested, so please contact the PV module manufacturer if
necessary
5. Tap on the (ENTER) button on the virtual keyboard to confirm each value and
move on to the next item
Fig. 26: Creating a new PV module - Step 2
4. Scroll the display up/down to view all the parameters. For the “Type” parameter, scroll
the thumb wheel to the right or left to set the PV module type (see Fig. 27). The
following options are available:
➢ STD → Standard Module (Monofacial)
➢ Bifacial → Bifacial Module