NOTE
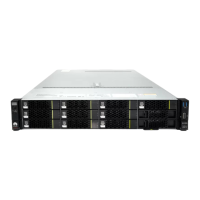
For drive locations and slot numbers, see 2.9.1 Drive Slot Numbers.
The slot ID is the slot number plus 80. For example, if the slot number is 5, the slot ID is 85.
Table 5-2 Mapping
Configuration Slot Number Slot ID
With four 2.5-inch rear
drives
44 to 47 124 to 127
With twelve 2.5-inch front
NVMe SSDs
8 to 19 88 to 99
With twenty-four 2.5-inch
drives (including NVMe
SSDs)
0 to 23 80 to 103
Step 8 Run the following command to remove the NVMe SSD:
echo n > /sys/bus/pci/slots/Slot ID/power
In the command, the value of n can be 0 or 1. The value 0 indicates hot removal, and the value
1 indicates hot insertion. If the value 0 is used, the hot removal command is executed but the
NVMe SSD is not physically removed.
For example, to hot remove the NVMe SSD in slot 44, run the following command:
echo 0 > /sys/bus/pci/slots/124/power
Step 9 If the OS uses the irqbalance service to balance CPU interrupts, run the following command
restart the service after performing a hot swap:
systemctl restart irqbalance.service
NOTE
For details about irqbalance service configuration management, see the related OS document.
Step 10 Observe the NVMe SSD indicators. When the green indicator is off and the yellow indicator
blinks at 0.5 Hz, slowly remove the NVMe SSD.
For details about how to manually remove an NVMe SSD, see 5.3.1 Removing a SAS/SATA
Drive.
Step 11 Place the removed drive into an ESD bag.
Step 12 After the orderly hot removal, change the value of the a8 register to f1.
setpci -s <bdf> a8.B=f1
<bdf>: indicates the Root Port (B/D/F) of an NVMe SSD. For the values, see Table 5-1.
NOTE
l You do not need to modify the a8 register value when 24 x 2.5-inch NVMe SSDs are configured.
You can skip this step.
l If the value of the register is not restored to the original one, the hot insertion of the NVMe SSD
may be abnormal.
2288H V5 Server
User Guide
5 Optional Part Installation
Issue 04 (2018-09-04) Copyright © Huawei Technologies Co., Ltd. 125

 Loading...