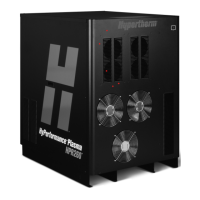
Maintenance
HPR800XD Auto Gas – 806500 5-53
3. Locate dipswitch S301 on the control board (PCB3) and move switch 5 to the ON position. The switch must be
returned to its original position before cutting.
4. Measure the open circuit voltage (OCV)
Attach the test leads of a DC volt meter to the NEG terminal and the WORK terminal on the I/O board. Turn ON the
power to start the chopper test. After the contactor (CON1) closes, read the OCV which should be about 360 VDC.
• IftheOCVis0,thechopperisprobablyfaulty.Swapchopper1withchopper2forverication.Ifchopper1is
faulty, the error code should change to 106. Replace chopper 1.
• IfOCVisabout360VDC,continuetostep5.
5. Swap current sensor 1 (CS1) with current sensor 2 (CS2). Move the sensor, but leave the power cable and the
control wiring in place.
• Iftheerrorremainsonchopper1,replacetheI/OPCB.
• Iftheerrorchangestochopper2,replaceCS1.
Chopper 3, 2, or 4 failure
1. Swap the current sensor for the chopper that failed with the current sensor for the next chopper in sequence.
• Iftheerrormovestothenextchopperinsequence,replacethecurrentsensorforthechopperthatfailed.
• Iftheerrorremainsontheoriginalchopper,continuetostep2.
2. Swap the chopper that failed with the next chopper in sequence. Remember that the chopper test sequence is
chopper 1, chopper 3, chopper 2, and chopper 4.
• Iftheerrormovestothepositionwhereyouinstalledthechopperthatfailed,replacethechopper.
• Iftheerrorremainsontheoriginalchopper,theissueiswiththecontrolboardorwiring.
Note: Return switch 5 on S301 to the OFF position before returning to normal cutting operations.
 Loading...