4-9
QA Tests
032-0330-EN Rev K
NOTE: If a pop-up message displays stating “Tru-Pan failed to process”, click OK and continue.
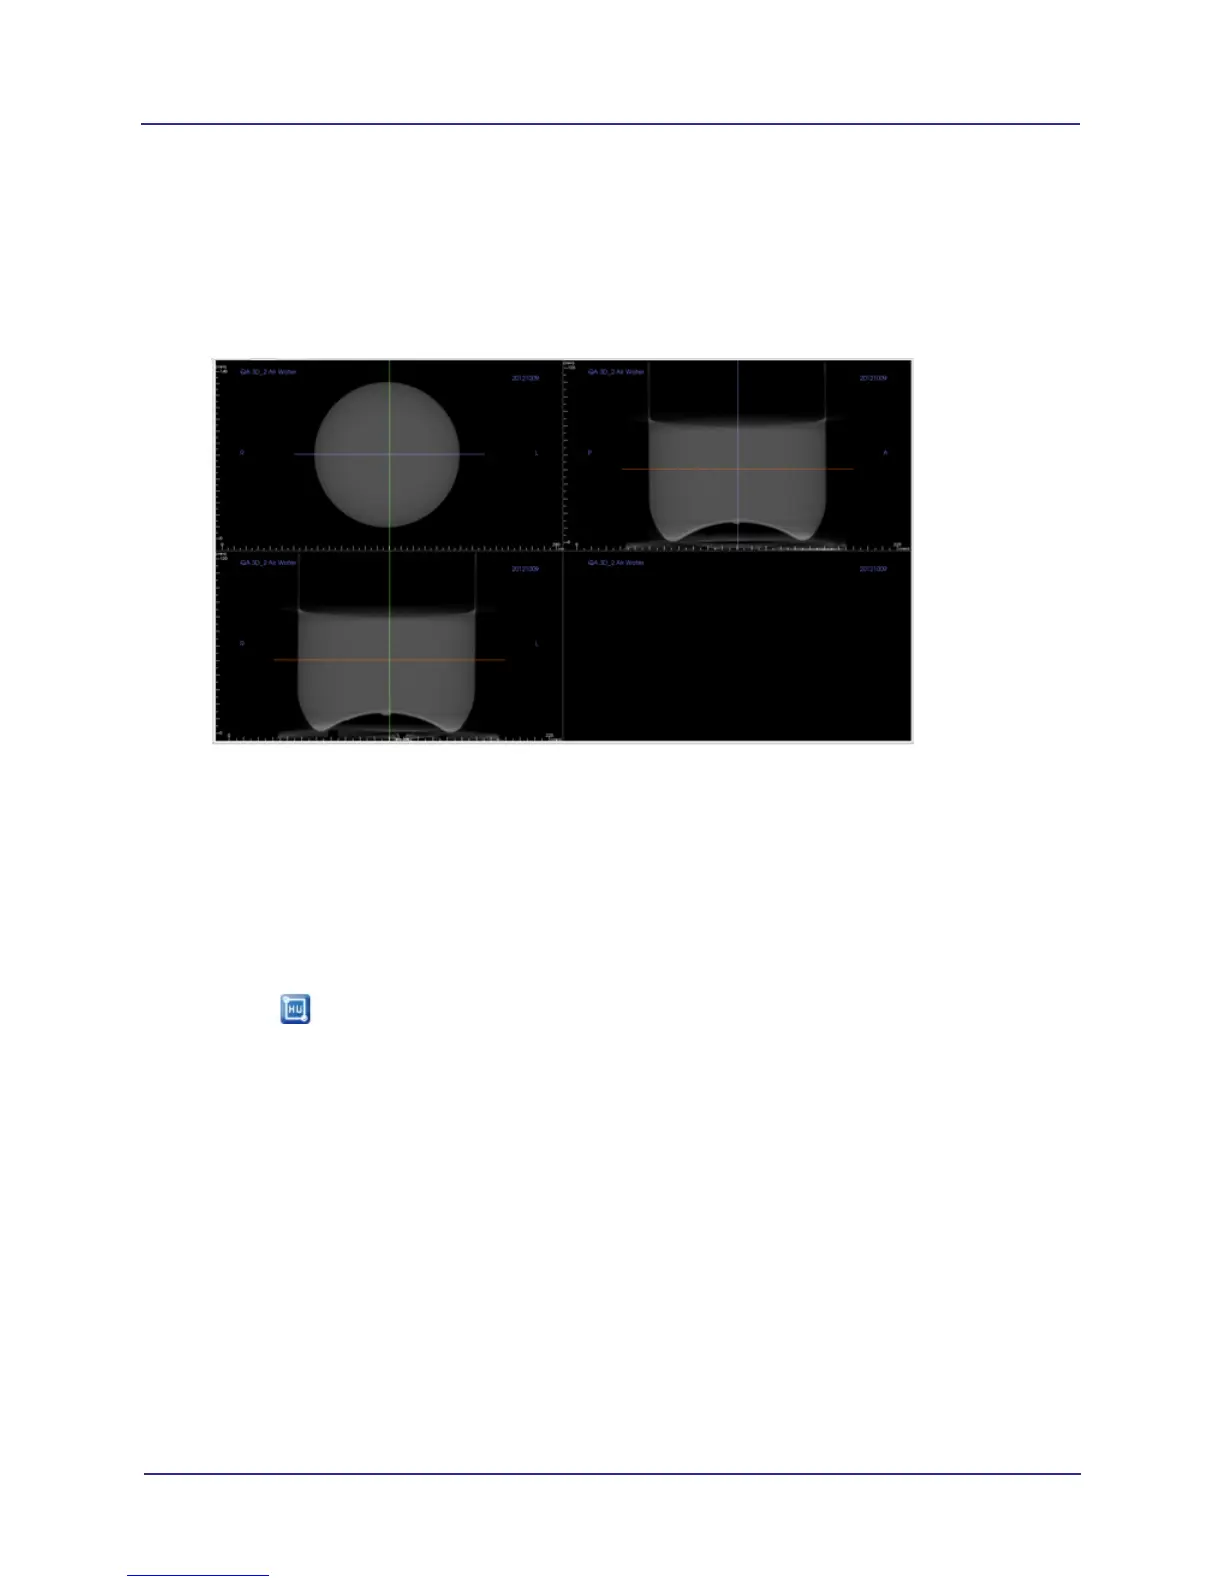
3. When exam is loaded, select Section tab at top of display.
4. In the upper right corner view, click where the vertical and horizontal cursor lines cross and drag to
the center of the water height and width, as shown.
Noise Level Evaluation
5. Zoom upper left image. To zoom, move the mouse cursor in the center of the image, hold down the
Control key and press the left mouse button. Move the cursor up or down to zoom in or out as
needed. To pan, move the mouse cursor in the center of the image, hold down the Shift key, press
left mouse button and drag the image.
6. In Slice Thickness, enter 0.4 (mm).
7. Select to activate HU tool.
8. Draw a box with an area of approximately 400 mm
2
in the center of the water in the phantom image,
as shown below.
a. Click and release at starting point. A red circle displays.
b. Move cursor to draw box.
c. When correct area is displayed (approximately 400 mm
2
), click to set box and display HU
information.